Walk into a Dollar Tree in November and you'll see two kinds of shoppers. The first grabs armfuls of glittery plastic and ends up with a house that looks like a craft store exploded. The second — the dangerous one — walks out with $30 of supplies and a home that looks like a boutique hotel lobby.
The difference isn't taste. It's knowing which dollar-store projects have good bones and which ones scream "I cost $1.25." I've spent years figuring that out so you don't have to. Here are 10 Dollar Tree Christmas DIYs that genuinely don't look cheap — each with the exact cost and the one elevation trick that takes it from crafty to classy.
If you want the full under-$50 whole-home playbook these pair with, start with our budget Christmas decor guide.
Key Takeaways
- Total for all 10 projects: roughly $65–$75 if you made every single one (you won't — pick 3–4)
- Time per project: 30 minutes to 2 hours; a weekend covers four easily
- The golden rule: one elevation trick per project (matte paint, real greenery, warm light) is what kills the "dollar store" look
- Skill level: beginner — if you can use a glue gun, you can do all of these
In this guide:
- 1. The ornament wreath
- 2. Frosted fairy-light jars
- 3. Twine cone trees
- 4. Faux tin tile tree collar
- 5. Wood bead garland
- 6. Mini village houses
- 7. Berry-pick floral arrangement
- 8. Tiered tray vignette
- 9. Chalk-painted candle pillars
- 10. Pinecone and evergreen bowl
- The takeaway
- Frequently asked questions
1. The ornament wreath
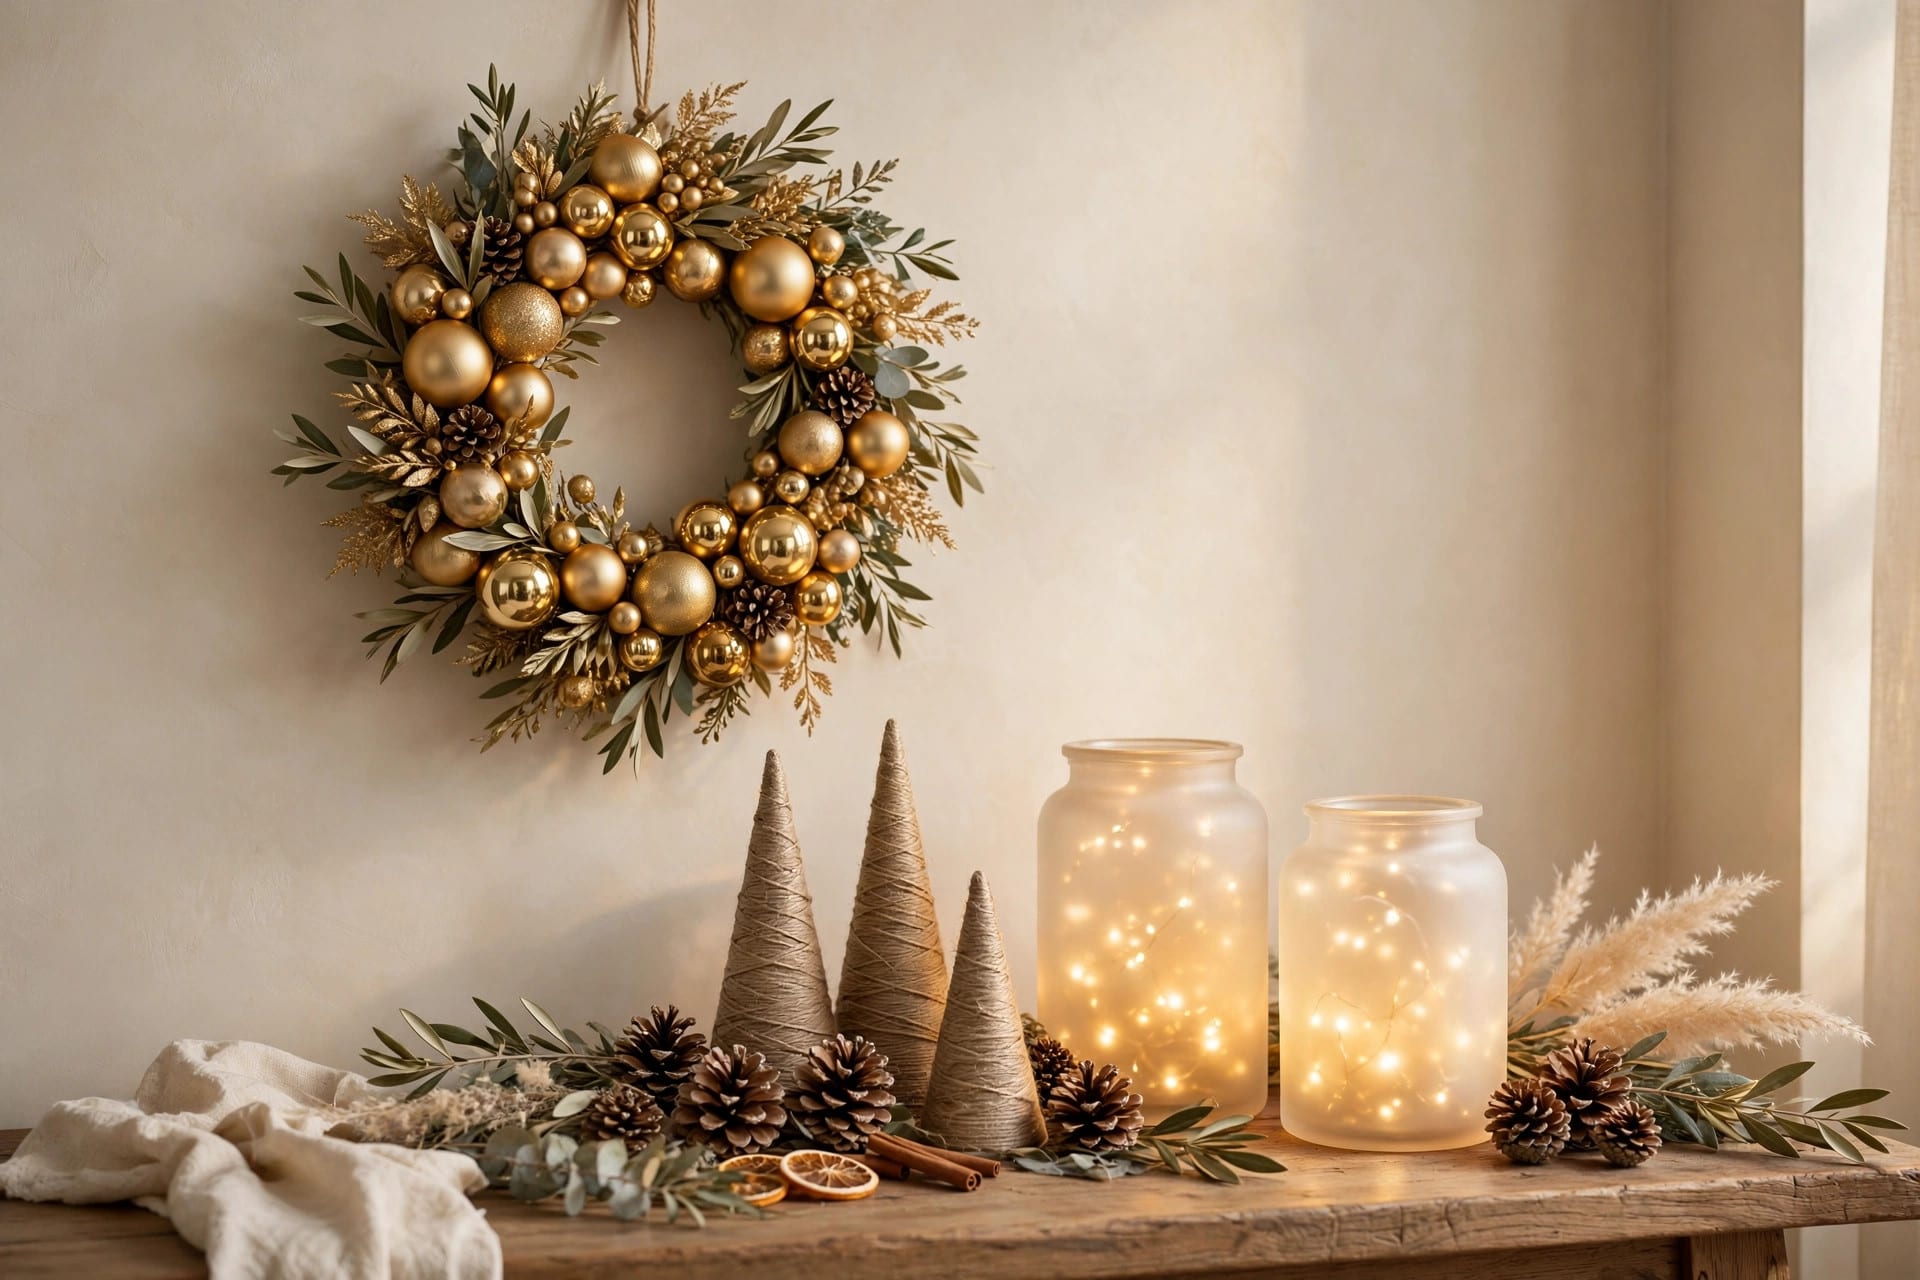
The classic for a reason. A wire wreath form ($1.25) plus 3–4 packs of shatterproof ornaments ($1.25 each) hot-glued into a dense, full wreath. Go monochromatic — all gold, all silver, or all matte white — and it reads expensive from across the street.
Cost: $6–$8. Time: 1–2 hours.
Elevation trick: stick to ONE finish. Mixed shiny red/gold/green is what makes it look like a dollar store. All-matte-champagne with a simple linen bow? Nobody's guessing the price.
Mistake to avoid: leaving gaps where the wire shows. Pack ornaments tight, layering smaller ones (4–5 cm) over the seams between big ones (8 cm). If you can see wire, you need more ornaments, not better glue.

2. Frosted fairy-light jars
Two Dollar Tree glass canisters or large mason-style jars, a can of frosted-glass spray paint (from a hardware store, ~$6 — the one non–Dollar Tree supply on this list), and a strand of warm-white fairy lights ($1.25) coiled inside each. The frosted glass diffuses the light into a soft glow that looks like a $25 candle lantern.
Cost: ~$6 per jar including the spray paint amortized across the pair. Time: 30 minutes plus drying.
Elevation trick: the frosted spray. It's the entire project — clear glass with fairy lights looks crafty; frosted glass looks like artisan lighting. Two light coats, 10 minutes apart.
Mistake to avoid: spraying too close. Hold the can 25–30 cm away or the finish goes blotchy. And use warm-white lights only — cool white through frosted glass looks like a hospital corridor.

3. Twine cone trees
Styrofoam cones ($1.25) wrapped tightly in jute twine ($1.25 a roll, covers 2–3 cones), glued as you go. A trio in different heights (15, 20, 25 cm) grouped on a tray reads rustic-luxe, especially next to real greenery.
Cost: ~$5 for three. Time: 45 minutes per tree, mostly wrapping.
Elevation trick: wrap the twine TIGHT with no gaps, and finish the base with a thin wood-slice round ($1.25 for a pack) instead of leaving raw foam showing. The base is where cheap reveals itself.
Mistake to avoid: wrapping loosely and then flooding it with glue to compensate — you get lumps. Thin line of hot glue every 3–4 cm as you wind, press, move on.
4. Faux tin tile tree collar
This is the showstopper. Dollar Tree's self-adhesive faux tin tiles ($1.25 each, you need 4–5) wrapped around a concrete form tube or a large popcorn tin, painted matte white or cream with chalk paint, then lightly dry-brushed with gold. It looks like vintage embossed tin — the kind that costs $60 at decor stores.
Cost: $7–$9. Time: 1 hour plus paint drying.
Elevation trick: the dry-brushing. After the white base dries, barely touch a dry brush in gold craft paint, wipe almost all of it off on a paper towel, then whisk across the raised tile pattern. The gold catches only the high points. That's the whole illusion.
Mistake to avoid: using glossy white paint. Shine kills it — matte or chalk paint only. And measure your tree stand first; a collar that doesn't fit around the base is just an expensive-looking tube.
5. Wood bead garland
A bag of large natural wood beads ($1.25) strung on jute twine with a tassel at each end. Drape it on the tree, the mantel, or a stair rail. It costs almost nothing and looks like the $18 garlands at boutique shops — because it basically IS the same thing.
Cost: ~$3. Time: 20 minutes.
Elevation trick: mix bead sizes if you can find two bags (large + medium), and add 3–4 dried orange slices from our budget Christmas guide between every dozen beads. The color variation is what separates handmade-chic from monotonous.
Mistake to avoid: stringing it too tight. Leave a little slack between beads so it drapes naturally instead of hanging like a rigid necklace.
6. Mini village houses
Dollar Tree's little ceramic or wood houses ($1.25 each) are genuinely cute shapes buried under glossy paint. Buy 3–5, coat them in matte white or cream chalk paint, add a pinch of faux snow ($1.25 a bag) and a tea light behind one window. A monochrome village on a mirrored tray or wood slice looks Scandinavian, not cheap.
Cost: $8–$10 for the village. Time: 1 hour plus drying.
Elevation trick: the monochrome paint job. One color erases every trace of "dollar store" — it's the single highest-ROI trick on this entire list. Cream (not stark white) looks warmest under Christmas lights.
Mistake to avoid: leaving the original glossy finish peeking through. Two thin coats, and sand lightly with fine sandpaper between them if the first coat beads up on the glaze.
7. Berry-pick floral arrangement
Three berry sprays and two evergreen stems from Dollar Tree ($1.25 each), arranged in a thrifted or dollar-store vase with the stems cut at varying heights. Red berries + green + a neutral vase is a combination that simply cannot look bad.
Cost: ~$7. Time: 10 minutes.
Elevation trick: the vase matters more than the stems. A simple matte ceramic or glass vase (thrift one for $2–$3) elevates $6 of faux stems instantly. Never put them in the shiny metallic vase they came next to at the store.
Mistake to avoid: using every stem at the same height. Cut one-third off two stems, keep one tall — the triangle arrangement is what makes it look "arranged" instead of "stuck in a vase."
8. Tiered tray vignette
A two-tier tray ($1.25–$5 at Dollar Tree depending on stock) styled with mini bottle-brush trees ($1.25 for a pack), a tiny sign, and a few ornaments. It's the Instagram Christmas look in miniature, and it moves anywhere — counter, coffee table, entryway.
Cost: $8–$10. Time: 20 minutes of styling.
Elevation trick: odd numbers and breathing room. Three trees, one sign, two ornaments — then STOP. A crowded tiered tray looks like a yard sale; a curated one looks like a stylist did it. Step back, remove one thing, then stop.
Mistake to avoid: mixing themes. Pick one: rustic (twine, wood, cream), traditional (red, green, gold), or winter white. The tray in the store aisle mixes everything — your home shouldn't.
9. Chalk-painted candle pillars
Dollar Tree glass pillar holders ($1.25) get a coat of matte chalk paint on the OUTSIDE (cream, sage, or charcoal), then a battery tea light inside. Painted glass glows softly and looks like expensive colored-glass candleware.
Cost: ~$4 each. Time: 30 minutes plus drying.
Elevation trick: paint the outside, never the inside — the unpainted interior lets the light through the glass so it glows instead of going dark. One coat is enough; you're tinting, not covering.
Mistake to avoid: real flames in painted holders. The paint isn't rated for heat — battery candles only, always. (Our budget Christmas guide has the full candle-safety rundown.)
10. Pinecone and evergreen bowl
A wide, shallow bowl (thrifted or $1.25), filled with pinecones — foraged free or $1.25 a bag — tucked with a few evergreen sprigs and a string of fairy lights woven through. It takes five minutes and looks like a florist's winter centerpiece.
Cost: $3–$5. Time: 10 minutes.
Elevation trick: the lights. A bowl of pinecones is nice; a bowl of pinecones with 20 warm fairy lights glowing through it is a centerpiece. The $1.25 light strand does 80% of the work here.
Mistake to avoid: using scented pinecones straight from the bag without airing them — the cinnamon smell is overwhelming in a small room. Air them outside for a day first.
The takeaway
The pattern across all ten: the Dollar Tree supply is never the problem — the FINISH is. Matte paint over gloss, one color story instead of five, warm light instead of cool, and real texture (twine, wood, greenery) next to the faux stuff. That's the entire formula. Pick three or four projects, spend a weekend, and nobody — nobody — will guess the budget.
Frequently asked questions
How much does it cost to decorate for Christmas from Dollar Tree? A full look runs $25–$40 if you pick 3–4 projects from this list. The wreath ($6–$8), frosted jars ($12 for the pair), and twine trees ($5) together cover a mantel, a door, and a table for about $25.
How do you make Dollar Tree decor not look cheap? Three rules: matte finishes (chalk paint kills the plastic shine), one cohesive color story per project, and warm-white lighting. The elevation trick in each project above follows exactly this logic.
What are the best Dollar Tree Christmas DIYs for beginners? Start with the pinecone bowl (#10), the wood bead garland (#5), and the berry arrangement (#7). No paint, no power tools, under $15 total, and all three are nearly impossible to mess up.
When should I start Dollar Tree Christmas crafts? Early to mid-November. Dollar Tree's Christmas stock peaks then and sells through fast — the good wreath forms and ceramic houses are gone by December. Paint and glue projects also need drying time you won't have in the last week before Christmas.
Is it cheaper to DIY or buy Christmas decor? For statement pieces (wreaths, tree collars, villages), DIY from Dollar Tree is 60–80% cheaper than buying equivalent looks. For tiny filler items like plain ornaments, buying is fine — save your crafting time for the pieces people actually notice.