Pressed flower art is everywhere — but every tutorial tells you to wait 3–4 weeks for the book-press method. There's a faster way: the microwave press, which dries flowers in about 12 minutes with BETTER color retention than the slow method. This tutorial covers both methods, which flowers actually press well, and how to arrange and frame the results into art that looks like a botanical print.
Hang your finished pieces in your thrifted made-over frames for the full budget-art effect.
Key Takeaways
- Two methods: microwave press (~12 min, better color) vs book press (3–4 weeks, zero equipment)
- Best flowers: flat-faced blooms — daisies, pansies, violets, cosmos, ferns, and lavender
- Microwave recipe: 25–30 sec initial burst, then 10-sec intervals with ventilation between
- Framing: floating frames (glass both sides) show pressed flowers best
- Color rule: keep finished art out of direct sun — UV fades pressed flowers in months
In this tutorial:
- Best flowers for pressing (and ones to skip)
- Method 1: the microwave press (12 minutes)
- Method 2: the book press (3–4 weeks)
- Arranging your composition
- Framing: the floating frame
- Making a series: the pressed-flower gallery wall
- Preserving color long-term
- 5 pressed-flower mistakes
- The takeaway
- Frequently asked questions
Best flowers for pressing (and ones to skip)
Press beautifully: daisies, pansies, violets, cosmos, buttercups, lavender, ferns, eucalyptus leaves, Queen Anne's lace. Flat-faced, thin-petaled flowers are ideal — they dry fast and hold color.
Work with prep: roses, dahlias, ranunculus — thick blooms trap moisture. Either dismantle them (press individual petals and reassemble) or slice thick flower heads in half horizontally before pressing.
Skip: succulents (too watery, they rot before they dry), very fleshy blooms, and anything already wilting — press flowers at their peak, ideally mid-morning after dew evaporates.
Color truth: purples, blues, and pinks hold best. Reds and oranges fade fastest. Yellows are unpredictable — some hold, some bleach. Press extras of every color so you can choose the best survivors.
Method 1: the microwave press (12 minutes)
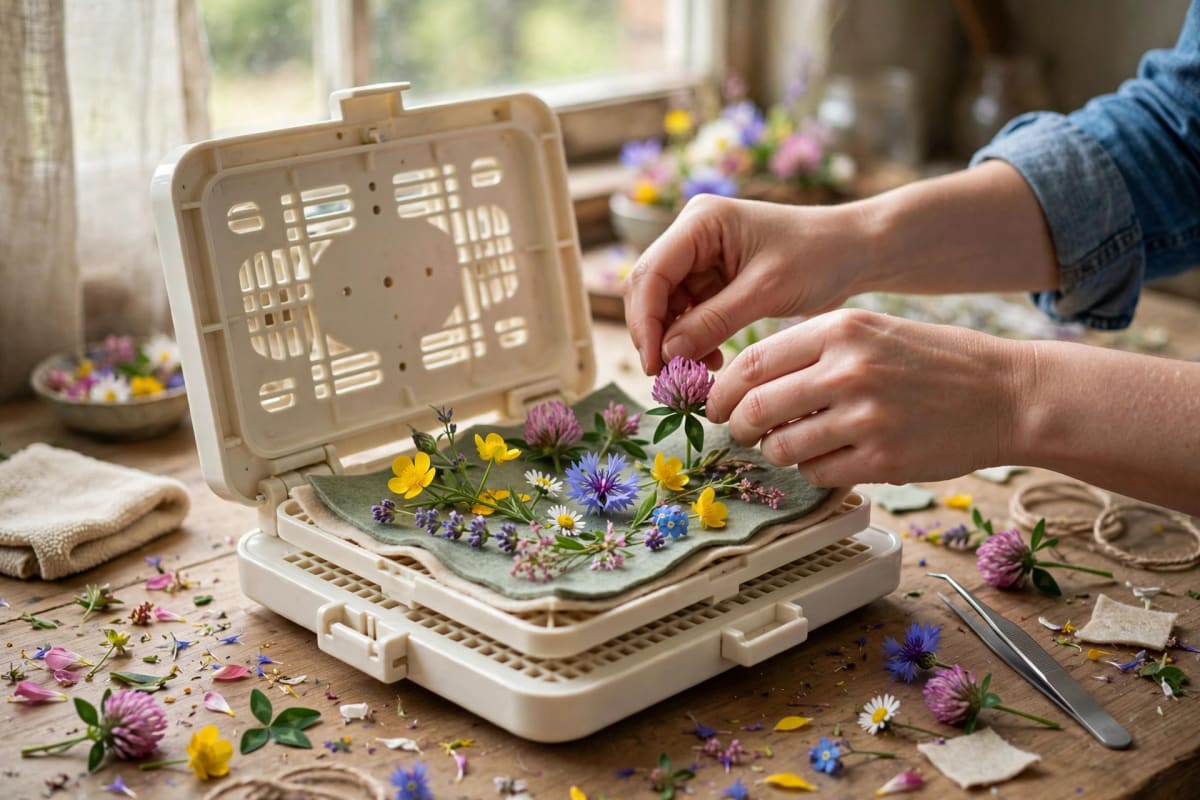
You need: a microwave flower press (two vented plates with clips, ~$15–$25 — reusable forever) OR a DIY version: two ceramic tiles + rubber bands + absorbent paper (paper towels or blotting paper).
- Arrange flowers on the press liner or paper in a single layer, not touching. Face some up, some at angles — variety looks natural.
- Close the press (or sandwich: tile → paper → flowers → paper → tile, rubber-banded firmly).
- Microwave 25–30 seconds on high for the initial burst.
- Ventilate: open the press, let steam escape 30 seconds. This step prevents browning — trapped steam cooks the petals.
- Continue in 10-second bursts, ventilating between each, until flowers feel dry and papery. Total: roughly 8–12 minutes of elapsed time for most flowers.
- Loosen flowers from the liner after the first burst — petals stick as they dry, and unsticking early prevents tearing later.
- Cool completely before handling — they firm up as they cool.
Why it beats the book method: speed is obvious, but the real win is color. Slow air-drying gives enzymes weeks to break down pigments; microwave drying halts that process in minutes. Side-by-side, microwaved flowers are visibly more vivid.
Safety: never microwave longer than 60 seconds per session; let everything cool between bursts. No metal in the press (obviously). Thick flowers may need a few extra cycles — patience in 10-second increments.
Method 2: the book press (3–4 weeks)
The classic, equipment-free method:
- Place flowers between sheets of absorbent paper (not directly on book pages — moisture damages books).
- Close inside a heavy book, stack more books on top.
- Wait 3–4 weeks, changing the paper after the first week if it feels damp.
- Check: flowers should be papery-dry and flat.
When to use it: delicate flowers that scorch easily, when you have no microwave press, or when you're pressing in bulk (books scale infinitely). The color won't match the microwave method, but the results are still beautiful — this is how pressed flowers were made for centuries.
Arranging your composition
This is where art happens. Rules that work:
- Odd numbers: 3, 5, or 7 stems per arrangement — odd groupings feel organic.
- One hero: a single large bloom as the focal point, smaller flowers and ferns supporting it.
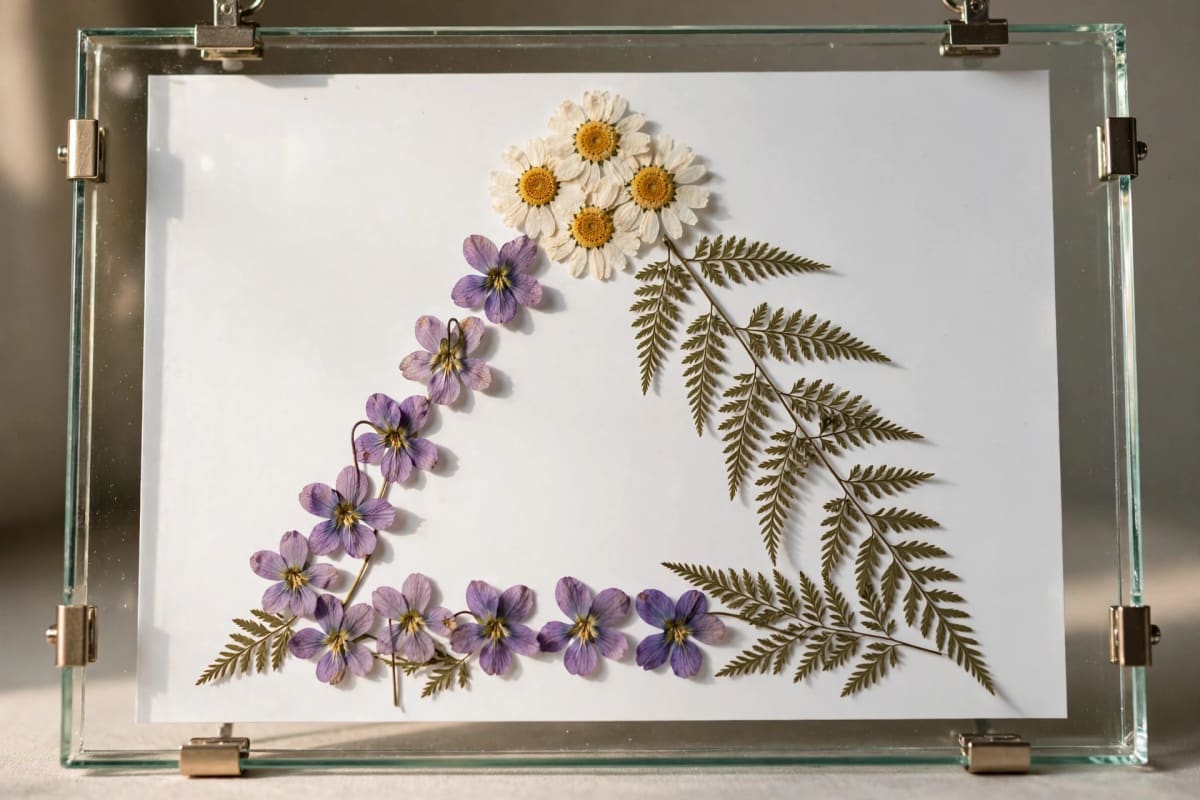
- Triangle composition: arrange stems so the eye travels in a triangle — the most pleasing classical layout.
- Negative space: don't fill the frame edge-to-edge. Breathing room around the arrangement is what separates "art" from "herbarium specimen."
- Vary heights: stems at different lengths create depth; uniform height looks stamped.
Lay it out first: arrange on the backing paper, photograph it, then glue. Tweezers are essential — fingers crush dried petals.
Framing: the floating frame
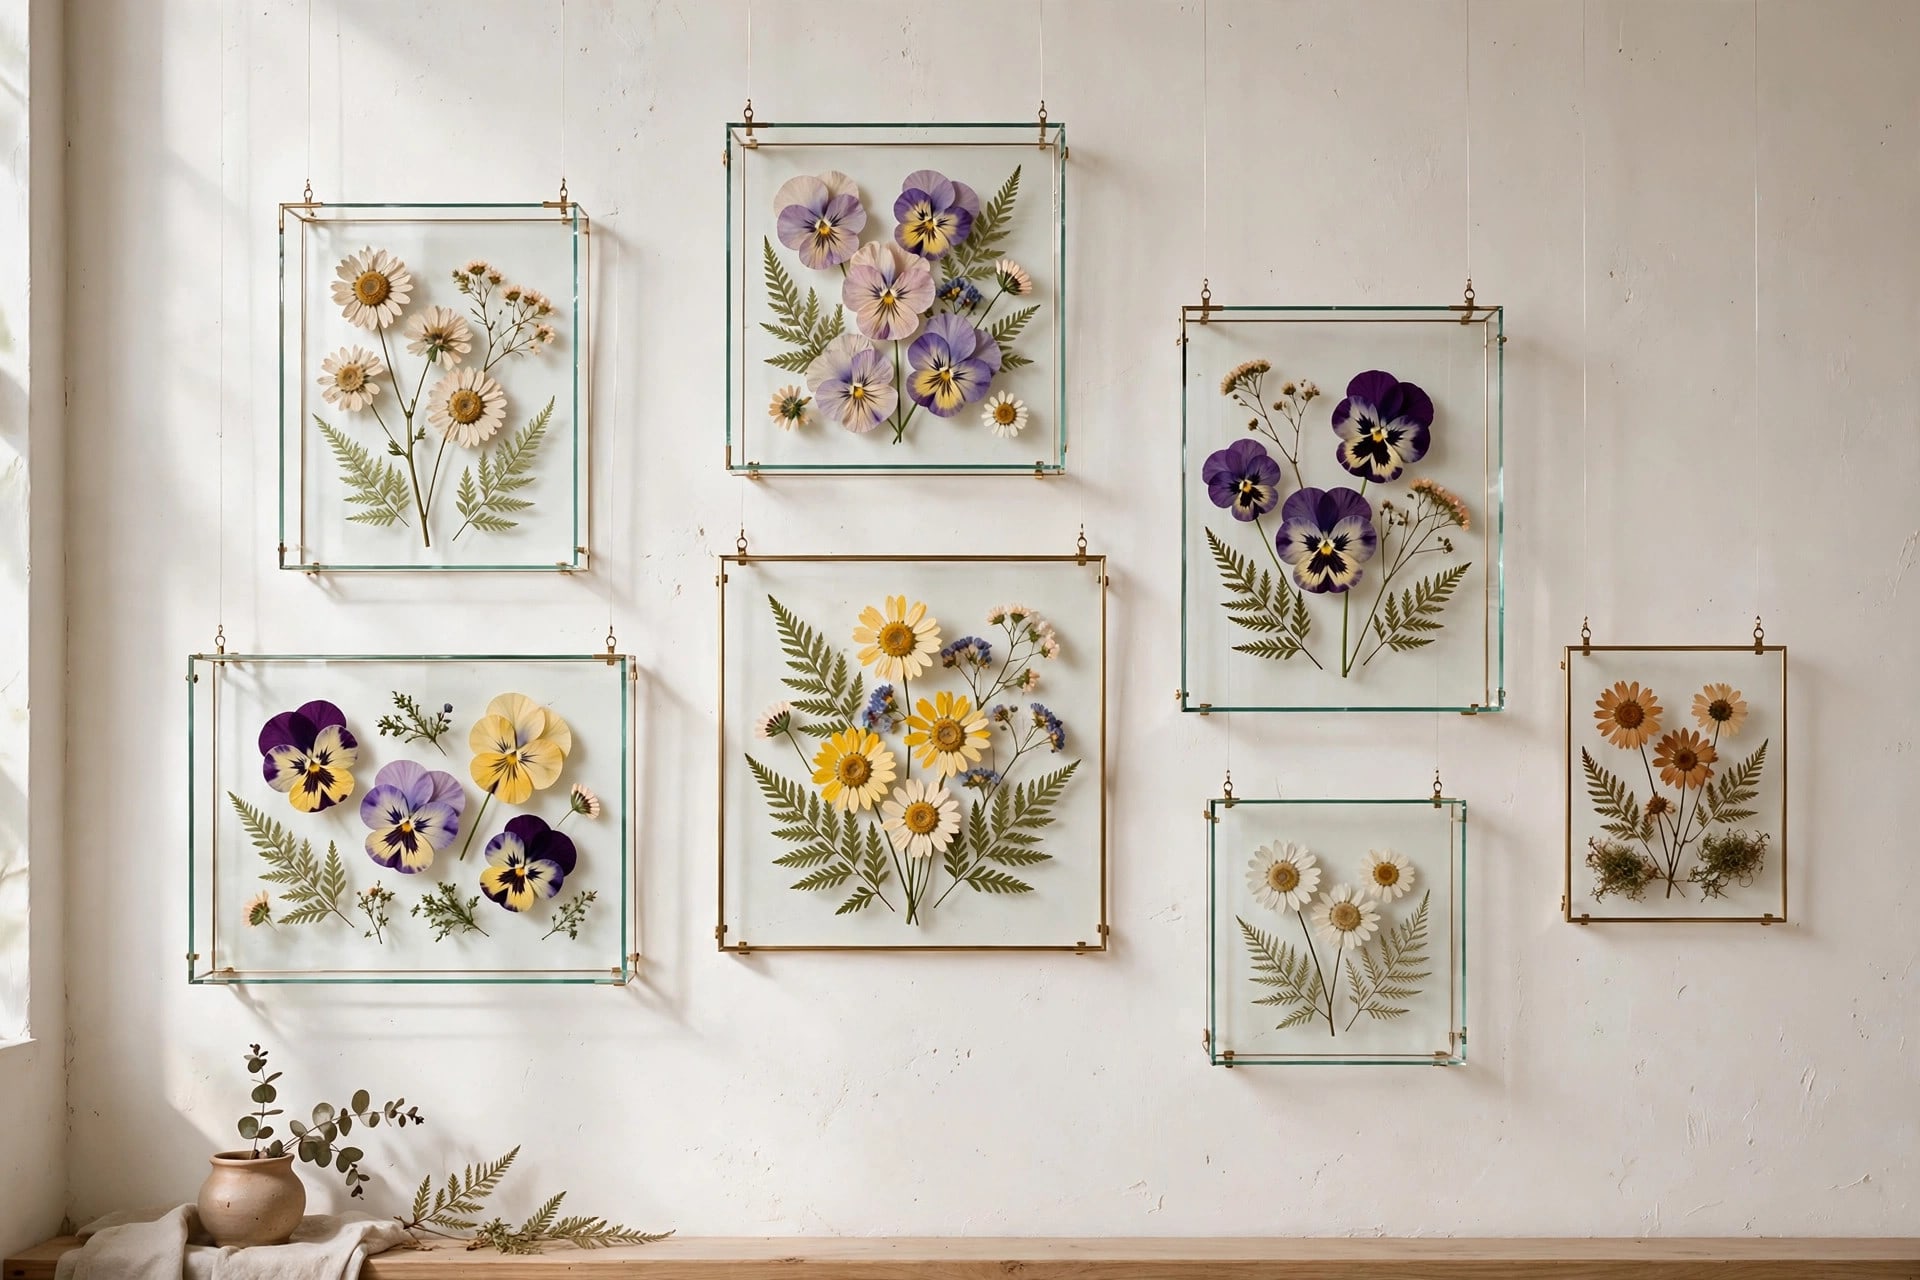
Floating frames (two panes of glass, flower sandwiched between) are the ideal display:
- They show both sides of the flowers and let light through the petals.
- They look modern and gallery-like — the $30 retail versions of this art use exactly this format.
- Use acid-free backing paper behind (or between) — regular paper yellows and can stain petals over time.
Assembly: clean both glass panes, lay the backing on the bottom pane, arrange flowers with tweezers, add tiny dots of acid-free glue or double-sided archival tape on stems only (never on petals — glue shows through), close the top pane, secure the frame.
Budget option: two thrifted frames with glass + your arrangement between them, held with small clips. Same effect, $3.
Making a series: the pressed-flower gallery wall
One floating frame is pretty. Three to five in a row is a statement. Pressed flowers are ideal for series work because one microwave session produces enough material for multiple frames:
- Press in batches: one 12-minute session yields 15–25 usable flowers — enough for 3–4 frames.
- Vary the compositions: same flower family, different arrangements — all-daisy triptych, or one hero bloom per frame with different supporting ferns.
- Unify with frames: identical floating frames in a row (see our gallery wall layout guide for spacing — the linear template suits series perfectly).
- Label like a botanist: small handwritten labels (Latin name, date pressed) under each arrangement elevate the whole series from "craft" to "collection."
A five-frame series costs under $20 total and looks like something from a botanical garden gift shop.
Preserving color long-term
Pressed flowers fade — the question is how fast:
- UV is the enemy. Hang finished art away from direct sunlight. A north-facing wall keeps colors vivid for years; a sunny window fades them in months.
- UV-protective glass (museum glass) helps significantly if the piece matters to you — $10–$15 for a small frame.
- Seal the frame back with tape to keep humidity out — moisture is the second enemy after light.
- Accept gentle fading. Even faded, pressed flowers develop a soft vintage patina that many people prefer. It's a feature, not a failure.
5 pressed-flower mistakes
- Microwaving too long per burst. 60+ seconds cooks petals brown. Short bursts, ventilate, repeat.
- Skipping ventilation. Trapped steam = brown spots. Open the press between every burst.
- Pressing wet flowers. Morning dew or rain = extra moisture = browning risk. Pick dry, mid-morning blooms.
- Gluing petals. Glue shows through dried petals as dark spots. Glue stems only, or use archival mounting corners.
- Hanging in direct sun. The fastest way to turn vivid purples into beige. Indirect light only.
The takeaway
Pressed flower art is two skills: drying (12 minutes in the microwave, done right) and arranging (odd numbers, one hero, breathing room). The materials cost almost nothing — garden flowers, a $15 press, thrifted frames — and the result is genuinely beautiful botanical art. Press a batch this weekend; you'll have framed art by Sunday evening.
Frequently asked questions
How long do you microwave flowers to press them? 25–30 seconds initial burst on high, then 10-second intervals with ventilation between bursts, until papery-dry — about 8–12 minutes total elapsed time. Never exceed 60 seconds per session; let everything cool between bursts.
What flowers press best in the microwave? Flat, thin-petaled flowers: daisies, pansies, violets, cosmos, lavender, ferns. Thick blooms (roses, dahlias) need dismantling or halving first. Microwave pressing preserves color better than slow methods.
How long does it take to press flowers in a book? 3–4 weeks between absorbent paper inside heavy books, changing the paper after week one if damp. Slower than microwaving and colors fade more, but it needs zero equipment and handles delicate flowers gently.
How do you keep pressed flowers from fading? Hang out of direct sunlight (UV is the main cause), use UV-protective glass for important pieces, and seal the frame back against humidity. Some gentle fading over years is normal and looks like vintage patina.
Can you press flowers without a special press? Yes — the book method needs only books and absorbent paper. For the microwave method, two ceramic tiles + rubber bands + paper towels work as a DIY press. Commercial microwave presses ($15–$25) are faster and more even, but not required.