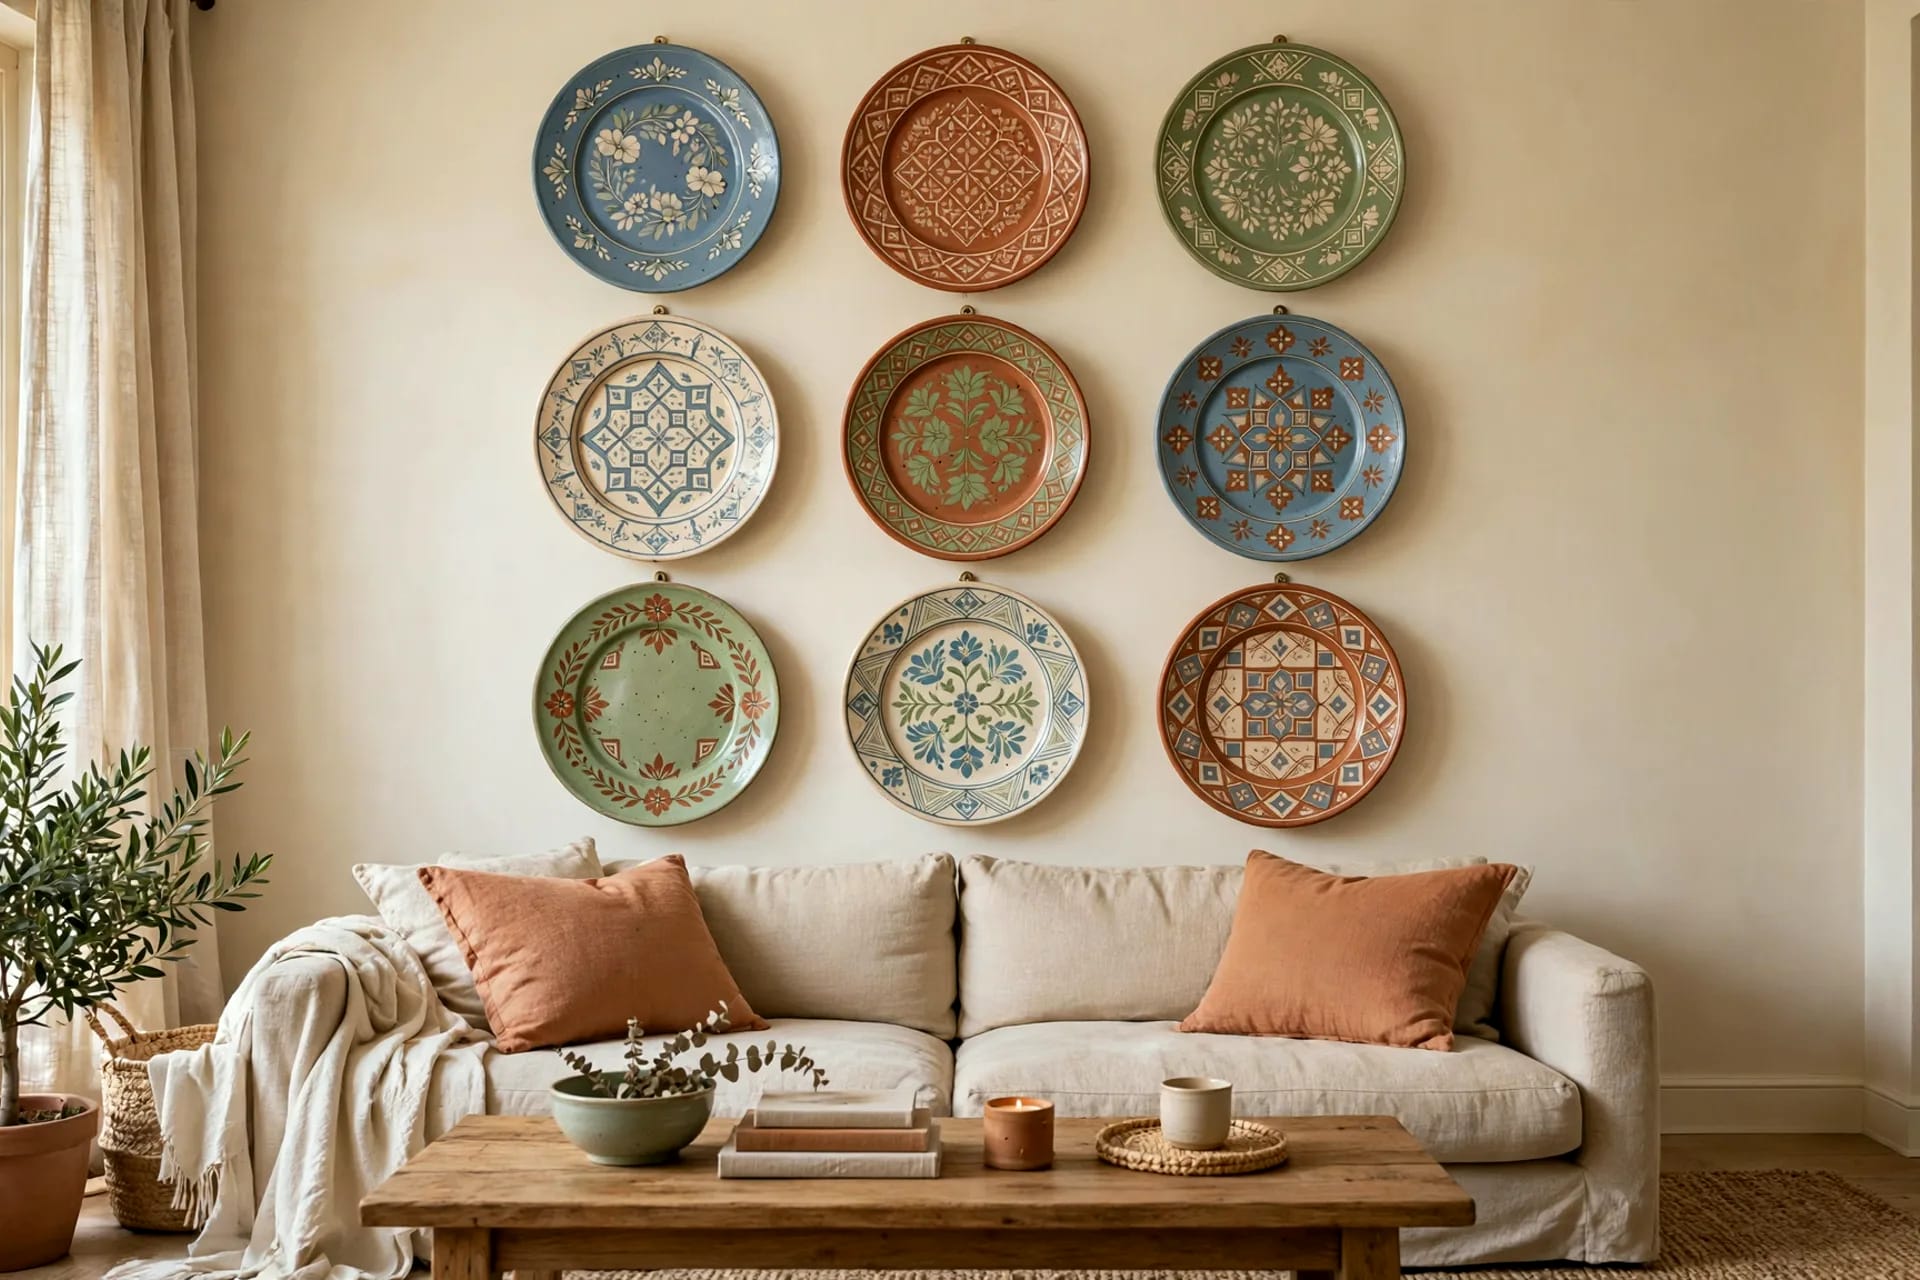
A plate wall looks expensive because it looks collected, not bought. Nine mismatched plates in a considered arrangement read as a lifetime of travel — and the whole wall can cost less than one framed print if you thrift the plates and decorate them yourself. This guide covers choosing plates, decorating them, and hanging them so they stay put.
Every idea here uses plates at $1 to $5 each from thrift stores, plus paint you may already own. Total for a nine-plate wall: under $30.
Key Takeaways
- Use ceramic, stoneware or melamine plates; avoid thin glass, bone china heirlooms and anything chipped.
- Four decorating techniques cover every look: paint, decoupage, stencils and gilded edges.
- Match the hanger to the weight: wire hangers for light plates, adhesive discs for smooth backs, and never exceed the rated limit.
- A plate wall should span about two-thirds of the furniture below it, with 5 to 8 cm between plates.
- Renters can build a full plate wall with adhesive discs and picture ledges — no holes needed.
Table of Contents
- Which Plates to Use (and Which to Avoid) + Where to Find Them Cheap
- 4 Ways to Decorate a Plate: Paint, Decoupage, Stencils and Gilded Edges
- How to Hang Plates Safely: Hangers, Adhesive Discs and Weight Limits
- Plate Wall Layouts: Grid, Freeform Cluster and Vertical Column
- Sizing Rules: How Many Plates and How Much Wall to Fill
- Style Directions: Farmhouse, Boho, Mediterranean and Minimalist
- Renter-Friendly Plate Walls (No Holes)
- Mistakes That Make a Plate Wall Look Cluttered
- FAQ
Which Plates to Use (and Which to Avoid) + Where to Find Them Cheap
The best plates for a wall are the ones nobody wants to eat off any more: plain ceramic and stoneware dinner plates, salad plates and saucers in mixed sizes. Ceramic takes paint well, holds a wire hanger without flexing, and hangs flat. Stoneware is sturdier still. Melamine works too — it is light — but paint needs a primer coat to stick to its slick surface.
Avoid thin glass plates, which are heavy for their size and shatter if they fall, and bone china or anything with sentimental or monetary value — a wall is a risky home for an heirloom. Skip chipped or cracked plates: a chip weakens the rim where a wire hanger grips, and a hairline crack can spread under pressure. Also avoid heavily textured backs — adhesive discs need a smooth, flat surface.
Where to find them cheap: thrift stores and charity shops, at $1 to $3 a plate — look for mismatched singles, not boxed sets. Estate sales and flea markets yield the most interesting patterns, often $0.50 a plate if you buy the lot. Dollar stores sell plain white plates for $1.25, perfect blanks for painting. For more thrifted-makeover thinking, see thrifted frame flips.
Buy more plates than you need: a nine-plate wall wants twelve candidates, so you can reject the two that clash and the one that is secretly chipped. Mix sizes — dinner plates at 26 to 28 cm, salad plates at 20 cm, saucers at 15 cm — because identical plates look like a shop display. Keep the palette to three colours plus white. For the placement rules behind every layout in this guide, see the DIY wall decor guide.
4 Ways to Decorate a Plate: Paint, Decoupage, Stencils and Gilded Edges
You do not need to be a painter to decorate a plate. These four techniques range from a single coat of paint to a detailed mandala, and the first eight ideas use them in order of difficulty.
1. Solid colour wash plate
Paint a plain white plate in one solid colour — terracotta, sage, dusty blue — with ceramic or multi-surface acrylic paint, two thin coats with a foam brush, sealed with clear matte varnish. One colour-washed plate among patterned ones calms a busy wall, for about $2 in paint.
2. Hand-painted floral plate
Paint simple five-petal flowers with a round brush: five dabs for petals, one dot for the centre, thin green strokes for stems. Work in two colours only — dusty pink flowers with sage stems. Imperfect petals read as handmade charm.
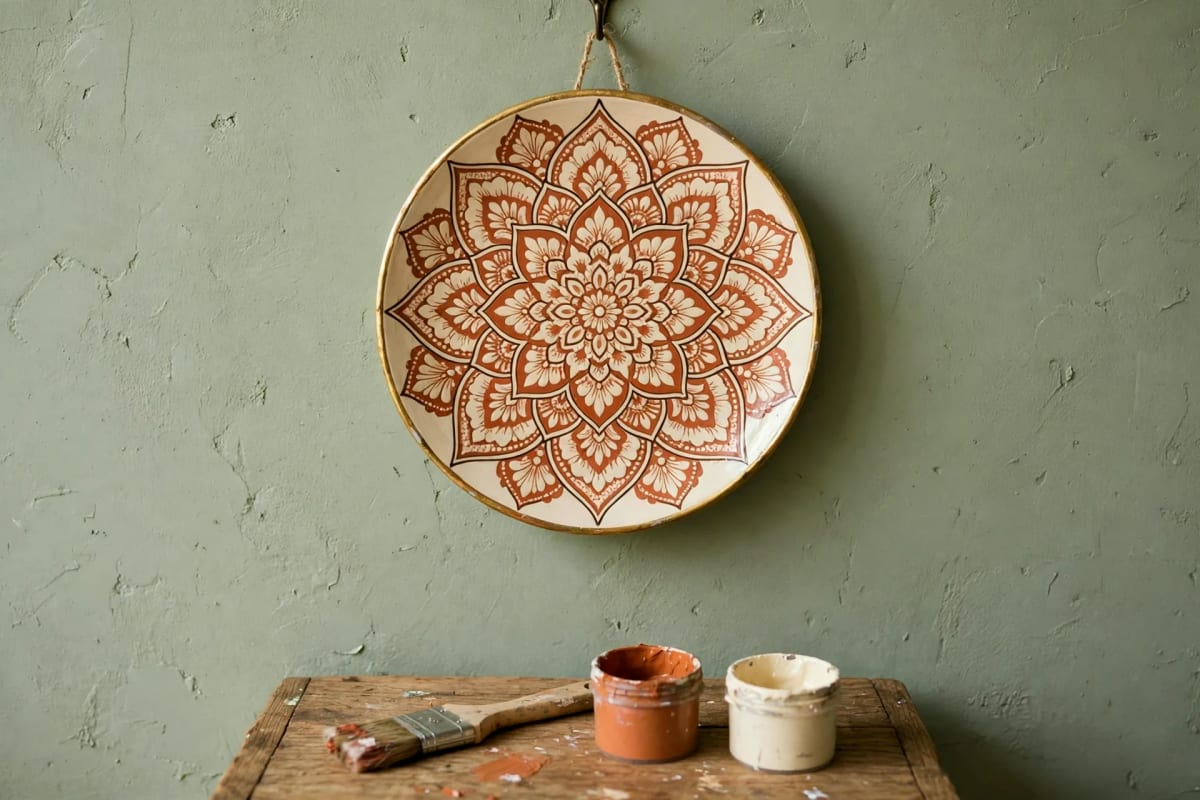
3. Mandala plate
Draw a mandala with a compass and pencil: concentric circles, then petal shapes repeated around each ring. Paint it in terracotta and cream with a thin gold rim, as in the photo below. It takes about an hour, but it becomes the centrepiece of any wall.
4. Decoupage napkin plate
Brush decoupage glue onto a plate, lay a single layer of a printed paper napkin over it, smooth out the bubbles, and seal with two more coats. Floral napkins work best; avoid dark prints, which look muddy on ceramic. A pack costs $2 and covers six plates.
5. Stencilled pattern plate
Hold a reusable stencil flat with painter's tape and dab paint through it with a stencil brush — dabbing, never brushing, so paint does not bleed under the edges. Geometric and Moroccan patterns give the most impact for the least skill. Peel it up while the paint is still slightly wet.
6. Gilded edge plate
Paint a thin gold band around the rim with metallic gold acrylic, or apply gold leaf with adhesive size for a richer finish. A gilded edge makes even a $1 plate look shop-bought. Keep the gold to the rim; gilding the whole plate looks gaudy.
7. Two-tone dipped plate
Paint the lower half of a plate in a bold colour and leave the top white, taping the edge for a clean line. Dipped plates add modern geometry to a wall of traditional patterns and take ten minutes each.
8. Chalkboard message plate
Coat a plate with chalkboard paint, let it cure for 24 hours, then write a word or date on it in chalk or a chalk marker. It is the only plate here you can change at will — a seasonal word, a family name — and children love updating it.
How to Hang Plates Safely: Hangers, Adhesive Discs and Weight Limits
Plates fall for one reason: the wrong hanger for the weight. Weigh each plate first — most dinner plates are 400 to 700 grams — then choose accordingly.
Wire plate hangers are the classic choice: four spring-loaded arms grip the rim and a hook loop hangs on a nail. They suit plates up to about 1 kg and cost $2 to $3 each. Check the vinyl tips are intact; bare wire scratches glaze and can chip the rim. Adhesive discs are the invisible alternative: a metal disc with a loop, glued to the back, rated by weight — buy the 1 kg or 2 kg size, never the 500 g one for a dinner plate. They need a smooth, clean back and 24 hours to cure. For heavy stoneware over 1 kg, use a wire hanger and a wall anchor, not adhesive.
Use one nail or screw per plate, driven into a stud or a proper wall plug — never a bare nail in plasterboard for anything over 500 grams. Centre the arrangement at 145 to 155 cm from the floor, and leave 5 to 8 cm between plates so they cannot knock each other. Test each plate with a gentle tug before you walk away.
Plate Wall Layouts: Grid, Freeform Cluster and Vertical Column
Layout separates a plate wall from plates nailed to a wall. Cut paper templates for each plate, tape them up first, and live with the layout for a day before drilling. For the spacing geometry behind all three layouts, see gallery wall layouts.
9. The 3 by 3 grid
Nine plates in three neat rows of three, evenly spaced, above a sofa or sideboard. Use same-size plates or the same visual weight — a large patterned plate counts double. The grid is the most formal layout and suits dining rooms best. See above sofa wall decor for the sizing rules that make a grid sit right over furniture.
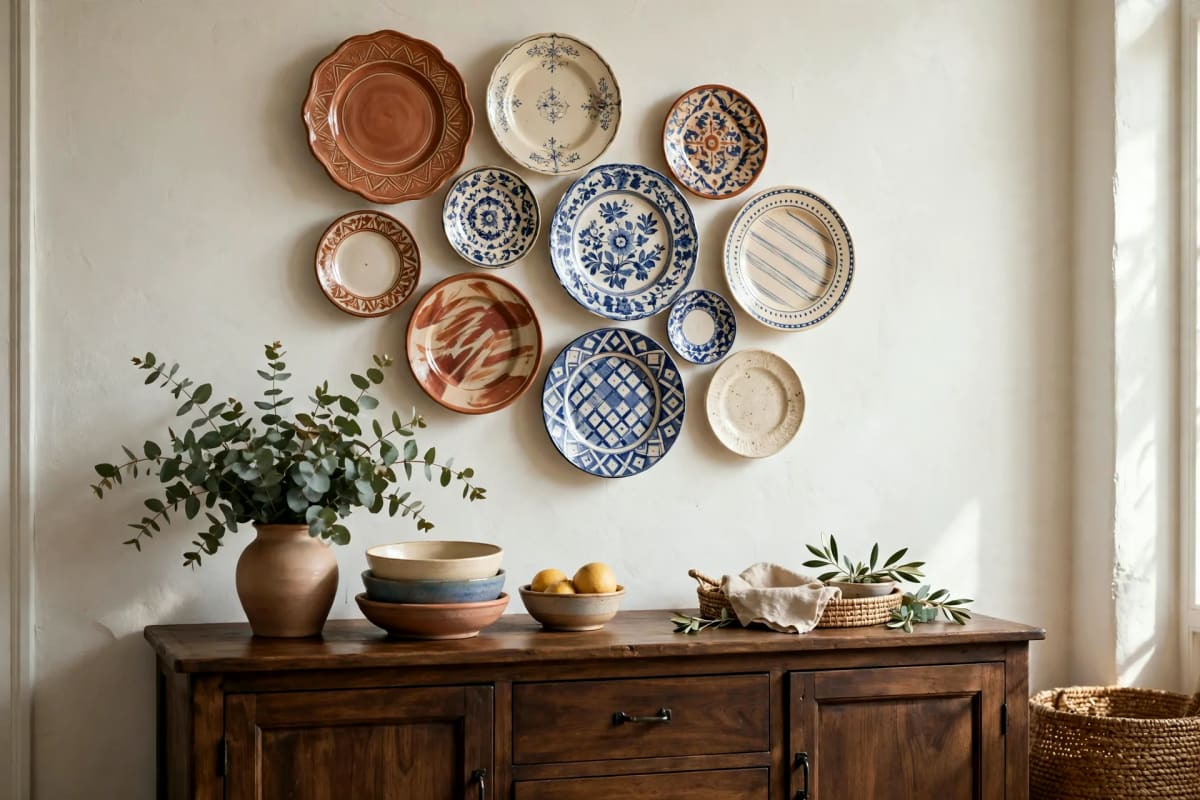
10. Freeform cluster
Plates of mixed sizes in a loose oval or cloud shape, largest near the centre, smallest at the edges. Start with the centre plate, then build outwards, checking the shape from across the room. This is the most forgiving layout — nothing has to line up — and it suits mixed thrifted plates.
11. Vertical column
Three to five plates stacked in a single vertical line down a narrow wall — a hallway, the side of a fireplace, or the gap between two doors. Use graduated sizes, largest at the bottom, and keep the column centred on the wall's width. It turns dead space into a feature.
Sizing Rules: How Many Plates and How Much Wall to Fill
A plate wall should span about two-thirds of the furniture below it: a 180 cm sofa takes a 120 cm arrangement, a 120 cm sideboard takes an 80 cm one. Smaller looks lost; wider swallows the furniture. A small wall takes 5 to 7 plates, a standard sofa wall takes 9, and a large dining wall takes 12 to 15. Odd numbers look more natural than even ones, so prefer 5, 7, 9 or 11.
Keep 5 to 8 cm between plates and at least 15 cm of empty wall around the group. The centre sits at 145 to 155 cm from the floor, or 15 to 20 cm above the furniture. On walls taller than 3 metres, raise the centre to 160 cm.
Style Directions: Farmhouse, Boho, Mediterranean and Minimalist
Choose your style first, then reject any plate that fights it — one palette keeps a mixed wall coherent.
12. Farmhouse plate wall
Cream, stone and soft grey plates with simple floral or stripe patterns, mixed with one or two wooden chargers for warmth. Keep the layout a grid or a gentle cluster in the dining room. The farmhouse feel comes from handmade-looking plates, not matching patterns.
13. Boho plate wall
Terracotta, mustard and dusty blue plates with mandala, paisley and woven textures, hung in a freeform cluster with a macrame piece or dried grasses nearby. Mix sizes freely — boho forgives chaos — but keep terracotta in every third plate.
14. Mediterranean plate wall
Blue and white plates with bold geometric and floral patterns, like the grid in our cover photo, hung above a wooden sideboard or a linen sofa. Add one terracotta plate per row to warm the blue. This is the brightest style here and suits sunny rooms.
15. Minimalist plate wall
Five plates only, all white or all one colour, in a precise grid with generous spacing. No patterns, no mixing — the beauty is the repetition and the shadows the plates cast.
Renter-Friendly Plate Walls (No Holes)
Renters can build a full plate wall without drilling: adhesive discs rated above each plate's weight, stuck to smooth backs and cured for 24 hours, then hung on adhesive picture hooks. For the full method, see damage-free wall decor and renter-friendly wall decor.
16. Adhesive-disc renter wall
Five light melamine or thin ceramic plates on adhesive discs, hung on removable hooks in a small cluster. Keep plates under 500 grams each and check the hooks monthly.
17. Leaning plates on a ledge
Stand plates on a picture ledge or sideboard, leaning against the wall, largest at the back. No fixings at all, and you can rearrange in seconds. It suits renters and anyone who changes decor often.
Mistakes That Make a Plate Wall Look Cluttered
Too many colours. Six patterns in six colours reads as a jumble. Fix: keep the palette to three colours plus white, with one colour repeating in every third plate.
Plates too close together. Rims touching look crowded and risk chips. Fix: leave 5 to 8 cm between plates and 15 cm of empty wall around the group.
Ignoring weight limits. An overloaded adhesive disc drops a plate without warning. Fix: weigh every plate, buy discs rated above that weight, and cure them for 24 hours.
Hanging heirlooms. A wall is a risky home for anything irreplaceable. Fix: hang thrifted plates you can replace, and keep valuable china in a cabinet.
FAQ
Can I hang plates with Command strips?
Yes, for light plates under 500 grams, using adhesive discs on the plate and a removable hook on the wall. Heavier plates need a wire hanger and a proper fixing.
What paint should I use on ceramic plates?
Multi-surface or ceramic acrylic paint, two thin coats, sealed with clear matte varnish. Decorative plates are not for food use — never eat off a painted plate.
How do I hang a plate without a hanger?
Use an adhesive disc: clean the back, stick it on, cure for 24 hours, then hang the loop on a nail or hook. It works only on smooth, flat backs.
How many plates do I need for a plate wall?
Five to seven for a small wall, nine for a standard sofa wall, twelve to fifteen for a large dining wall. Odd numbers look more natural.
Will plate hangers damage my plates?
Wire hangers can scratch glaze if their vinyl tips are worn. Check the tips first, and use adhesive discs for valuable or delicate plates.