
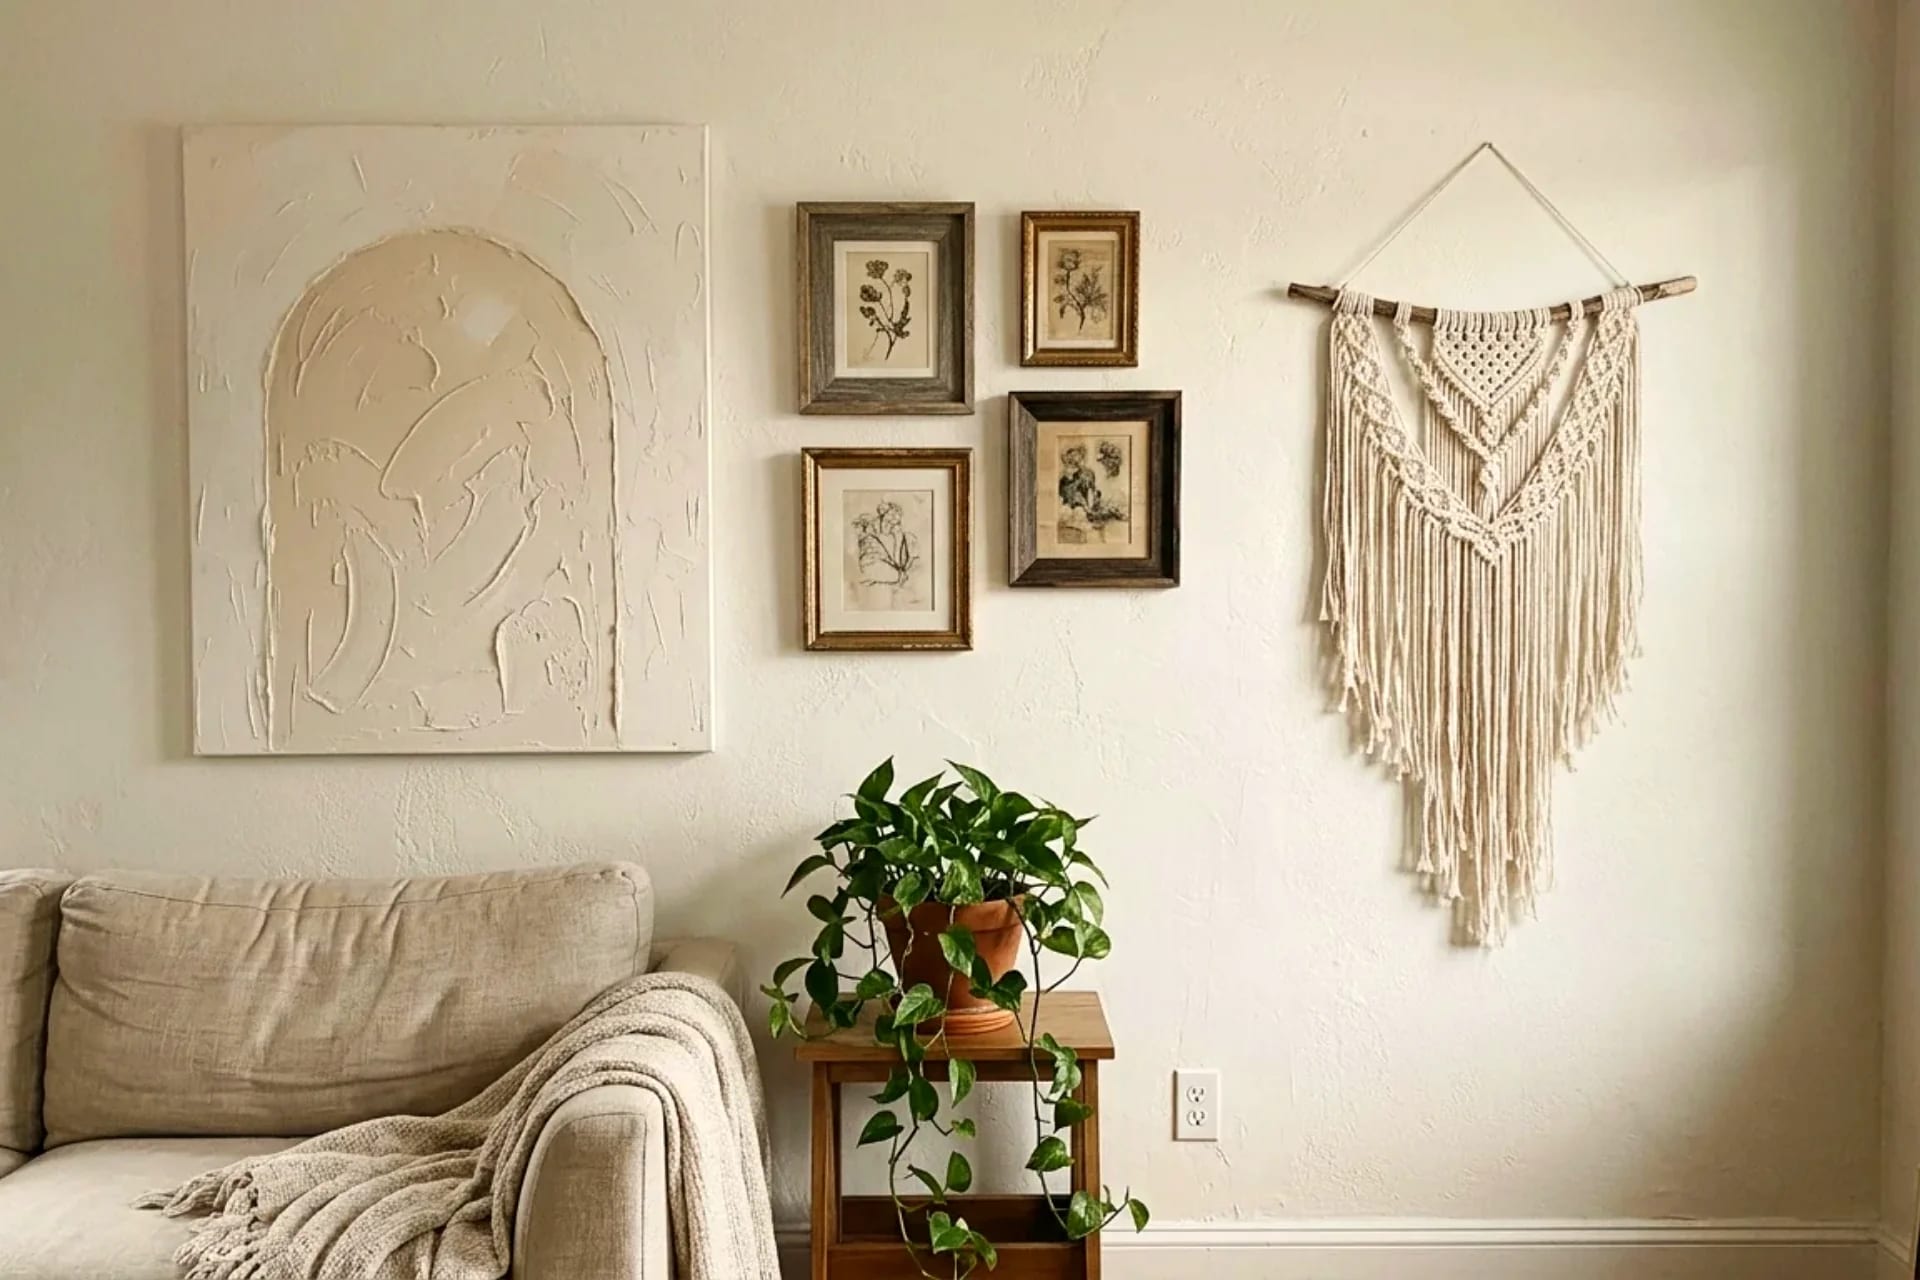
Bare walls make even a well-furnished room feel unfinished. The fix doesn't require a gallery budget — it requires a Saturday, basic tools, and knowing which technique fits your skill level. This guide covers everything: 40+ DIY wall decor ideas across 7 core techniques, real costs, the tools worth buying, color and hanging rules, and the mistakes that separate "handmade" from "homemade-looking." Every technique links to a full step-by-step tutorial.
If you have never made anything for your walls before, read our beginner's guide to DIY wall decor first, then come back here to pick your technique.
Key Takeaways
- 7 core techniques cover 90% of DIY wall decor: plaster art, gallery walls, macrame, pressed flowers, thrifted frames, renter-friendly installs, painted and paper art
- Budget: most projects cost $10–$40; a full statement wall runs $50–$120
- Start here: pick ONE technique and make 2–3 pieces before branching out — depth beats variety
- The 57-inch rule: hang art so its center sits ~145 cm (57 in) from the floor — the single biggest hanging upgrade
- Interlink: every technique below links to its full tutorial — this page is your hub
Table of Contents
- Why make your own wall decor
- The 7 core DIY wall decor techniques
- Which technique should you start with
- Tools you will actually need
- Color and finish basics
- Hanging and placement rules
- Mistakes that ruin DIY wall art
- Frequently asked questions
- The takeaway
Why make your own wall decor
Three reasons, in order of how much they matter:
1. Cost. A textured canvas that retails for $120–$300 costs $10–$20 in joint compound and a thrifted canvas. A gallery wall of 8 frames runs $25–$60 thrifted versus $200+ new. The markup on wall art is enormous because you're paying for someone else's afternoon.
2. Fit. Store art comes in standard sizes and generic palettes. DIY means the exact size for that awkward wall above your sofa, in the exact tone of your rug. Custom-fit art is the difference between "decorated" and "designed."
3. Skill compounds. Your third plaster piece will embarrass your first — and that's the point. Wall decor techniques share fundamentals (composition, texture, color), so every project makes the next one better. Six months of weekend projects builds a genuine skill, not just a decorated apartment.
The 7 core DIY wall decor techniques
Everything below links to a full tutorial. Read the summaries, pick one lane, and go deep before trying the next.
Textured plaster art
Sculptural, tactile canvases made with joint compound — the Pinterest staple. Arches, waves, organic blobs, combed lines. Cost: $10–$20 per piece. Skill: beginner-friendly, very forgiving (mistakes scrape off while wet).

Start with the complete DIY plaster wall art tutorial, then browse textured plaster art designs for 15+ patterns, plaster art color ideas for palettes and finishes, and the plaster art tools checklist before you shop.
Best for: statement pieces, neutral/minimalist/Japandi/boho rooms, anyone who wants maximum visual impact per dollar.
Gallery walls
Curated arrangements of multiple frames — photos, prints, small art — composed as one installation. Cost: $25–$60 for 6–10 thrifted frames. Skill: easy to make, hard to compose well (layout is the skill).
Our gallery wall layout guide covers templates, spacing math (5–8 cm between frames), and the paper-template trick professionals use.

Best for: hallways, staircases, large blank walls, displaying personal photos and collected art as one story.
Macrame wall hangings
Knotted cord art — boho texture without paint or power tools. Cost: $8–$25 (cord + dowel). Skill: genuinely easy; three knots cover 80% of patterns.
See the macrame wall hanging tutorial for the three essential knots and your first project.
Best for: bedrooms, reading corners, renters (hangs from one hook), anyone who wants a calm, handmade texture.
Pressed flower art
Real botanicals pressed flat and framed — delicate, personal, nearly free. Cost: $5–$15 (frames + paper). Skill: easy; patience is the only requirement (2–4 weeks pressing time).
The pressed flower wall art guide covers pressing methods, arranging, and sealing so colors don't fade.
Best for: small art, gifts, spring/summer seasonal decor, nature-inspired rooms.
Thrifted frame makeovers
Turning $2 thrift-store frames into cohesive art with paint, new mats, and styling. Cost: $2–$8 per frame. Skill: beginner — spray paint covers many sins.
Our thrifted frame makeover tutorial shows the paint-and-mat formula that makes mismatched frames look intentional.
Best for: gallery walls on a budget, eclectic and vintage styles, instant gratification projects (one afternoon).
Renter-friendly wall decor
Everything above, installed without damaging walls: adhesive strips, removable hooks, lean-and-layer styling, washi tape art, removable wallpaper. Cost: varies; damage-free hanging adds $5–$15.
The renter-friendly wall decor guide covers weight limits by product, what actually holds, and landlord-proof installation.
Best for: renters, dorms, anyone who rearranges often.
Simple painted and paper art
Abstract acrylics, line art, paper collage, large-scale brushstroke canvases. Cost: $5–$20. Skill: the widest range — from "my kid could do it" abstracts (which genuinely look good) to more practiced pieces.
Our DIY wall decor ideas collection includes 25+ quick projects in this lane.
Best for: total beginners, kids' rooms, filling small gaps fast, experimenting with color.
Which technique should you start with
Match the technique to your situation, not to what's trending:
| Your situation | Start with | Why | |---|---|---| | Total beginner, want a win this weekend | Thrifted frame makeovers | One afternoon, near-zero skill, instant result | | Want one big statement piece | Textured plaster art | Highest impact per dollar; forgiving process | | Renter, can't drill | Macrame or renter-friendly installs | One hook or zero holes | | Love the collected/eclectic look | Gallery wall | Built piece by piece over time | | Tiny budget (under $15) | Pressed flowers or paper art | Nearly free materials | | Want a calm, handmade texture | Macrame | Repetitive knotting is meditative, not difficult |
Depth beats variety: make 2–3 pieces in ONE technique before trying another. Composition eye, material comfort, finishing quality — everything jumps between piece one and piece three.
Tools you will actually need
Don't buy a craft store. The honest starter kit for wall decor:
- Cutting and shaping: craft knife, scissors, putty knives (for plaster work)
- Adhesive: hot glue gun + sticks, E6000 or similar strong glue, painter's tape
- Hanging: picture hooks, adhesive strips (Command-style), small level, measuring tape
- Finishing: 120-grit sandpaper, matte sealant or clear wax, basic acrylic paint set
- Protection: drop cloth or old sheet, dust mask (for sanding plaster/compound)
Total starter kit: $30–$50, and most of it serves every technique on this page. For plaster-specific shopping, use the detailed plaster art tools and materials checklist — it breaks down exactly what to buy, what to skip, and three budget kit tiers.
What NOT to buy yet: specialty texture mediums, professional framing equipment, or anything marketed as a "complete kit" — kits charge 2–3x the price of the same items bought individually.
Color and finish basics
Color decisions make or break DIY art more than technique does. Four rules:
1. Pull colors from the room. Your art should repeat 1–2 existing colors (rug, sofa, curtains) plus one neutral. Art that introduces a brand-new color family looks disconnected, however well made.
2. Neutrals are not boring — they're load-bearing. Warm whites, greige, beige, soft black, natural wood tones: these carry a room. Make your biggest pieces neutral and let small pieces carry the color. For plaster art specifically, our plaster art color ideas guide breaks down neutral palettes, earthy tones, and when to go bold.
3. Matte finishes forgive; glossy finishes expose. Matte paint and sealant hide texture imperfections and brush marks. Satin and gloss reflect light unevenly across handmade surfaces and broadcast every flaw. Until your technique is polished, stay matte.
4. Test at scale. A color that looks perfect on a 10 cm swatch can overwhelm at 60×80 cm. Paint a large piece of cardboard, prop it on the wall, and live with it for 24 hours before committing.
Hanging and placement rules
Good art hung badly looks like bad art. The rules professionals actually use:
- The 57-inch rule: the center of the piece (or arrangement) sits ~145 cm from the floor — average human eye level. This is the single most impactful hanging rule. Above sofas, the bottom of the art should sit 15–20 cm above the sofa back.
- Scale to the wall, not the furniture. Art should span roughly two-thirds the width of the furniture below it. A tiny frame centered on a huge empty wall looks lost; an oversized piece in a tight hallway overwhelms.
- Odd numbers and asymmetry. Groups of 3 or 5 read as intentional; pairs read as formal. Slight asymmetry feels collected and human; perfect symmetry feels corporate.
- The paper template trick: trace each frame on kraft paper, tape the papers to the wall, adjust until the composition works — then hammer exactly one set of holes. From the gallery wall layout guide.
- Weight honesty: know what your wall holds. Drywall anchors for anything over 2 kg; adhesive strips only within their rated weight (and never in steamy bathrooms — humidity kills adhesion).
Mistakes that ruin DIY wall art
The same five errors appear in almost every disappointing result:
1. Wrong scale. Too-small art on a big wall is the #1 beginner mistake. When in doubt, go bigger — or group small pieces into one arrangement.
2. Hanging too high. Art drifts upward because people hang at their own eye level plus "a bit." Measure the 145 cm center. It will feel low the first day. It's correct.
3. Skipping the finish. Unsealed plaster art turns chalky and marks on touch. Unsealed wood absorbs grease. Unvarnished paper art fades. Sealing takes 10 minutes and is the difference between "lasts years" and "looks tired in months."
4. Too many colors. Three colors maximum per piece (plus neutrals). Beginners add "one more accent" until the piece looks busy. Restraint reads as taste.
5. Visible shortcuts. Dried glue strings, crooked wire, dusty surfaces. Spend the last 15 minutes on cleanup — the cheapest quality upgrade there is.
Frequently asked questions
What is the easiest DIY wall decor for beginners? Thrifted frame makeovers and simple painted abstracts. Both need minimal skill, cost under $15, and finish in an afternoon. Plaster art is the next step up — slightly more involved but very forgiving since mistakes scrape off while wet.
How much does DIY wall decor cost compared to buying art? Typically 10–20% of retail. A $150 textured canvas costs ~$15 to make; a $200 gallery wall of new frames costs ~$40 thrifted. The main investment is your time: 2–4 hours per statement piece.
How do I decorate walls as a renter without damage? Adhesive strips and removable hooks for pieces under 2 kg, lean large art on shelves and mantels instead of hanging, and use removable wallpaper or washi tape for color. Full details in the renter-friendly wall decor guide.
What size art should go above a sofa? Two-thirds the sofa's width, bottom edge 15–20 cm above the sofa back — about 130 cm wide for a standard 200 cm sofa.
How do I make DIY art look expensive, not crafty? Four things: generous scale, a restrained palette (neutrals + one accent), matte finishes, and clean edges/finishing. Expensive-looking is 90% restraint and finishing, 10% technique.
Can I mix different wall decor techniques in one room? Yes — that's how collected, designer rooms happen. Keep one unifying thread: consistent palette, consistent frame color, or consistent subject matter. Two to three techniques per room is the sweet spot; more starts to feel chaotic.
The takeaway
DIY wall decor is one of the highest-ROI home projects: $10–$40 and a weekend buys what stores charge hundreds for, fitted exactly to your space. Pick one technique, make three pieces, hang them right — then come back for the next. This page is your hub: every tutorial above goes deeper.



