A photo wall works when it looks intentional rather than accidental. The difference is rarely the photographs themselves. It is the editing, sizing and spacing, and how the arrangement sits against the furniture around it. Get those right and phone photographs can look like a gallery display.
This guide covers the whole project, from choosing images to hanging them straight and swapping them seasonally: fourteen layouts, size and spacing rules, a paper template method, and advice on hardware and rentals.
Key Takeaways
- Edit ruthlessly first and give the wall one unifying rule, such as a single frame colour.
- Hang the centre at about 57 inches from the floor, or lower it over furniture so it relates to the piece below.
- Keep gaps consistent, usually two to three inches, and treat the whole group as one large picture.
- Use paper templates before you drill a single hole, especially for salon and staircase arrangements.
- Match hardware to the real weight of each frame, and use adhesive or leaning options when holes are not allowed.
In this guide:
- Choosing and Curating Your Photos
- Print Sizes and Viewing Distance
- Spacing Rules That Make a Wall Look Professional
- The Paper Template Method
- 14 DIY Photo Wall Layouts by Style
- Hanging Hardware by Frame Weight
- Renter Friendly No Hole Options
- Updating and Swapping Photos Seasonally
- Mistakes and How to Fix Them
- FAQ
Choosing and Curating Your Photos
Start with far more photographs than you need, then cut hard. A strong wall shows fewer, better images, not every good holiday photograph. Lay your shortlist on a table and, if three pictures tell the same story, keep the strongest one.
Candid Moments Versus Posed Portraits
Candid photographs tend to carry a photo wall because they show real expression, movement and place. A laughing group often feels more alive than a stiffly posed line up. Posed portraits still suit weddings and graduations, but work best balanced with candid images: roughly two candid images for every posed portrait.
Colour Versus Black and White
Colour suits travel, gardens and bright rooms, while black and white brings instant cohesion to images taken in different light at different times. Converting a varied set to black and white makes photographs from several years look as though they belong together. If you prefer colour, choose one unifying rule: matching frames, identical mounts, a consistent tone, or a single subject theme. Also check quality at print size, because a phone-sharp photograph can soften badly when enlarged.
Print Sizes and Viewing Distance
Size is where many photo walls go wrong. Small prints scattered across a large wall look lost, while oversized prints crammed together leave no breathing room. As a rough guide, the arrangement should fill roughly two thirds of the furniture width below it, or two thirds of the wall width otherwise. Viewing distance matters too: a print viewed from across a living room needs to be larger than one viewed from a hallway step. Small prints suit staircases; large prints anchor a room and read clearly from a sofa. Mix sizes deliberately, with one or two larger anchors and smaller supporting prints.
| Viewing distance | Best print sizes | Works well for | | --- | --- | --- | | Under 1 metre | 10 by 8 inches and smaller | Hallways, staircases, desk walls | | 1 to 2 metres | 12 by 10 inches to 16 by 12 inches | Bedrooms, dining areas, reading corners | | 2 to 3 metres | 20 by 16 inches to 24 by 18 inches | Living rooms, above a sofa | | Over 3 metres | 30 by 20 inches and larger | Large living rooms, open plan spaces |
Keep the largest print no more than about twice the size of the smallest in the same group, unless one hero image is deliberately surrounded by much smaller prints. Include mount and frame in measurements, because a wide mount can add several inches.
Spacing Rules That Make a Wall Look Professional
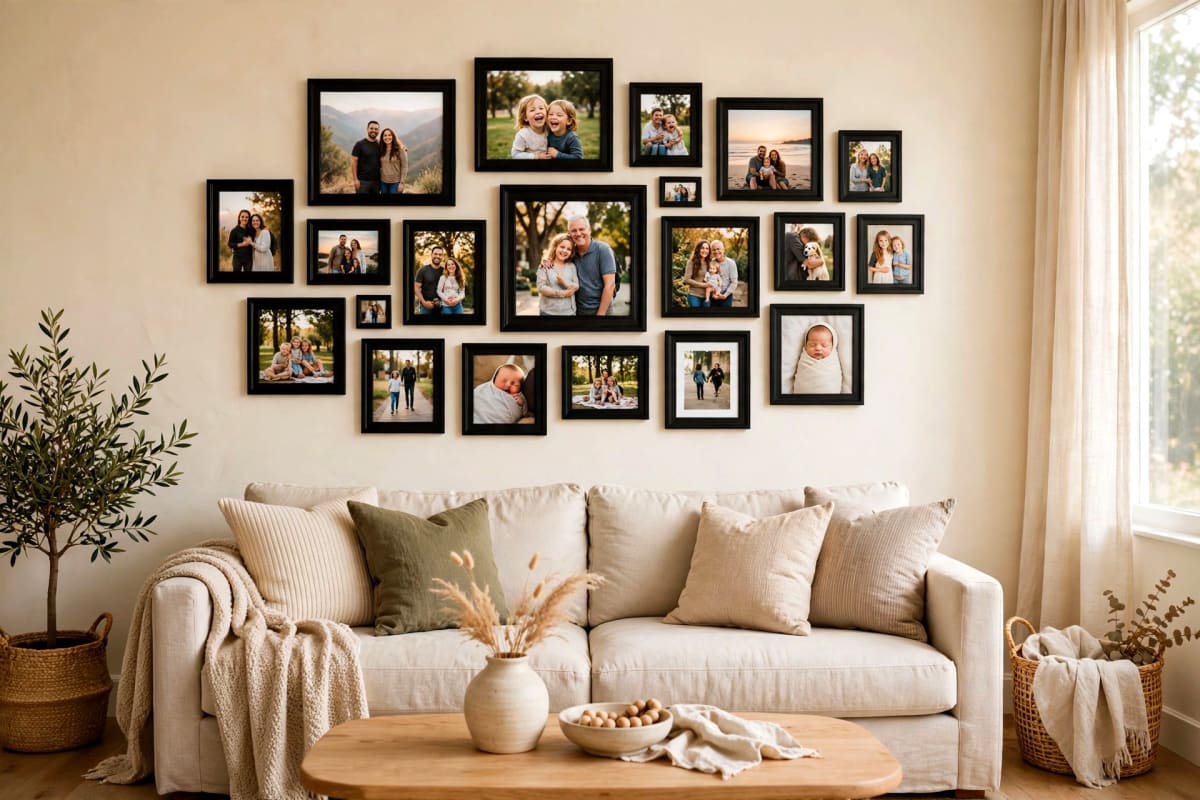
Consistent spacing is the fastest way to make a photo wall look professional. Most arrangements look best with two to three inches between frames: around one and a half inches for tight grids, up to four inches for very large frames. Keep the gap the same throughout. Uneven gaps make a wall look thrown together.
The 57 Inch Centre Rule
Galleries commonly hang the centre of a picture at about 57 inches from the floor, close to average eye level. For an arrangement, find the centre of the whole group, not of one frame, and place that point at 57 inches. Where viewing happens seated, drop it slightly to 54 or 55 inches.
Rules for Walls Above Furniture
Above a sofa, console table or bed, a photo wall should relate to that furniture. Leave six to eight inches between the furniture top and the lowest frame, and keep total width between two thirds and three quarters of the furniture width. For more ideas above seating, see above-sofa wall decor. Treat the outer edge as a rough rectangle or square, and view the wall from the doorway.
The Paper Template Method
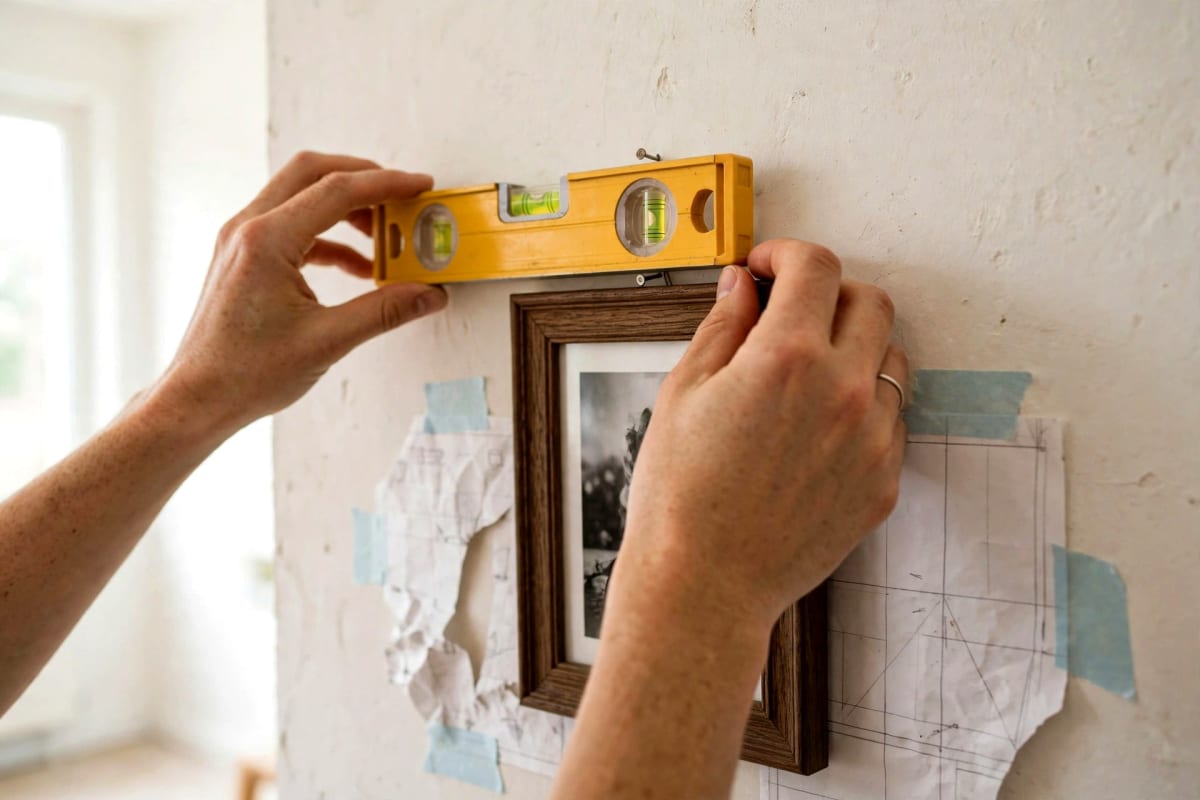
The paper template method removes almost all guesswork and drilling regret. You will need kraft paper, scissors, masking tape, a pencil and a spirit level.
First, trace each frame onto paper, cut out the shape, and mark the centre and hook position on the back. Label each template. Next, tape the templates to the wall, starting with the anchor piece and working outward, using the spacing rules above.
Live with the templates for a day if you can. View them in morning and evening light, from the sofa and from the doorway, and check whether the arrangement feels too high, too wide or too crowded. Adjust the tape, not the wall. When happy, mark the hook position and hang each frame, checking level as you go.
14 DIY Photo Wall Layouts by Style
Layouts are grouped by style so you can choose by room and budget. Costs are approximate for frames and hardware only, excluding printing, and assume ready made frames.
Grid Layouts
1. Classic Four Square. Four identical squares, two by two, two inch gaps. Room: bedroom or hallway. Cost: low.
2. Six Piece Gallery Grid. Six matching rectangles, two rows of three. Room: living room or dining room. Cost: low to medium.
3. Large Grid With a Hero Print. One large central print, eight smaller matching prints around it. Room: living room. Cost: medium.
Grid layouts are easiest to hang well because every gap and edge aligns. See gallery wall layouts and gallery wall templates.
Salon Style Layouts
4. Salon Cluster. A loose, floor to ceiling cluster of varied sizes, one large anchor near the centre. Room: living room or stairwell wall. Cost: medium.
5. Horizontal Salon Row. A long, relaxed row growing outward from a central image. Room: above a long console. Cost: medium.
6. Corner Wrap Salon. Frames continue around a corner onto the adjoining wall. Room: reading corner or open plan space. Cost: medium to high.
Salon style suits eclectic homes and large collections. It needs paper templates most, because its charm comes from careful imbalance.
Ledge and Clip String Layouts
7. Single Picture Ledge. One long ledge, five to seven leaning frames, swapped without tools. Room: bedroom, nursery or home office. Cost: low to medium.
8. Double Ledge Display. Two parallel ledges, larger frames below, smaller above. Room: living room or hallway. Cost: medium.
9. Clip String Line. A wire or cord with clips holding unframed prints in one line. Room: bedroom, student room or studio. Cost: very low.
10. Three Strand Clip Display. Three parallel strings at staggered lengths. Room: children's room or studio. Cost: very low.
Ledge displays suit frequent changes, as frames lean and slide. See picture ledge wall decor.
Staircase Layouts
11. Staircase Step Follow. Frames rise with the stairs, each centre following the slope. Room: staircase wall. Cost: medium.
12. Staircase Grid Columns. Vertical columns of matching frames stepping up in a regular rhythm. Room: wide staircase or landing. Cost: medium.
13. Landing Feature Wall. One large arrangement on the landing, viewed head on from the stairs. Room: landing. Cost: medium to high.
Staircase walls need extra care, because eye level changes with every step. Measure from the step you stand on, not the floor below. See staircase wall decor ideas.
Mixed Feature Layout
14. Mixed Media Feature Wall. Photographs plus a mirror, a small shelf and one art piece or woven hanging. Room: living room or entryway. Cost: medium to high.
This works when the other pieces share a colour or material with the frames, so the wall reads as one composition. Keep photographs in the majority.
Hanging Hardware by Frame Weight
Choose hardware by real weight, including glass, not by guesswork. Light frames under one kilogram, such as small unglazed prints, can hang on a single picture nail or a small adhesive hook rated above the frame weight. Medium frames between one and five kilograms suit picture hooks, screws into a wall plug, or two hooks to share the load.
Heavy frames over five kilograms, especially large glazed frames, need a screw into a stud or a proper wall anchor, ideally with two fixing points. For brick or concrete, use masonry plugs and screws. For plasterboard without a stud, use a specialist anchor, never a plain nail. Choose hardware rated comfortably above the frame weight, and check level after a day, as wire can settle.
Renter Friendly No Hole Options
Renters can still build a beautiful photo wall without losing a deposit. Adhesive strips and hooks are simplest for light to medium frames, provided the wall is clean, dry and smooth. Follow the weight rating, press firmly for the recommended time, and remove them by pulling the tab slowly downward.
Leaning frames on a ledge, console or mantel need no fixings and suit heavier frames well. A tension rod with clips, a leaning ladder shelf, or a cork or magnetic board can also hold prints without holes. Washi tape borders work for very light prints, but test on a hidden patch first, as tape can lift fresh paint. Check your tenancy agreement before using adhesive, and photograph the wall before you start.
Updating and Swapping Photos Seasonally
A photo wall stays fresh when swapping is easy by design. Ledge and clip string layouts make this effortless, but even framed walls can be seasonal if you plan for it. Keep spare prints in the same sizes as your frames, so a swap takes minutes. Change one or two anchors each season, rather than the whole wall.
Use a light seasonal theme, not a full redecoration: bright outdoor photographs for spring and summer, warm indoor gatherings for autumn, festive or snowy scenes for winter. Store removed prints flat, interleaved with tissue paper, labelled with the frame size.
Mistakes and How to Fix Them
Hanging everything too high is the most common mistake. Fix it by lowering the group so its centre sits near eye level, or by re-centring it over the furniture below. Inconsistent gaps are the second most common problem; remeasure and rehang with a single gap size, using a spacer card.
Frames that fight each other are another frequent error. Unify them by spray painting them one colour, using identical mounts, or converting prints to black and white. A cluttered wall usually needs editing, not more decoration: remove the weakest twenty percent of images and increase gaps slightly. Avoid direct sunlight and radiators, which fade prints and warp frames.
FAQ
How many photos should be on a photo wall? For a first wall, five to nine photographs usually look best. Fewer can look sparse, while more than twelve needs careful planning. Start small and add frames if the wall still feels empty.
What size should photo wall prints be? Choose size by viewing distance and wall width. Small prints suit hallways, medium prints suit bedrooms, and large prints suit living rooms viewed from across the room. Keep the arrangement about two thirds of the furniture width below it.
How far apart should photo frames be? Two to three inches between frames works for most walls: about one and a half inches for tight grids, up to four inches for very large frames. Keep the same gap throughout.
What height should I hang a photo wall? Hang the centre of the arrangement at about 57 inches from the floor, or six to eight inches above the furniture below it. Adjust slightly lower where you mostly sit to view the wall.
Can I make a photo wall without drilling holes? Yes. Adhesive strips and hooks suit light to medium frames, while leaning frames on ledges suit heavier pieces. Check weight ratings and follow removal instructions to protect paint.
How often should I update my photo wall? Swap one or two photographs each season, or whenever a new favourite deserves a place. Ledge and clip displays make this easy; framed walls benefit from spare prints in matching sizes.
A good photo wall is less about perfect photographs and more about clear, consistent choices. Edit with confidence, size for the room, space evenly, and test with paper first.