
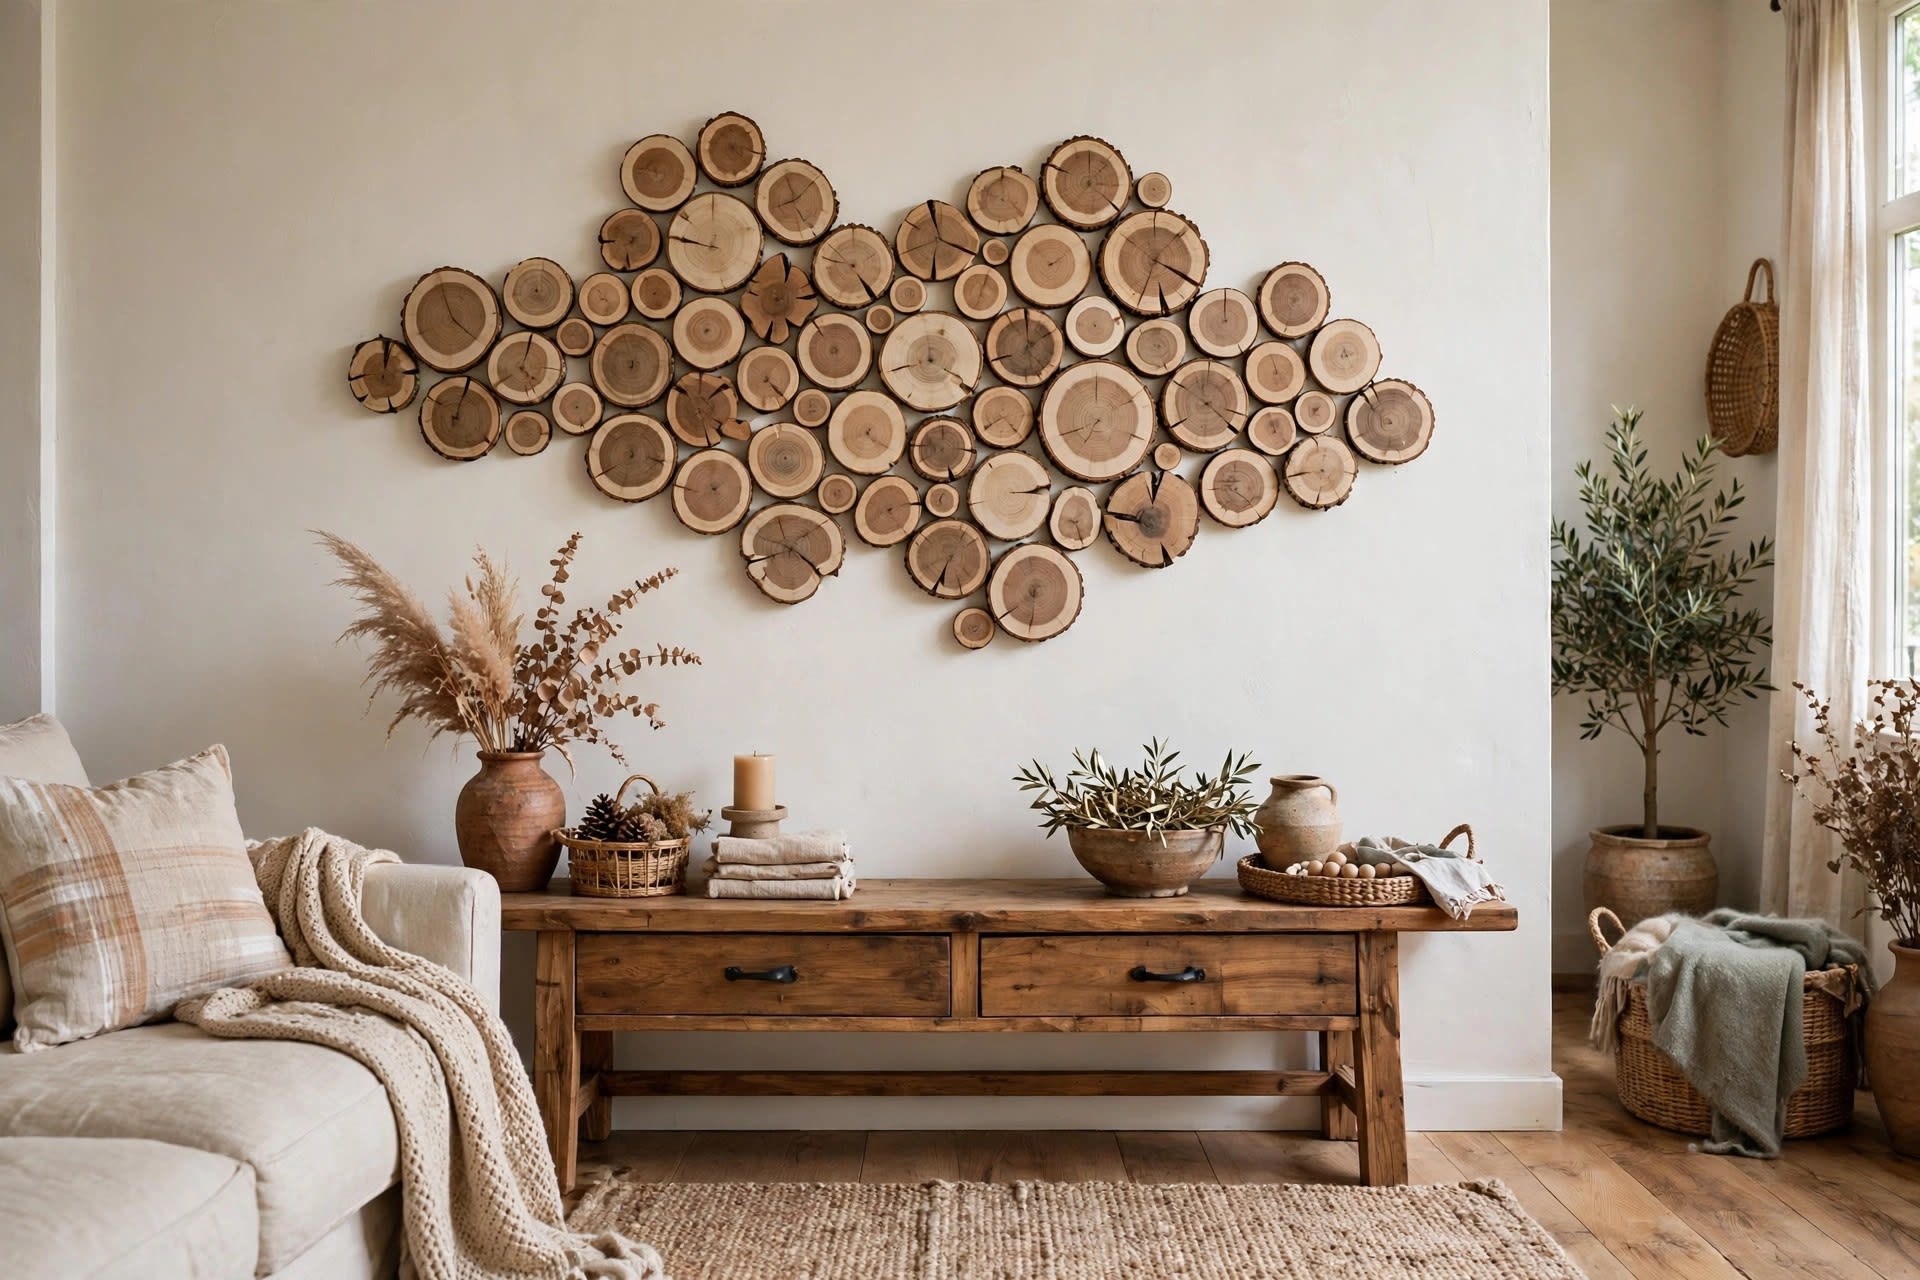
Few wall treatments deliver as much warmth per pound as wood slice art. A cross-section of a real log carries its history in the grain, and no two pieces are ever identical. Yet many first attempts end in disappointment: green or over-thin slices split within weeks, sap bleeds through paint, and a heavy panel hung on one hook slides off the wall.
This guide covers the parts other tutorials skip — sourcing, slow drying, and sealing — then eight finished designs, from a natural cluster to a wood-burned panel.
Key Takeaways
- Cost: $10–$60 for a cluster panel; $5–$25 per single statement slice
- Time needed: a weekend of hands-on work, plus 2–6 weeks of drying if you cut fresh slices
- Skill level: beginner-friendly, with one power-tool step you can outsource
- The rule that matters most: dry slowly, seal the ends, and never hang a heavy panel on one hook
In this guide:
- Sourcing wood slices
- Drying slices and preventing cracks
- Sanding and sealing
- 8 design ideas
- Step-by-step: the natural cluster panel
- Hanging heavy pieces safely
- Care and maintenance
- Mistakes to avoid
- FAQ
Sourcing wood slices
You have two routes: buy ready-cut slices, or cut your own. Buying is the sensible choice for a first project. Craft suppliers, timber yards and online sellers stock kiln-dried slices, usually 8–30 cm, and kiln drying removes most cracking risk before the wood reaches you. Inspect before you buy: reject slices with radial cracks, soft or crumbly patches, and any sign of active woodworm — tiny fresh holes with fine dust beneath them.
Cutting your own is cheaper and gives you control over size and species, but adds drying time and one safety decision. A chainsaw or bandsaw does the cutting; a handsaw rarely gives a flat face on anything wider than a wrist. If you do not already use a chainsaw confidently, ask a local tree surgeon or timber yard to cut the log for you. Arborists often give away interesting offcuts that would otherwise be chipped.
Species matters more than most guides admit. Safe choices include pine, ash, oak, birch, beech and fruit woods such as apple and cherry. Avoid yew, laburnum and oleander, which are toxic and should never be sanded indoors, and skip treated or painted timber entirely. Pine and other conifers also weep resin for months, which ruins finishes unless the slice is fully dried and sealed first.
Thickness is the other decision people get wrong. For wall art, aim for 15–25 mm (roughly ⅝ to 1 inch). Thinner slices cup and crack as they dry; thicker slices take far longer to dry and add serious weight. A cluster of 20 mm slices on plywood is sturdy and hangable; a single 40 mm slice may need a French cleat. Decide the design first, then cut or buy to suit it.
Drying slices and preventing cracks
Cracking is the number one reason wood slice projects fail, and it is almost entirely preventable. Wood shrinks far more around the circumference than along the grain, and that uneven shrinkage pulls a slice apart from the bark inward. The fix is patience: slow, even drying, with the ends protected from the start.
If you cut fresh slices, seal the faces — or at minimum the bark edge and any exposed end grain — within hours, using anchor seal, melted paraffin wax, or several coats of latex paint. This slows moisture loss from the ends, which otherwise dry far faster than the middle and split. Then stack the slices somewhere cool, dry and out of direct sun, with spacers between them so air circulates on both faces. A garage shelf or spare room works; a radiator or sunlit windowsill does not.
How long? A 20 mm softwood slice like pine typically needs 2–4 weeks indoors with good airflow; a hardwood like oak can need 4–6 weeks or more. Weighing weekly tells you when a slice has stabilised: when the weight stops dropping, it is close to equilibrium with your home. Kiln-dried shop slices still deserve a week indoors before finishing, to adjust to your home's humidity.
Two more crack controls are worth knowing. First, a shallow relief cut — a single saw kerf from the bark toward, but not reaching, the centre, on the back — gives shrinkage somewhere harmless to go, and is invisible once mounted. Second, if a crack appears, do not bin the slice: thin cracks fill beautifully with matched wood filler or tinted epoxy.
Sanding and sealing
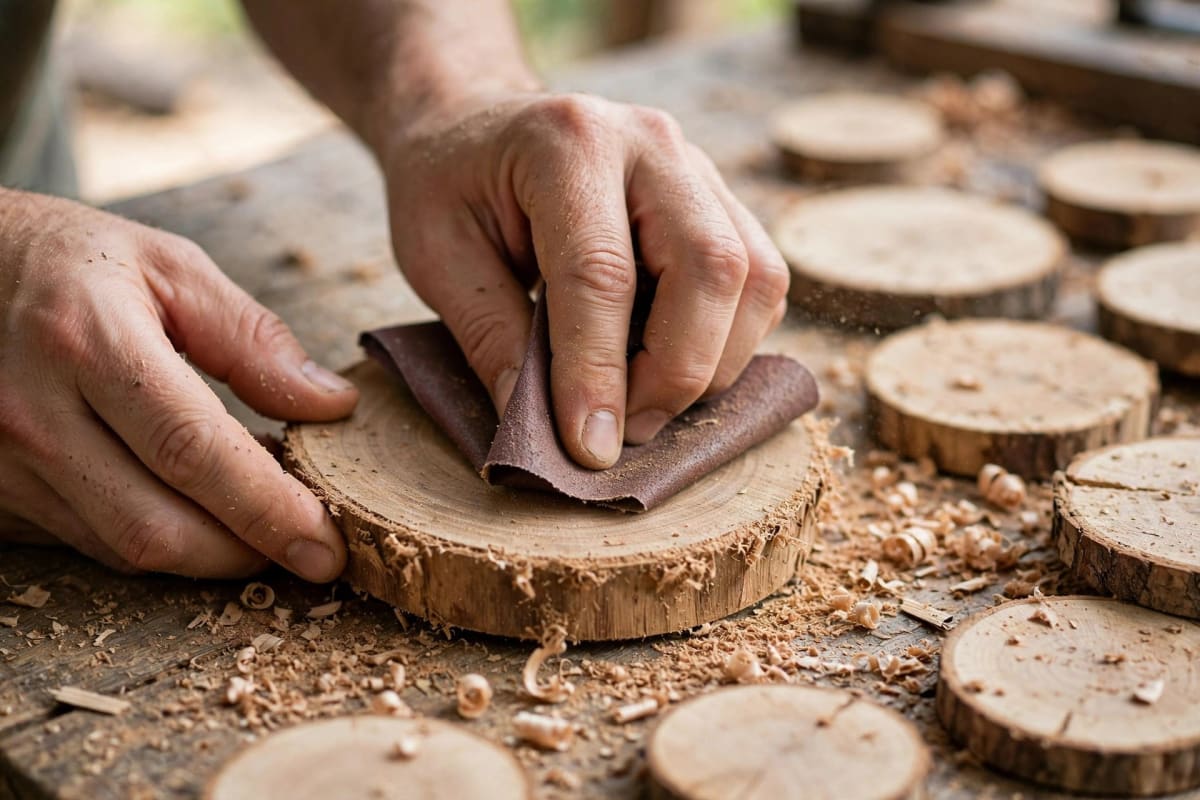
Once a slice is dry and stable, sanding turns a rough disc into a display piece. Start at 80 grit to flatten saw marks and remove loose bark, then work through 120 and 220 grit for a smooth face. Sand the front and edge; the back only needs flattening so it sits flush. Always sand outdoors or with extraction and a dust mask.
Sealing does three jobs: it locks in remaining sap, stops the wood absorbing moisture and moving again, and gives paint, stain or wood-burning a predictable surface. For a natural look, two thin coats of clear matte polyurethane or hardwax oil keep the grain visible without a plastic shine. For painted or decoupage designs, a coat of clear primer or shellac first prevents sap bleed and uneven paint absorption into end grain. Let each coat dry fully and sand lightly with 320 grit between coats.
8 design ideas
1. Natural cluster panel
The classic first project: a dozen or more slices of mixed sizes mounted close together on a plywood backing, bark left on, grain sealed clear. It reads as one piece of art rather than a pile of coasters, and suits rustic, farmhouse and Scandinavian rooms. Cost: $10–$40. Time: 2–3 hours plus drying.
2. Painted colour-block slices
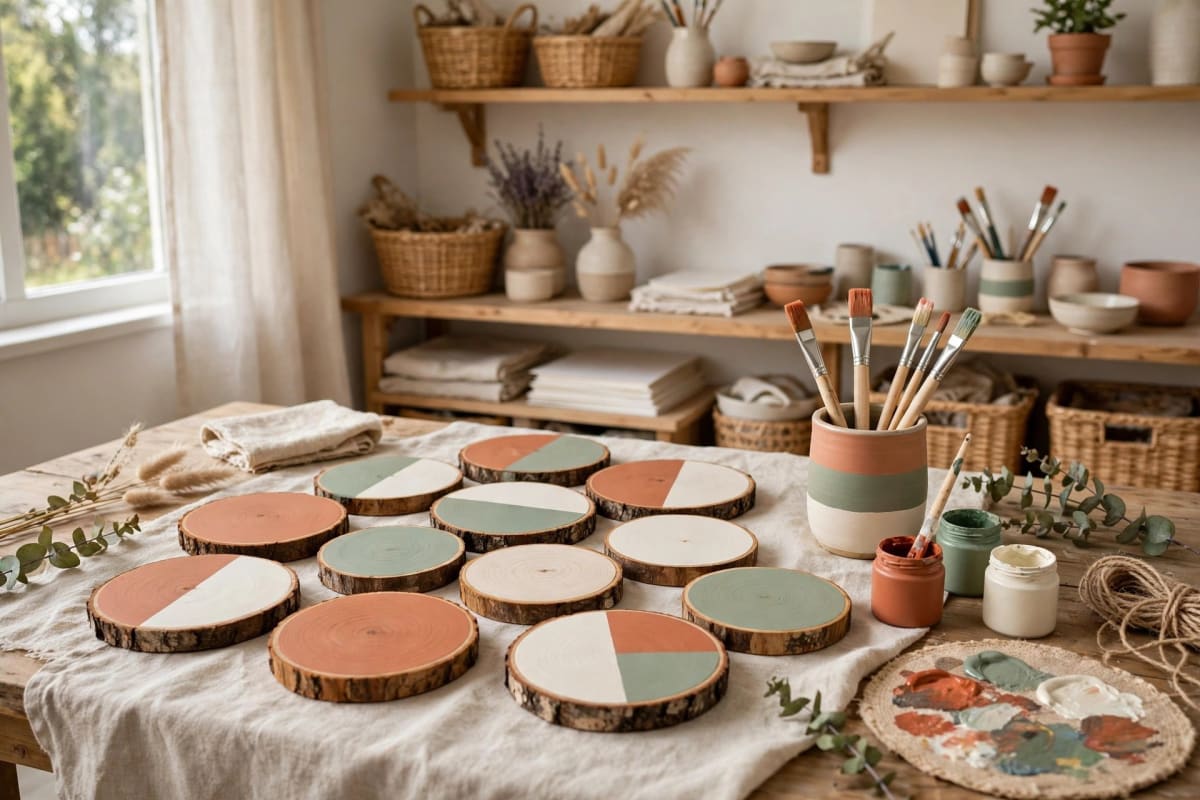
Paint each slice face in a single flat colour — sage, terracotta, cream, charcoal — leaving a thin ring of natural wood or bark at the edge. Hung in a grid, the effect is graphic and modern. Cost: $15–$30. Time: 2–4 hours.
3. Wood-burned slices
A pyrography pen turns a plain slice into a personalised piece: botanical drawings, constellations, family names, or a mandala following the growth rings. Burn after sanding and before sealing, work in a ventilated space, and practise on a spare slice first. Cost: $10–$25 plus a pen. Time: 1–3 hours per piece.
4. Photo transfer slices
Print a favourite photo in reverse, transfer it onto a sealed slice with gel medium, then rub the paper away to leave the image embedded in the grain. Choose high-contrast images; pale, detailed photos wash out. Cost: $10–$20. Time: 2 hours plus overnight drying.
5. Decoupage botanical slices
Pressed leaves, ferns or vintage botanical prints, glued with decoupage medium and sealed with clear coats, give a soft, collected feel for bedrooms and hallways. Keep the design central and let the bark edge frame it. Cost: $10–$25. Time: 2–3 hours plus drying.
6. Wood slice mirror frame
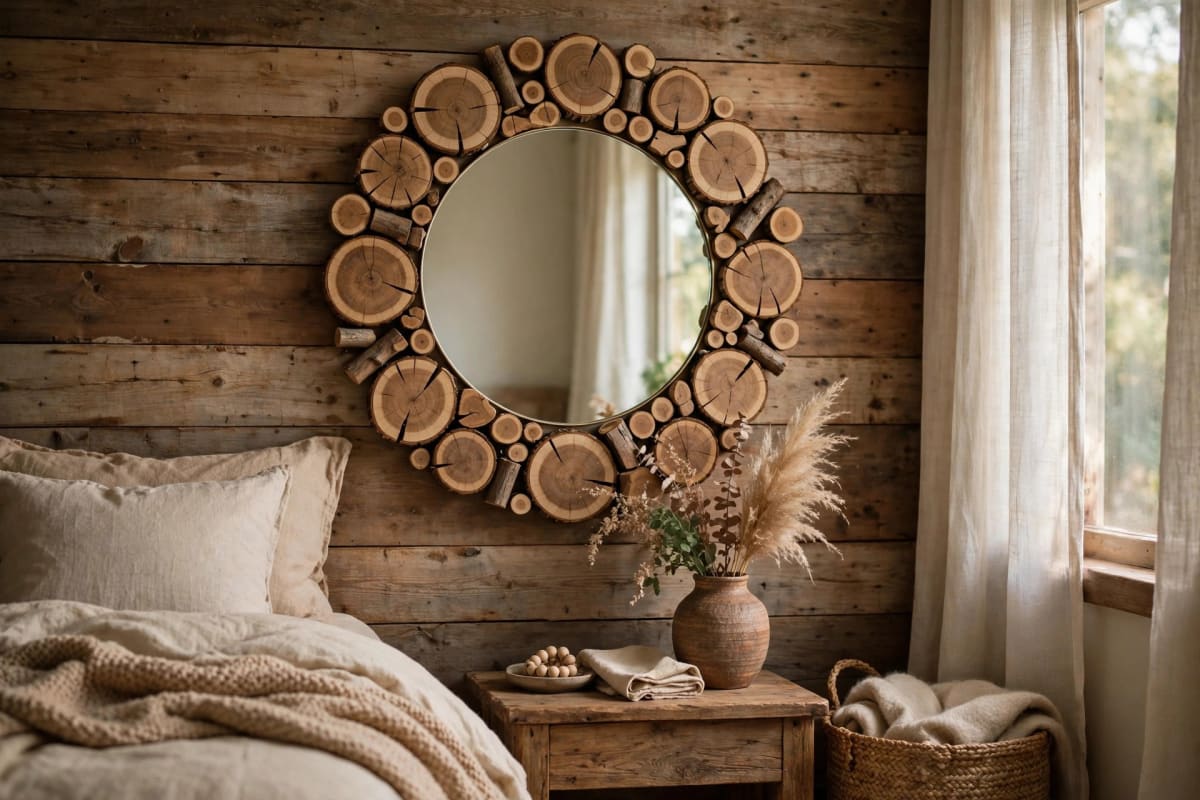
Glue small slices around a round mirror, overlapping slightly like petals, with the largest slices at the bottom. It is heavier than it looks, so use a solid backing board and hang it on a cleat, not a wire. Cost: $25–$50. Time: 3–4 hours.
7. Wood slice garland
Drill small holes near the top of thin slices, thread them on jute twine with wooden beads between them, and hang the garland along a mantel, doorway or staircase. This is the lightest, most renter-friendly design here. Cost: $8–$20. Time: 1–2 hours.
8. Single statement slice
One large slice — 30 cm or more across — with a dramatic grain pattern, a single burned motif or a bold painted ring, hung alone on an otherwise empty wall. The secret is restraint: one piece, one wall. Like a basket wall decor arrangement, it works because the placement is deliberate, not because the wall is full. Cost: $5–$25. Time: under an hour once dried and sealed.
Step-by-step: the natural cluster panel
This is the design to make first: it forgives uneven slices and teaches every skill the other designs rely on.
You will need: 12–18 dried slices (8–25 cm), a plywood backing board, wood glue, a sawtooth hanger or French cleat, sandpaper, clear sealant, and a pencil.
Step 1 — Plan the layout on the floor. Arrange the slices on the backing board without glue. Put the largest slice slightly off-centre, fill around it with medium slices, and use the smallest pieces to plug gaps. Photograph the arrangement — the photo shows imbalance your eyes miss.
Step 2 — Seal before gluing. If the slices are not already sealed, give them two coats of clear sealant and let them dry. Sealing first means glue grips a stable surface rather than raw end grain, which would drink the glue in and weaken the bond.
Step 3 — Glue from the centre out. Glue the anchor slice first, press firmly, then work outward, checking the shape after every few pieces. Hold each slice for 30 seconds. Leave the panel flat overnight.
Step 4 — Fill and finish. Once dry, fill thin gaps with small offcuts or leave them as shadow lines — both look intentional. Touch up sealant on any scuffed face, and add felt pads to the back corners so the panel hangs flat.
Step 5 — Hang it properly. Weigh the finished panel before choosing hardware (see the next section). A cluster panel with a dozen 20 mm slices on plywood can easily weigh 4–7 kg, well beyond a single picture hook.
Hanging heavy pieces safely
Wood slice art is heavier than it looks, and this is where most accidents happen. A single slice is light; a panel is not. Always weigh the finished piece, then choose fixings rated for at least twice that weight.
For pieces under 2 kg, a good picture hook or adhesive strips rated for the weight will do, provided the wall is smooth and clean. For anything heavier, screw into a stud where possible, or use wall anchors rated for the load. A French cleat — two interlocking angled battens, one on the wall and one on the panel — is the gold standard for heavy panels: it spreads the load across several screws and holds the panel flush. Renters can use a cleat too, since it needs only a few small screw holes that are easy to fill later.
Check the panel after a day and again after a week. Wood moves slightly with humidity, and a fixing that felt solid on day one can loosen as the panel settles. If a piece ever feels loose, take it down and refix it properly.
Care and maintenance
Wood slice art is low-maintenance if sealed properly. Dust monthly with a soft brush or microfibre cloth, working around the bark edges where dust collects. Never soak it or spray it with cleaner; a barely damp cloth on sealed faces is enough for marks. Keep slices out of direct sunlight, which bleaches the grain unevenly, and away from radiators and steamy bathrooms.
Mistakes to avoid
- Hanging green slices. The most common failure. If a slice still feels cool and damp, or its weight is still dropping, it is not ready.
- Skipping end sealing. Unsealed ends dry fastest and crack first. Seal within hours of cutting, not days.
- Painting over sap. Pine and other resinous woods bleed through paint for months. Seal with shellac or a stain-blocking primer first.
- Mixing thicknesses on one panel. Slices of different thicknesses rock, glue unevenly and cast messy shadows. Sort by thickness first, and sand the backs flat.
- Weak glue on heavy panels. Craft and hot glue suit garlands and light slices, but a panel needs proper wood glue and an overnight cure.
- One hook for a heavy panel. Weigh the piece, double the rating, and use a cleat or stud fixings for anything over a few kilos.
FAQ
How thick should wood slices be for wall art? Aim for 15–25 mm. Thinner slices warp and crack easily, while thicker slices take longer to dry and make panels heavy.
How long do fresh wood slices take to dry? A 20 mm softwood slice usually needs 2–4 weeks indoors with good airflow; hardwood needs 4–6 weeks or more. Weigh weekly — when the weight stops falling, slices are close to stable.
What is the best wood for slice wall art? Pine, ash, oak, birch, beech and fruit woods like apple and cherry are reliable. Avoid toxic species such as yew and laburnum, and never use treated or painted timber.
Can I stop wood slices cracking completely? You can reduce cracking to almost nothing by sealing the ends immediately, drying slowly away from heat, and adding a relief cut on the back. Small cracks can be filled with wood filler or tinted epoxy.
How do I hang a heavy wood slice panel? Weigh it, choose fixings rated for at least double the weight, and for panels over a few kilos use a French cleat screwed into studs or proper wall anchors. Check the fixings after a day and again after a week.
Start with dry wood, seal it well, and hang it on hardware that respects its weight. For more ideas, see our DIY wall decor guide, and for timber on a larger scale, the wood slat accent wall.



