
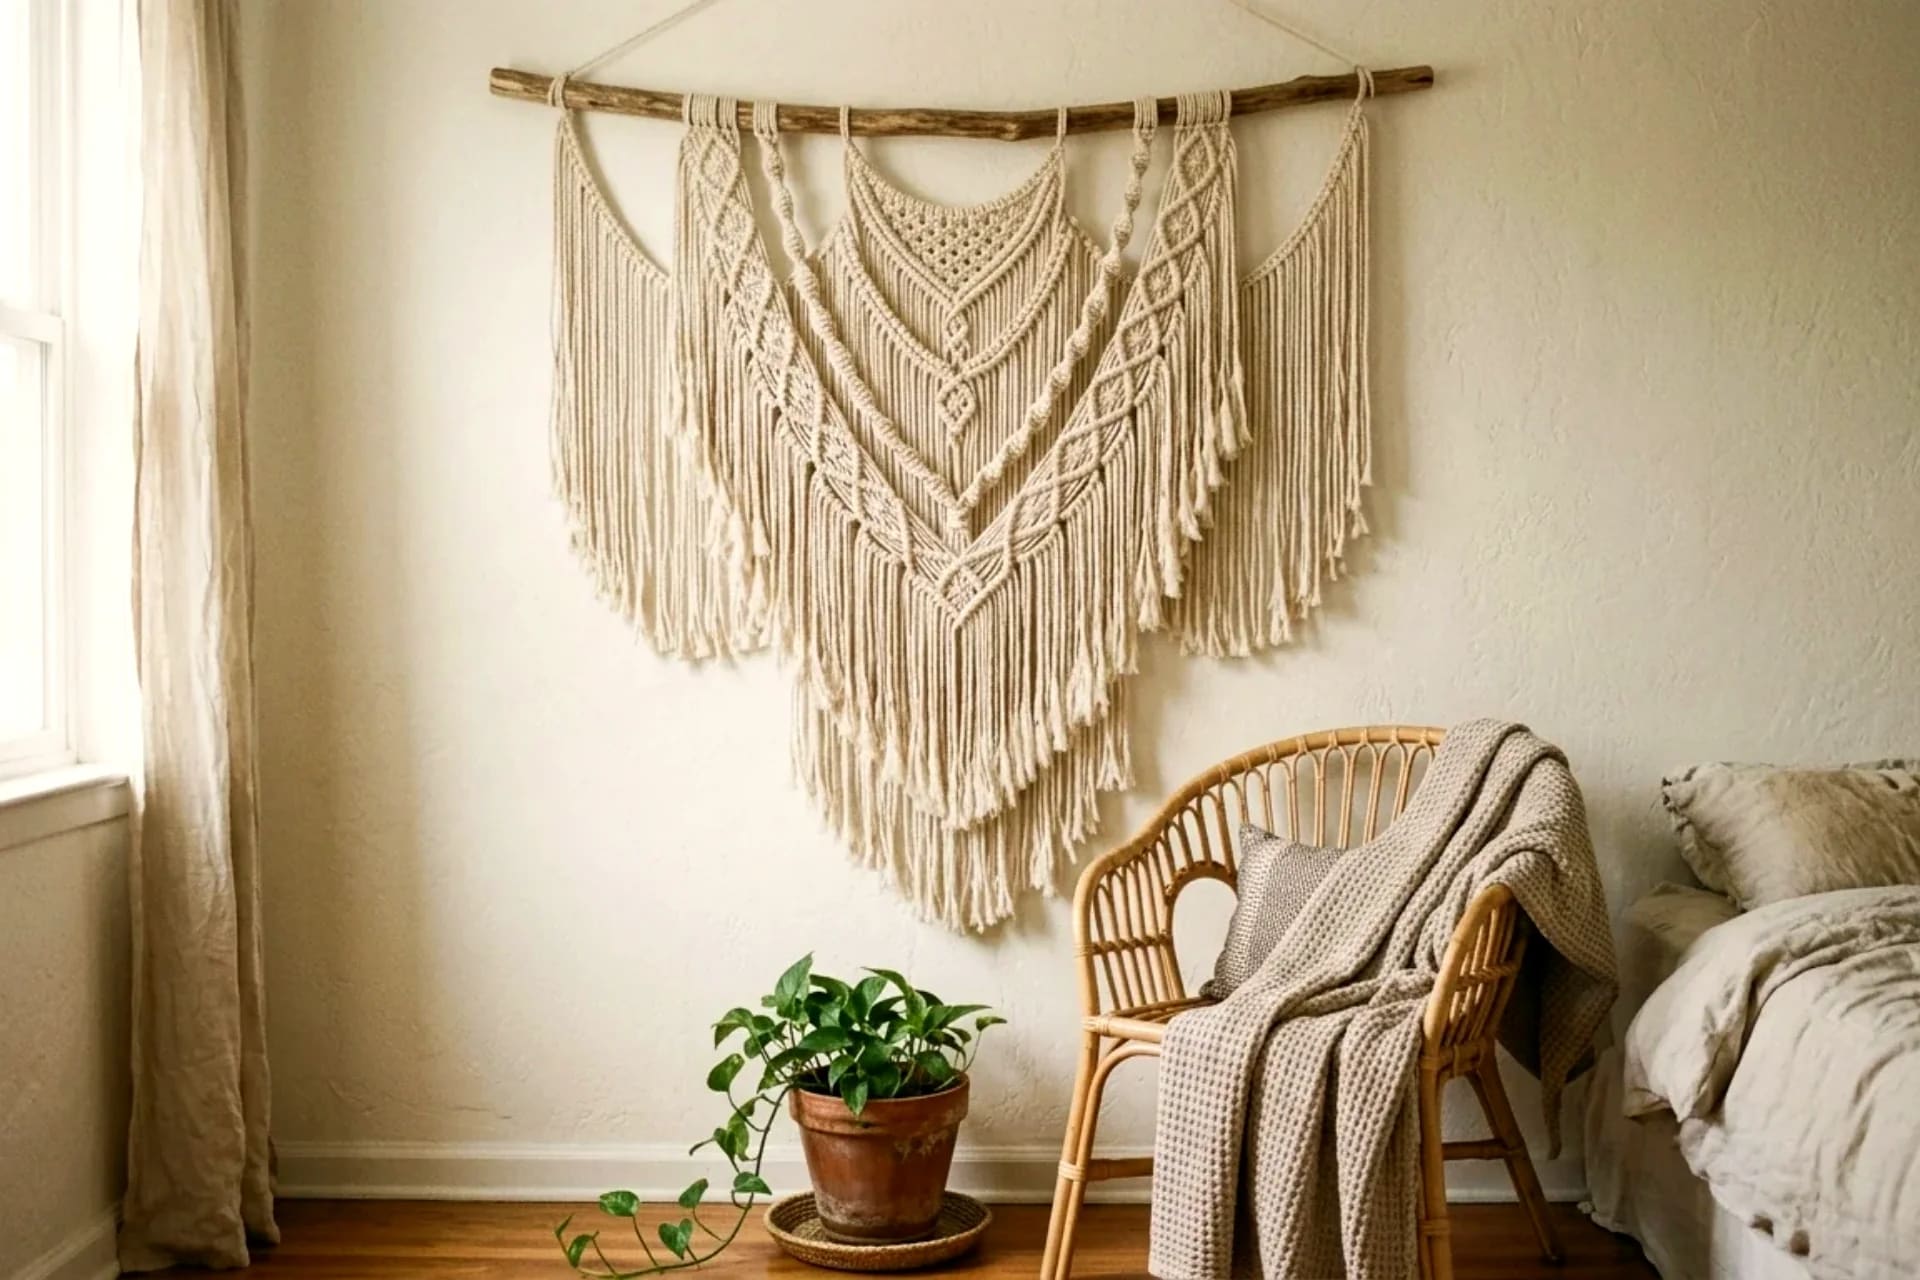
Macramé looks intricate, but every wall hanging — from a simple fringe piece to an elaborate lattice — is built from just three knots. Learn those three, and the "patterns" below are simply recipes: this knot, this many times, in this order. No experience needed, no special talent, just cord and patience. This guide gives you the three knots as step-by-step diagrams, four complete beginner patterns, and the cord-length formula that stops you from cutting too short (the classic beginner heartbreak).
If you're brand new to knotting, our beginner's macramé wall hanging tutorial covers your first project start to finish — come back here when you're ready for patterns.
Key Takeaways
- Only 3 knots to learn: lark's head (mounting), square knot (the workhorse), double half hitch (diagonal lines)
- Cord: 3–5 mm single-twist cotton cord — soft, forgiving, fringes beautifully
- The cord formula: cut each cord 4× your finished hanging length (5× for knot-heavy patterns)
- Cost: $15–25 for cord + a wooden dowel; every pattern below fits in a weekend
- Start here: Pattern 1 (Classic V) uses only 2 of the 3 knots
Table of Contents
- What you need
- The only 3 knots you need
- Pattern 1: Classic V wall hanging
- Pattern 2: Fringe statement piece
- Pattern 3: Diamond lattice
- Pattern 4: Layered mini hanging
- How much cord to cut: the formula
- 5 beginner mistakes that waste cord
- The takeaway
- Frequently asked questions
What you need
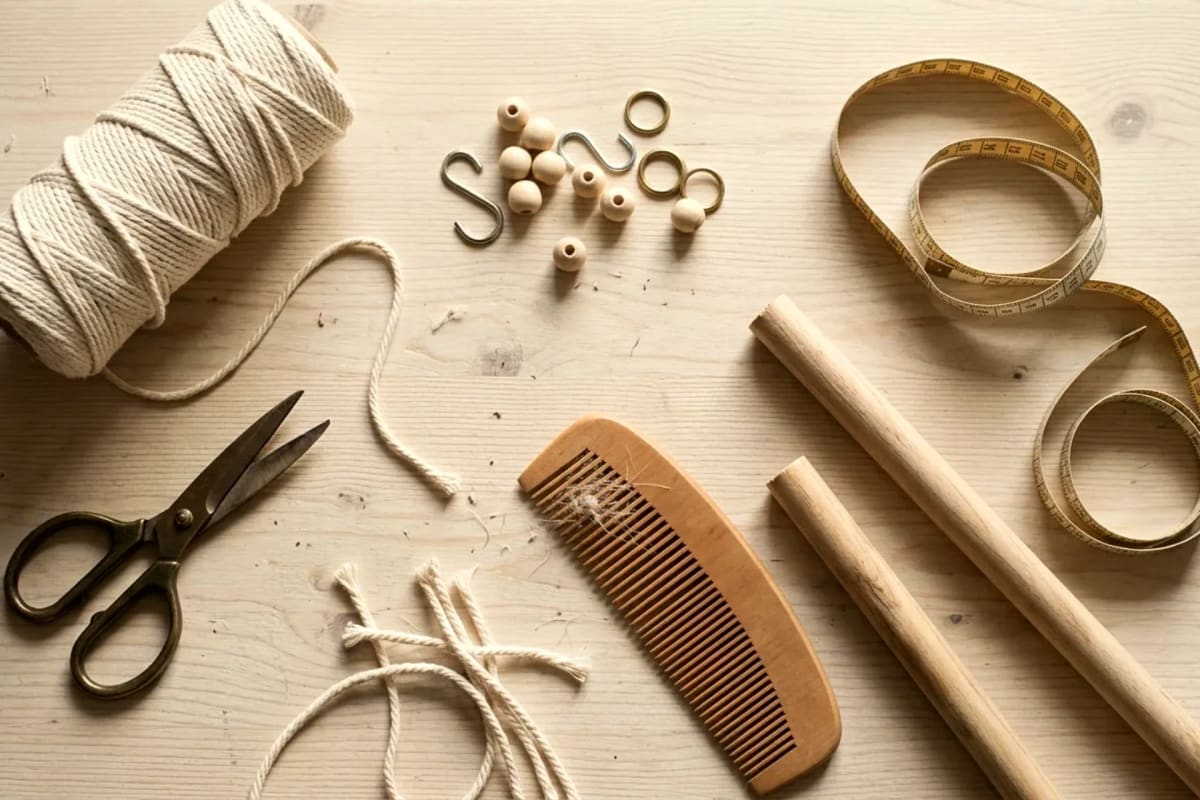
- Cord: 3 mm or 5 mm single-twist cotton cord. Single-twist (not braided) unravels into soft fringe — that's the look you want. A 100-meter spool ($15–20) covers every pattern here. Avoid acrylic/polyester for your first pieces; it's slippery and the knots don't grip.
- Dowel or stick: a 40–60 cm wooden dowel (1.5–2 cm diameter), a branch, or a piece of driftwood. Thrift stores sell curtain rods for $2 that work perfectly.
- Sharp scissors — dull scissors fray cord ends and make every cut miserable.
- Tape measure — cord math is everything in macramé.
- A comb or pet brush — for brushing out fringe at the end.
- Something to hang the dowel from while you work: a clothes rack, two stacked chairs, or removable wall hooks at standing height. Working flat on a table kinks the knots — hang it vertically.
Total startup cost: $15–25, and the cord spool covers 3–4 hangings.
The only 3 knots you need
Each "diagram" below is a numbered sequence. Read it once, do it once with scrap cord, and your hands will know it.
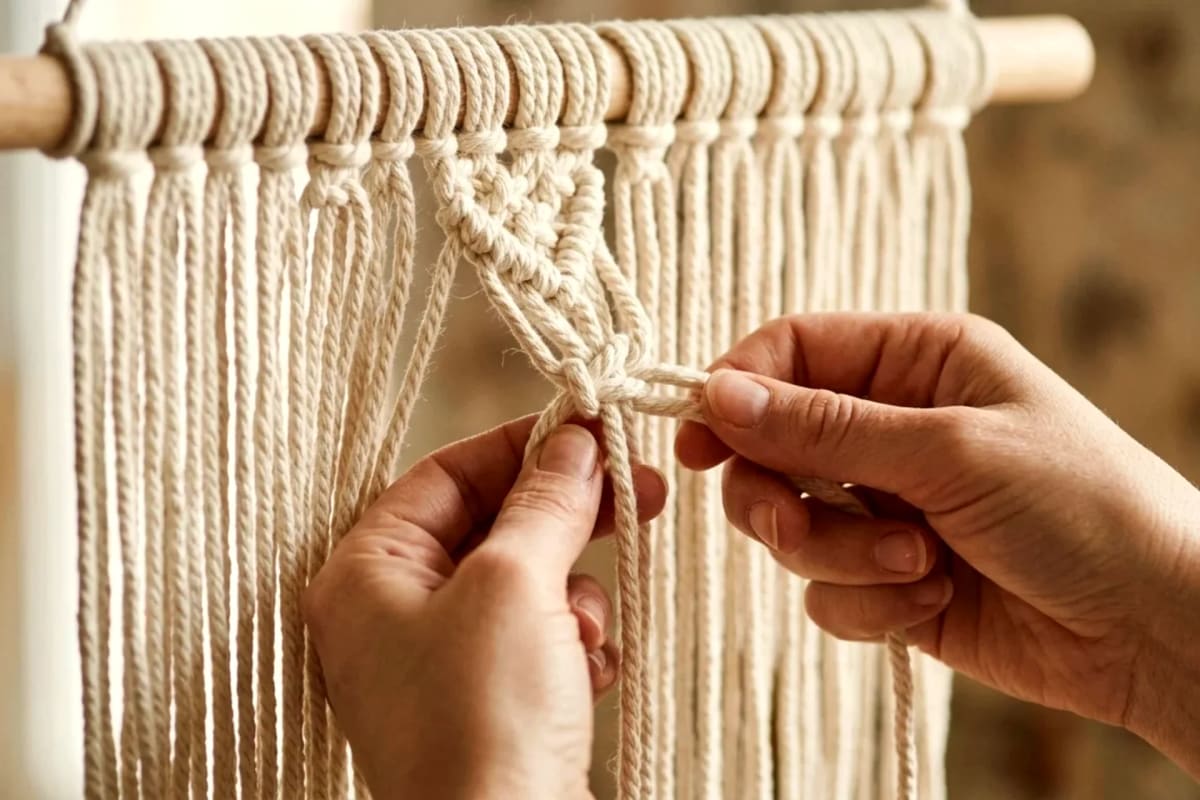
Knot 1: Lark's head (mounting knot)
This attaches cord to the dowel. Everything starts here.
- Fold a cord in half — you now have a loop at the top, two tails below.
- Place the loop behind the dowel, tails hanging in front.
- Pull the two tails up and through the loop.
- Pull tight. The cord is now mounted, with two working strands hanging down.
Mount all your cords this way, spaced evenly. For a 50 cm dowel with 5 mm cord, mount 24–30 cords (48–60 strands).
Knot 2: Square knot (the workhorse)
The knot you'll tie hundreds of. It uses 4 strands: two outer "working" cords, two inner "filler" cords that stay straight.
- Take the left working cord and lay it horizontally across the two fillers, forming a "4" shape.
- Take the right working cord, lay it over the horizontal left cord's tail, then tuck it behind the fillers and up through the loop of the "4".
- Pull both working cords outward to tighten — the fillers stay straight in the middle.
- Now mirror it: right cord makes the "4", left cord goes over-behind-through.
- Tighten. That's one complete square knot (two half-knots = one square knot).
Tension tip: push each knot up firmly against the one above it. Loose knots slide and the pattern sags within days.
Knot 3: Double half hitch (diagonal lines)
This creates the diagonal and V-shaped lines in patterns. One cord is the "anchor" (held taut diagonally); the working cord wraps it twice.
- Hold the anchor cord diagonally across your work with your non-dominant hand — keep it taut.
- With the working cord, bring it over the anchor, then loop it under and through — that's one half hitch. Pull snug.
- Repeat on the same spot — over, under, through. Two hitches = one double half hitch.
- Move to the next working cord along the diagonal and repeat.
The diagonal line forms as each working cord hitches onto the anchor. Keep the anchor's angle consistent or the line wobbles.
Pattern 1: Classic V wall hanging
The iconic macramé shape — a deep V of diagonal knots with fringe below. Uses only lark's head + double half hitch.
Finished size: ~50 cm wide × 70 cm long. Time: 3–4 hours. Cord: 28 cords × 3.2 m of 5 mm single-twist.
- Mount 28 cords on a 50 cm dowel with lark's head knots (56 strands).
- Tie one row of alternating square knots across all strands (14 knots) — this is your top border.
- Pick the center 2 strands as your V point. From the center, work outward: use the outermost strand on each side as a diagonal anchor, and double-half-hitch every strand onto it, moving from center to edge. This forms the V.
- Repeat 4–5 V rows, each starting one strand further out, to deepen the V.
- Below the last V, tie 2 more rows of alternating square knots to lock everything.
- Trim the bottom into a V or straight line, then brush out the fringe with a comb.
Why start here: only two knots, and the V shape is forgiving — slight unevenness reads as handmade charm, not error.
Pattern 2: Fringe statement piece
Maximum impact, minimum knotting. A dense top section with long, brushed fringe — the boho bedroom classic.
Finished size: ~60 cm wide × 90 cm long. Time: 2–3 hours. Cord: 36 cords × 4 m of 5 mm single-twist.
- Mount 36 cords on a 60 cm dowel (72 strands).
- Tie 3 rows of alternating square knots across the full width — this is the entire "patterned" section.
- That's the knotting done. Trim the fringe: longest in the center (90 cm total), tapering to 60 cm at the edges — a soft inverted V.
- Brush every strand out fully with a comb or pet brush until fluffy. This takes 30–40 minutes; it's the actual work of this piece.
- Optional: tie a few wooden beads onto random strands before brushing for texture.
Pro tip: the brushing is the design. Under-brushed fringe looks stringy; fully brushed fringe looks like a textile. Don't rush it.
Pattern 3: Diamond lattice
A net of open diamonds — airy, geometric, and impressive for the effort. Uses all three knots.
Finished size: ~45 cm wide × 75 cm long. Time: 4–5 hours. Cord: 24 cords × 3.6 m of 4 mm single-twist.
- Mount 24 cords on a 45 cm dowel (48 strands).
- Row 1: tie 12 square knots using strands 1–4, 5–8, etc. (every group of 4).
- Row 2: offset — skip the first 2 strands, tie 11 square knots on strands 3–6, 7–10, etc. Leave the last 2 strands free.
- Row 3: back to Row 1's grouping (12 knots).
- Repeat the offset for 8–10 rows. The alternating offset creates the diamond openings.
- Finish with a row of double half hitches along a diagonal to frame the bottom, then trim fringe to 15 cm and brush lightly.
Watch for: the diamonds must stay even — count strands every row. One miscounted group cascades into a lopsided lattice three rows later.
Pattern 4: Layered mini hanging
A small two-layer piece — perfect second project, gift-sized, and a preview of the mini macramé projects collection.
Finished size: ~25 cm wide × 35 cm long. Time: 1.5–2 hours. Cord: 16 cords × 2 m of 3 mm single-twist.
- Mount 16 cords on a 25 cm dowel or stick (32 strands).
- Back layer: tie 2 rows of alternating square knots, then trim straight at 25 cm — leave it unbrushed for contrast.
- Front layer: take the center 16 strands, tie one row of square knots 8 cm below the dowel, then double-half-hitch a shallow V.
- Trim the front layer to 18 cm in a point, brush it out fully.
- The contrast — smooth back layer, fluffy front — is the whole design.
How much cord to cut: the formula
Knots eat cord. The universal rule: cut each cord 4× your desired finished length. Knot-dense patterns (lattice, lots of square knots) need 5×; fringe-heavy pieces can use 3.5×.
| Finished hanging length | Cut length per cord (standard) | Cut length (knot-heavy) | |---|---|---| | 50 cm | 2 m | 2.5 m | | 70 cm | 2.8 m | 3.5 m | | 90 cm | 3.6 m | 4.5 m | | 110 cm | 4.4 m | 5.5 m |
Always round up. Leftover cord becomes fringe, mini projects, or plant hangers. Cord cut too short becomes trash — there is no joining mid-pattern without a visible lump.
5 beginner mistakes that waste cord
- Cutting exactly 4× on a knot-heavy pattern. The formula is a minimum. Diamond lattice and dense square-knot fields need 5×. When in doubt, add half a meter.
- Inconsistent tension. Some knots tight, some loose — the piece twists and the pattern ripples. Push every knot up snug against the last one.
- Working flat on a table. Knots tied horizontally tighten differently than vertical ones. Hang the dowel at chest height; your tension will even out immediately.
- Using braided or synthetic cord first. It looks fine on the spool and fights you on the dowel — slippery knots, no fringe. Start with single-twist cotton.
- Skipping the test knot. Tie 10 cm of your planned pattern with scrap cord first. It reveals tension problems and shows you the real finished width before you commit the good spool.
The takeaway
Macramé is three knots and a tape measure. Learn the lark's head, square knot, and double half hitch on scrap cord tonight; tomorrow, cut cord for the Classic V and finish a real wall hanging by the weekend. Measure twice, cut long, keep tension even, and brush the fringe like you mean it. If the wall-hanging bug bites, our DIY wall decor guide has more texture-based projects to try next.
Frequently asked questions
What is the easiest macramé knot for beginners? The lark's head — it's a fold-and-pull mounting knot that takes ten seconds to learn. The first real knotting to practice is the square knot; ten minutes of repetition and it's muscle memory.
What kind of cord is best for macramé wall hangings? 3–5 mm single-twist cotton cord. It grips well for knots, feels soft, and unravels into beautiful fringe. Avoid braided or synthetic cord until you're experienced — it's slippery and won't fringe.
How much cord do I need for a macramé wall hanging? Cut each cord 4× your finished hanging length (5× for knot-dense patterns). A typical 50×70 cm wall hanging needs 24–30 cords at ~3–3.5 m each — roughly 80–100 meters total.
Can I use yarn instead of macramé cord? For practice, yes — chunky yarn works for learning knots. For finished wall hangings, no: yarn stretches, the knots loosen over time, and it won't hold crisp patterns or fringe properly.
How long does a macramé wall hanging take to make? 2–5 hours depending on size and pattern density. The Fringe statement piece is fastest (~2–3 hours, mostly brushing); the Diamond lattice is slowest (~4–5 hours of knotting).
How do you hang a macramé wall hanging without damaging walls? Adhesive picture-hanging strips or removable hooks rated for the weight (most hangings are under 1 kg). A 50 cm dowel distributes weight across two hooks — well within strip ratings.



