Key Takeaways
- Decorate in this order: fluff, lights, ribbon or garland, large ornaments deep inside, medium ornaments, favorite pieces last, picks for gaps, topper, skirt.
- Quantities per foot of tree: about 100 lights, 15 to 20 ornaments, and 9 feet of ribbon. A 6-foot tree needs roughly 600 lights, 90 to 120 ornaments, and 54 feet of ribbon.
- If your topper is tall or fragile, or you need a step stool to reach the top, put it on right after the lights, before the ornaments, so you do not knock anything off.
- Hang ornaments in a loose zigzag around the tree, not in rows, and push the large plain ones deep into the branches to fill gaps.
- Shop your own bins first. Most trees need one new element, usually ribbon or a few filler ornaments, not a whole new set of decorations.
Table of Contents
- Before you start: spot, size, and palette
- The order that prevents rework
- How much you actually need
- Ribbon technique: cascades, spirals, and tucks
- Five themes you can copy
- Kids, pets, and fragile ornaments
- The squint test and gap fixes
Before you start: spot, size, and palette
Pick the spot first. The tree goes in its final position before a single ornament comes out of the box, because a decorated tree is miserable to move. A corner placement saves space while still giving impact, but leave enough room from the wall for the branches to open fully. If you have the space, centering the tree in front of a window or between seating areas lets it be enjoyed from several angles. Measure the ceiling too: the tree plus topper should clear it by a few inches, not graze it.
Pick a palette, not a pile. The trees that look designed all share one discipline: two or three main colors, plus one or two accents at most. Pull the colors from the room the tree will stand in: if the living room has blue accents, blue-toned ornaments will look intentional rather than random. A base of two to three colors with one metallic gives variety without chaos.
Shop your own bins first. Gather every ornament, ribbon, and pick you already own before buying anything. Spread them out and sort by color and size. Most trees need one new element to feel fresh, usually a new ribbon color or a bag of plain filler balls, not an entirely new collection. Dollar stores, craft stores, and thrift shops cover the gaps cheaply.
Set aside two to four hours. That is the honest time for a full-size tree, including fluffing, and it is worth blocking out rather than squeezing between errands. The fluffing step alone is what separates a full tree from a thin one, and it cannot be rushed.
The order that prevents rework
Decorating in the wrong order is the main reason trees end up with bare patches and exposed light wires. The order below is the one designers use, and each step exists so the next one does not disturb it.
1. Fluff every branch, inside out. Start at the bottom and work up, pulling each branch tip outward and spreading the layers so no gaps show the trunk. Artificial trees ship compressed, and a tree that looks thin is almost always a tree that was not fluffed properly, not a tree that needs more ornaments.
2. Add the lights. Test every strand before it goes on. Start at the bottom near the trunk and work upward, weaving out to the branch tips and back in toward the trunk, so the lights sit inside the tree rather than draped on its surface. Plug them in as you go to catch dead strands early. Warm white lights suit most themes; multicolor suits a nostalgic, family tree.
3. Put the topper on early if it is tall or fragile. The traditional order puts the topper last, but that means reaching over a fully decorated tree with a step stool, which is exactly how ornaments get knocked off. If your topper needs height or careful handling, put it on right after the lights, while the tree is still bare. If your topper is a simple star that drops on easily, leaving it to the end is fine.
4. Add ribbon or garland. Ribbon goes in vertical cascades or a spiral, and garland in loose swoops. Doing this before the ornaments means the ornaments then sit on top of the ribbon rather than getting buried under it.
5. Hang the large plain ornaments deep inside. These are your gap fillers. Push them into the interior of the tree, where they catch light and color from behind the outer branches. A tree with nothing inside it looks hollow from the side, no matter how many ornaments hang on the tips.
6. Hang the medium ornaments. Spread each color around the tree in a loose zigzag, not in rows and not clustered on the front. Step back every few minutes and check the back and sides, not just the face you see from the sofa.
7. Add your favorite pieces last, on the outside. The special ornaments, the handmade ones, the ones with stories, go where they can be seen: at eye level, facing outward, on the outer branches. Grouping the most special pieces at eye level is the difference between a display tree and a family tree.
8. Fill gaps with picks and sprays. Frosted branches, berry picks, and pinecone sprays tuck into any hole that is still showing. Work in triangles around the tree rather than filling one side completely and then discovering the other side is bare.
9. Finish the base. A tree skirt, collar, or a simple wrapped scene hides the stand and gives the presents a backdrop. A collar suits modern rooms; a full skirt suits traditional ones.
How much you actually need
Guessing quantities is what causes the extra trips to the store in December. These per-foot rules let you buy once.
| Tree height | Lights (about 100 per foot) | Ornaments (15 to 20 per foot) | Ribbon (about 9 feet per foot) | | --- | --- | --- | --- | | 6 feet | about 600 | 90 to 120 | about 54 feet | | 7 feet | about 700 | 105 to 140 | about 63 feet | | 7.5 feet | about 750 | 110 to 150 | about 68 feet | | 9 feet | about 900 | 135 to 180 | about 81 feet |
Two notes on those numbers. First, if you like a really bright tree, push the lights up to 150 per foot; the 100 figure is the standard glow, not the maximum. Second, use fewer ornaments if you also have heavy ribbon, garland, or lots of picks, because those fill visual space too. A tree drowning in both ribbon and ornaments looks crowded rather than lush.
For a slim tree in a rental or a tight corner, the same per-foot rules apply, but buy the lower end of the ornament range and keep the ribbon to one style: a slim tree has less branch volume to absorb decoration, and restraint reads as elegance on it.
Ribbon technique: cascades, spirals, and tucks
Ribbon is the element that most often separates a good tree from a great one, and it is also the one people get wrong most often, because they wrap it around the tree like a bandage.
Use wired ribbon. Wired edges hold their shape, which is what makes loops and cascades possible. Unwired ribbon collapses into flat strips within a day.
Cut it into manageable lengths. Working with one endless spool means fighting tangles. Cut lengths of about 3 to 4 feet, and work with one at a time.
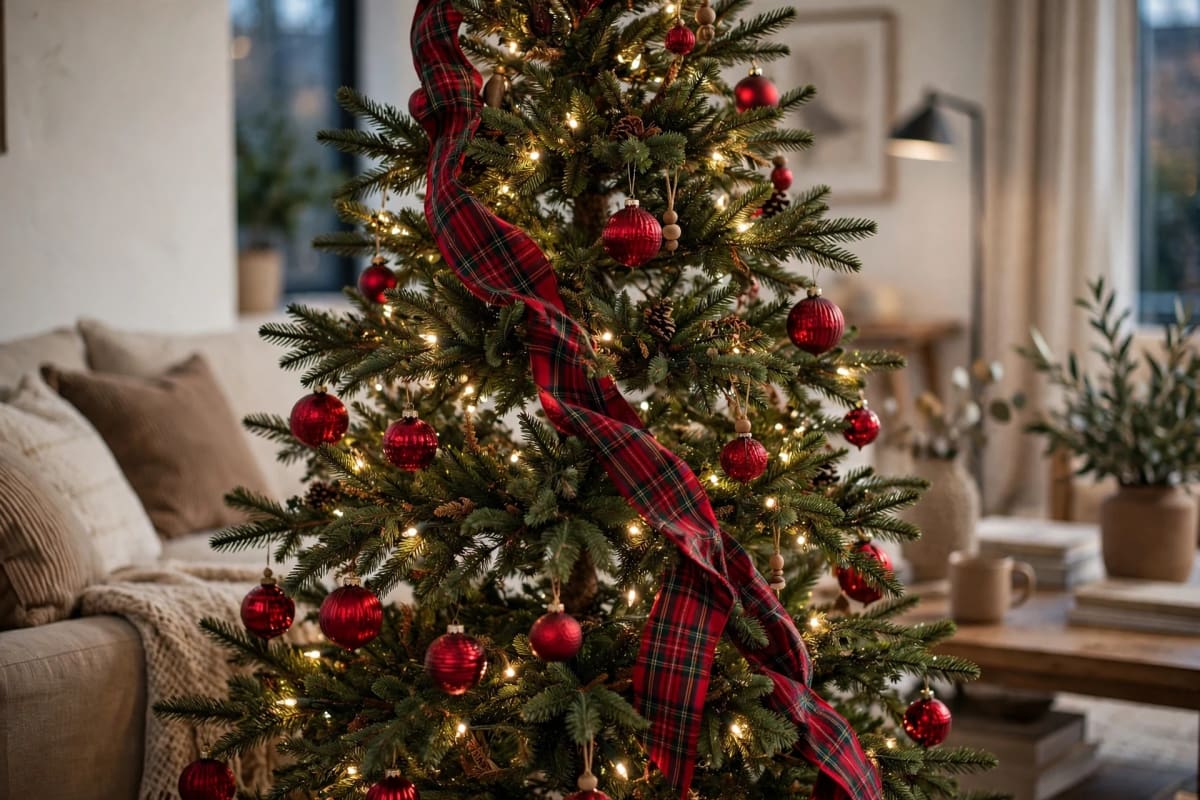
Cascades for a designer look. Start at the top and let the ribbon fall vertically, tucking it into a branch every foot or so and twisting it slightly at each tuck so it forms a loop or wave. Three or four cascades around the tree are enough; more than that and the ribbon becomes the theme instead of an accent.
Spirals for a traditional look. Wrap the ribbon around the tree in a loose spiral from top to bottom, keeping the spacing even and the ribbon slightly loose rather than pulled tight. A tight spiral looks rigid; a loose one looks like it grew there.
Layer two ribbons for depth. A wide ribbon in the main color plus a narrower ribbon in a metallic or contrasting texture, run along the same path, gives a layered effect that reads as expensive without costing much more. Keep the two ribbons in the same color family so they read as one idea.
Bows at strategic points. Large bows where cascades meet the top, or at intervals down a spiral, act as punctuation. Make them from the same ribbon so they belong to the tree rather than looking stuck on.
Five themes you can copy
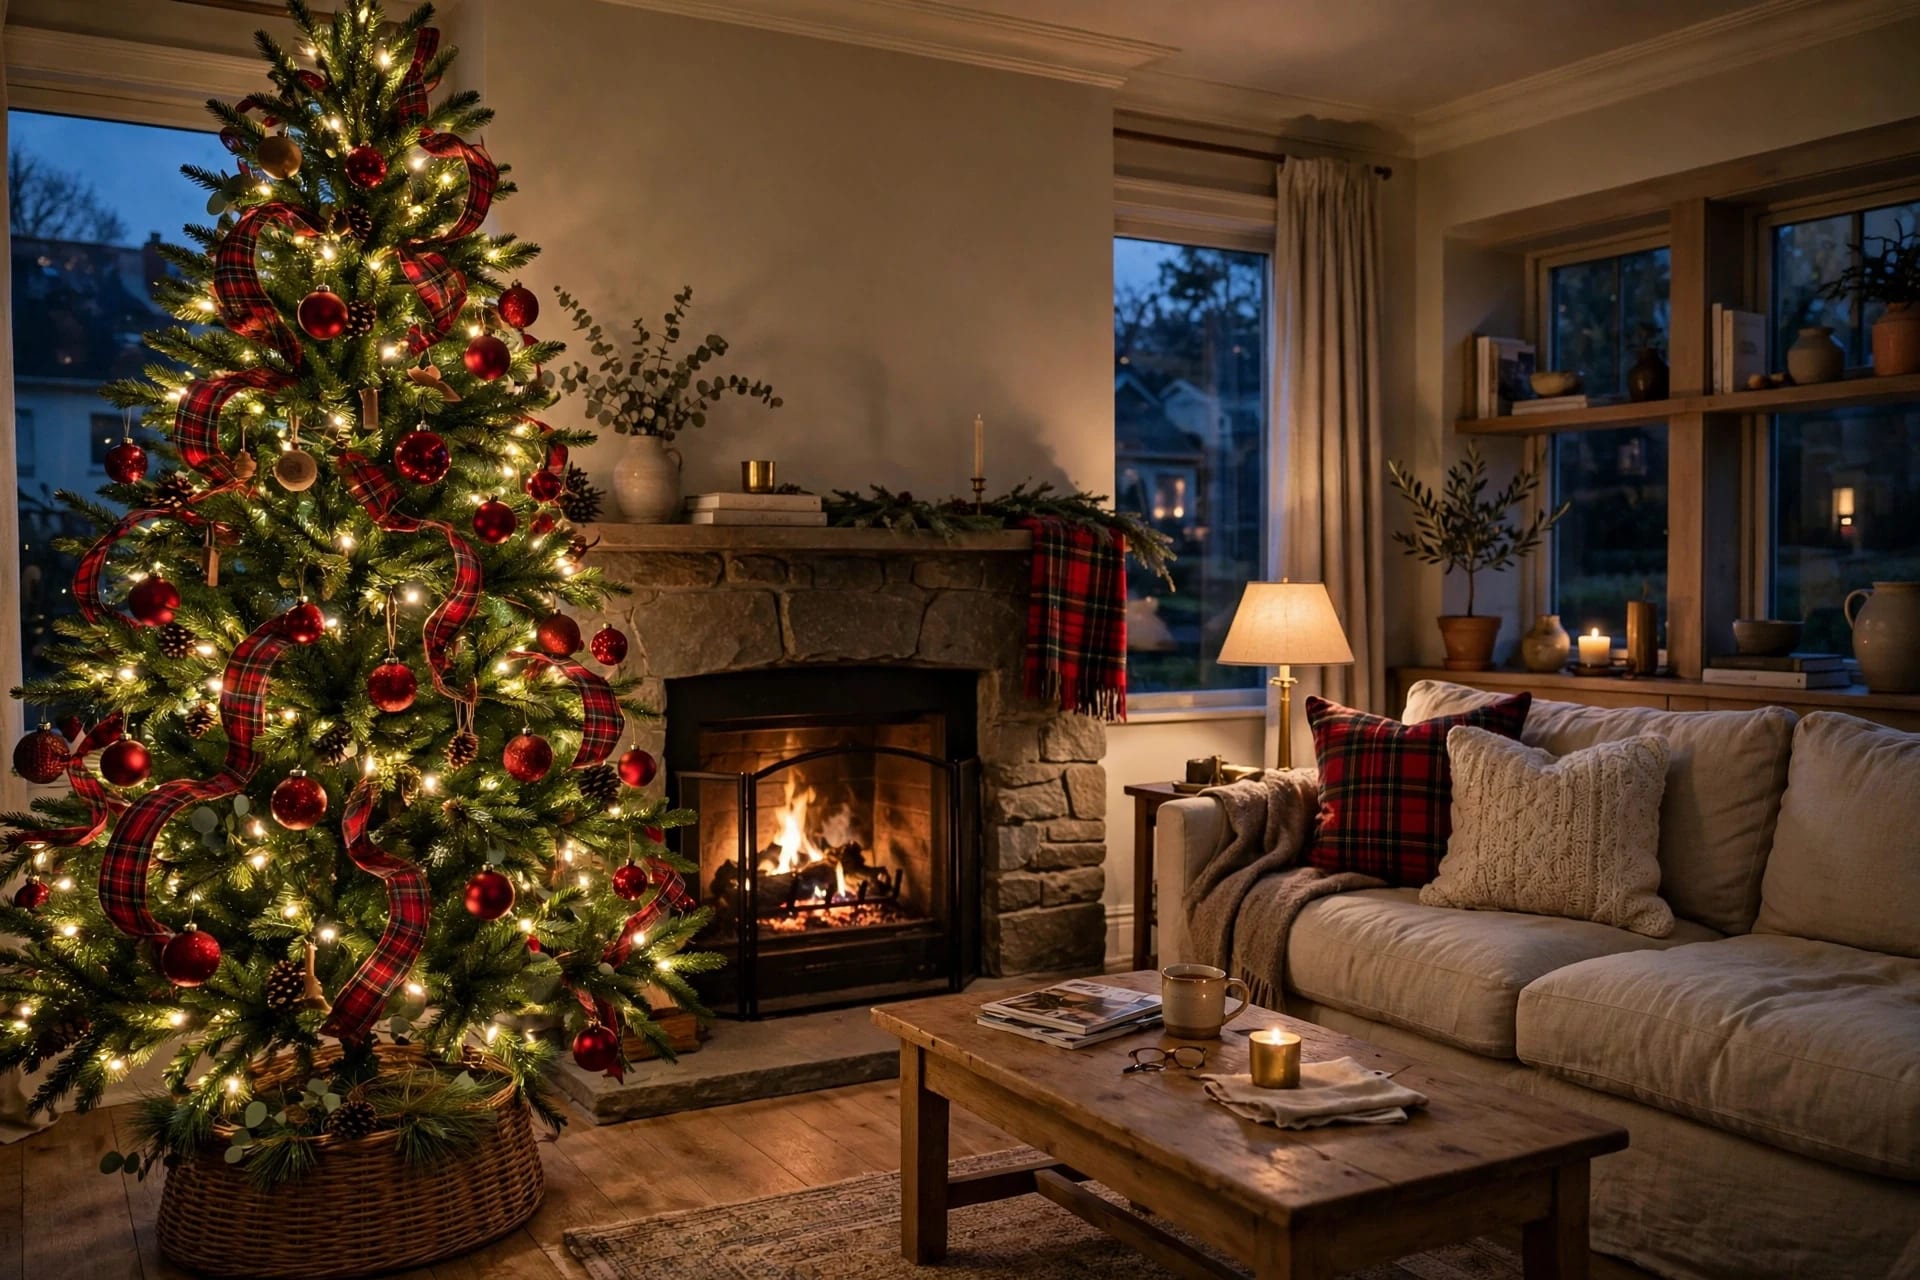
Classic red with plaid ribbon. Red balls in two shades, bright red and deep wine red, tartan ribbon in three or four long cascades from the top down, and small gold bells or pinecones as filler. For a more elegant version of the same tree, swap the plaid for red velvet ribbon. This is the warmest, most traditional look, and it carries into the rest of the room naturally: our Christmas mantel decor and Christmas living room decor guides show how to repeat the palette beyond the tree.
White winter wonderland. A flocked tree, or a green tree dressed in whites and silvers, with white ornaments in at least three shapes, a pearl or white wood bead garland in loose swoops, white feather or frosted picks for gaps, and warm white lights so the tree feels cozy rather than cold. Let the flocked branches show between ornament clusters rather than covering every inch.
The traditional heirloom tree. Not every tree needs a theme. The heirloom tree is full of things that mean something: the ornament from a first Christmas, a handmade star, a glass bird from a grandparent. The discipline here is placement, not purchasing: put the pieces that matter most at eye level, turned outward, and fill the rest with plain colored balls so the tree does not look messy.
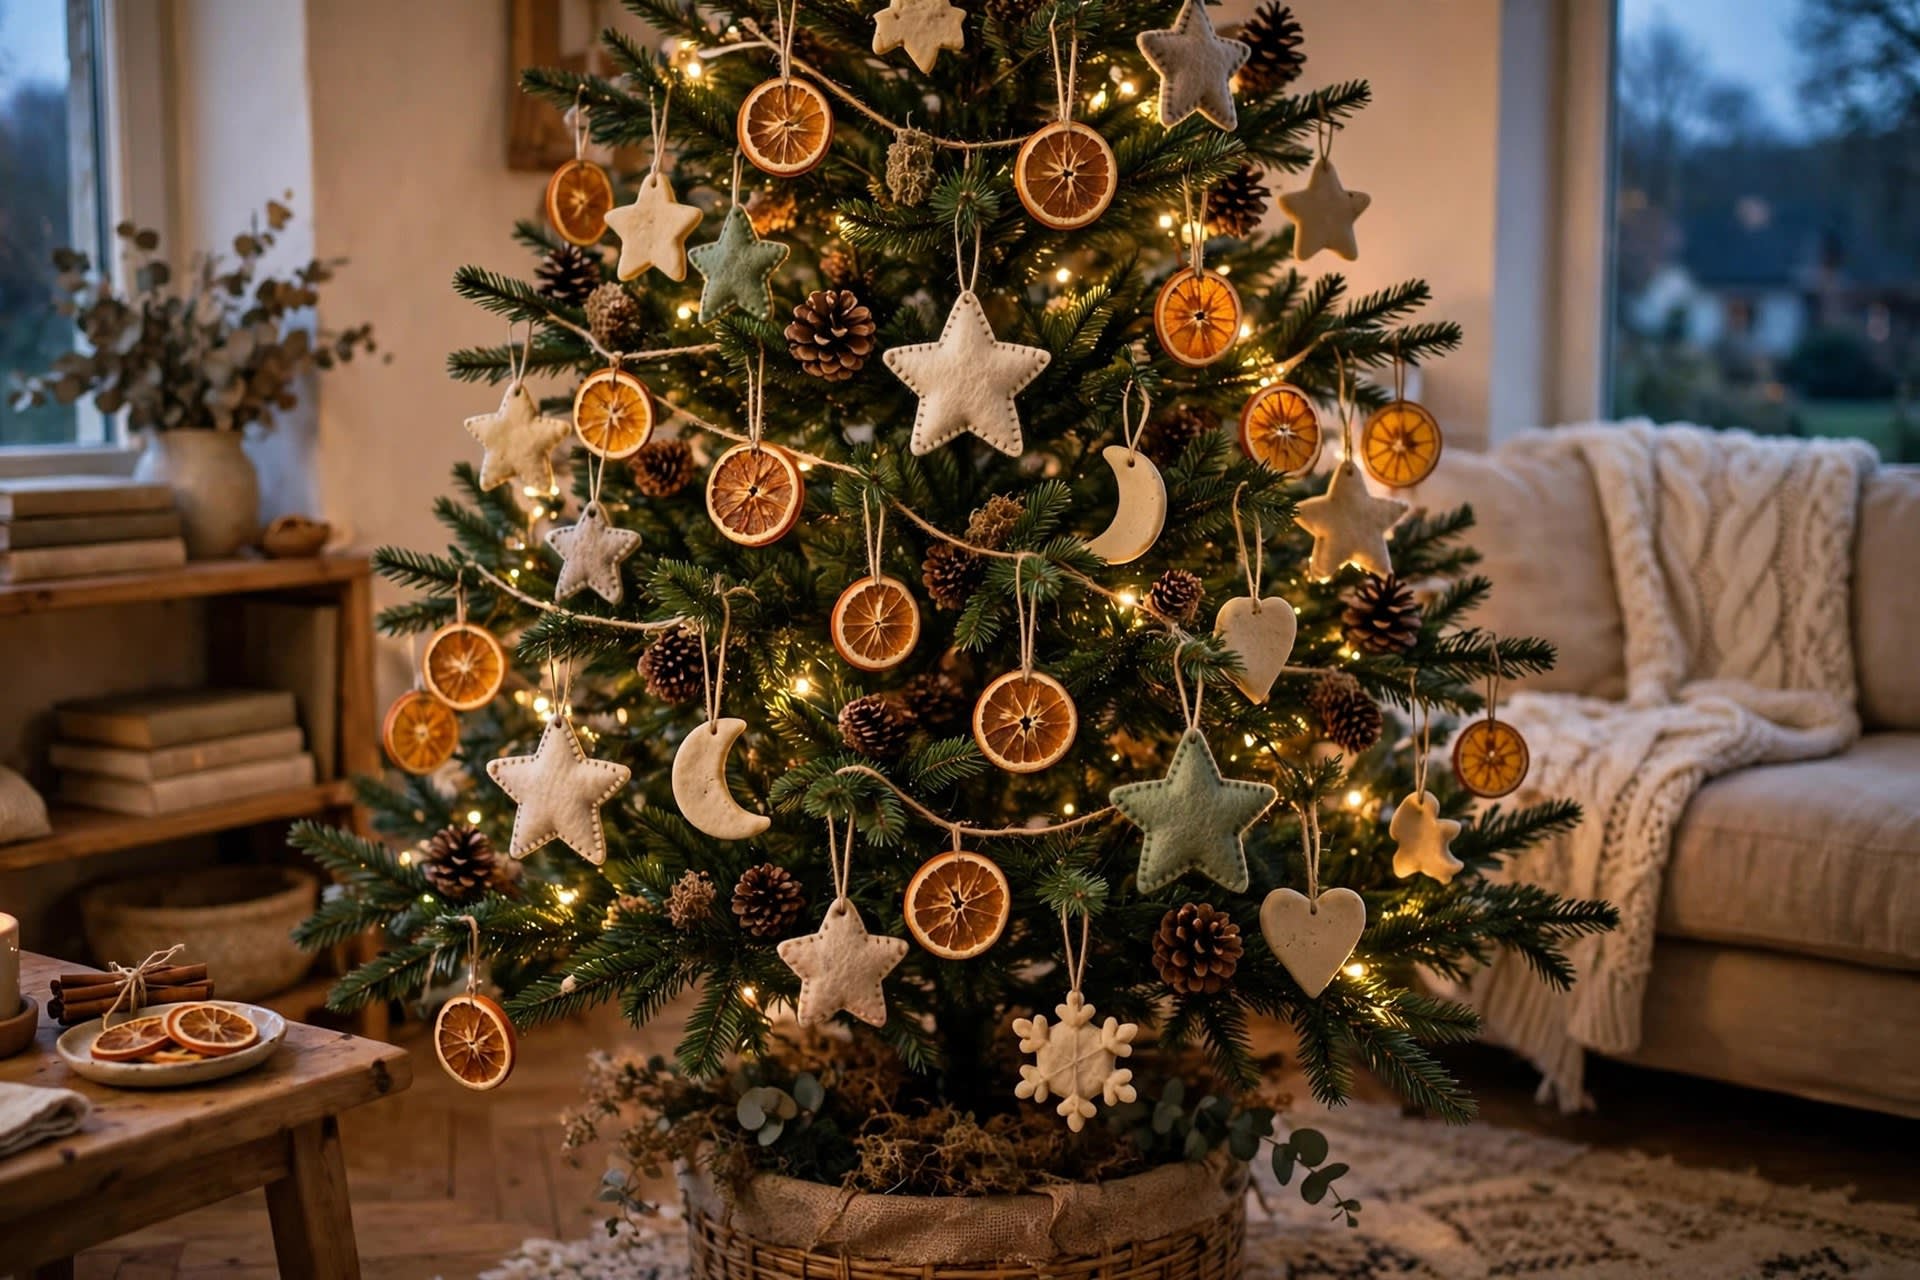
Rustic woodland. Natural elements do the work: pinecones, dried orange slices, cinnamon sticks tied in small bundles with twine, cranberry or red bead garland, and warm white lights placed behind the orange slices so they glow. Burlap or linen ribbon in cream or soft gray keeps the look grounded. This theme pairs naturally with the garland and wreath projects in Christmas garland ideas and DIY Christmas wreath ideas.
Single-ribbon modern. Choose one ribbon style in a solid color, matte black, white, or soft metallic, keep the rest of the decor simple, and let the ribbon be the statement. Thin ribbon accents used sparingly, or ribbon placed in select sections for an intentionally imperfect, asymmetric look, both belong to this family. It is the fastest theme to execute and the easiest to change next year, because only the ribbon changes.
Kids, pets, and fragile ornaments
A tree in a house with small children or pets needs three adjustments, and none of them hurt how it looks.
Keep breakable ornaments higher, at adult eye level and above, and use shatterproof balls on the lower third of the tree. Secure the tree itself: a wide, heavy stand, or a stand weighted down, prevents the classic toddler-meets-tree disaster. And skip the tinsel if you have cats, since it is the one decoration that regularly sends pets to the vet.
For kids who want to participate, give them the lower branches and the shatterproof ornaments, and let them place a few special pieces themselves. A tree the kids helped decorate is a tree they will be proud of, and the slightly imperfect lower branches read as charm, not as mistakes.
The squint test and gap fixes
When you think the tree is done, step back to the doorway and half-close your eyes. With detail blurred out, only light and dark masses remain, and any bare patches jump out at once. Those are the spots that need one more ornament, a pick, or a bit of ribbon.
Check the tree from three angles, not just the front: the side facing the window, the side facing the door, and the back if anyone can walk behind it. Most trees have one neglected side, and it is always the one guests see when they come in.
If a section still looks thin after picks and ornaments, the problem is usually the fluffing underneath, not a shortage of decorations. Reach in and spread the branch tips in that section before adding anything else.
When the season ends, store ornaments sorted by color and size rather than in one mixed box. Next year's decorating starts with the same shop-your-bins step, and sorted bins make it a ten-minute job instead of an excavation. For the rest of the room, budget Christmas decor and dollar tree Christmas DIY cover inexpensive ways to carry the theme beyond the tree.
FAQ
What order should I decorate a Christmas tree in?
Fluff the branches, add lights, add ribbon or garland, hang large ornaments deep inside, then medium ornaments, then favorite pieces on the outside, fill gaps with picks, add the topper, and finish with the skirt or collar. If your topper is tall or fragile, put it on right after the lights instead.
How many lights do I need for a 6-foot tree?
About 600 small lights, based on roughly 100 lights per foot of tree height. For a brighter tree, go up to 150 per foot, which is about 900 for a 6-foot tree.
How many ornaments do I need for a 7.5-foot tree?
About 110 to 150 ornaments, based on 15 to 20 per foot. Use fewer if you also have heavy ribbon, garland, or lots of picks filling the tree.
How much ribbon do I need for a Christmas tree?
About 9 feet of ribbon per foot of tree height, so roughly 54 feet for a 6-foot tree and 68 feet for a 7.5-foot tree. Wired ribbon holds its shape; cut it into 3 to 4 foot lengths and tuck it into the branches every 12 to 18 inches.
Should the topper go on first or last?
Either works, and the deciding factor is practicality. If the topper is tall, fragile, or needs a step stool, put it on early, right after the lights, so you do not knock ornaments off reaching over a decorated tree. If it drops on easily, last is fine.