
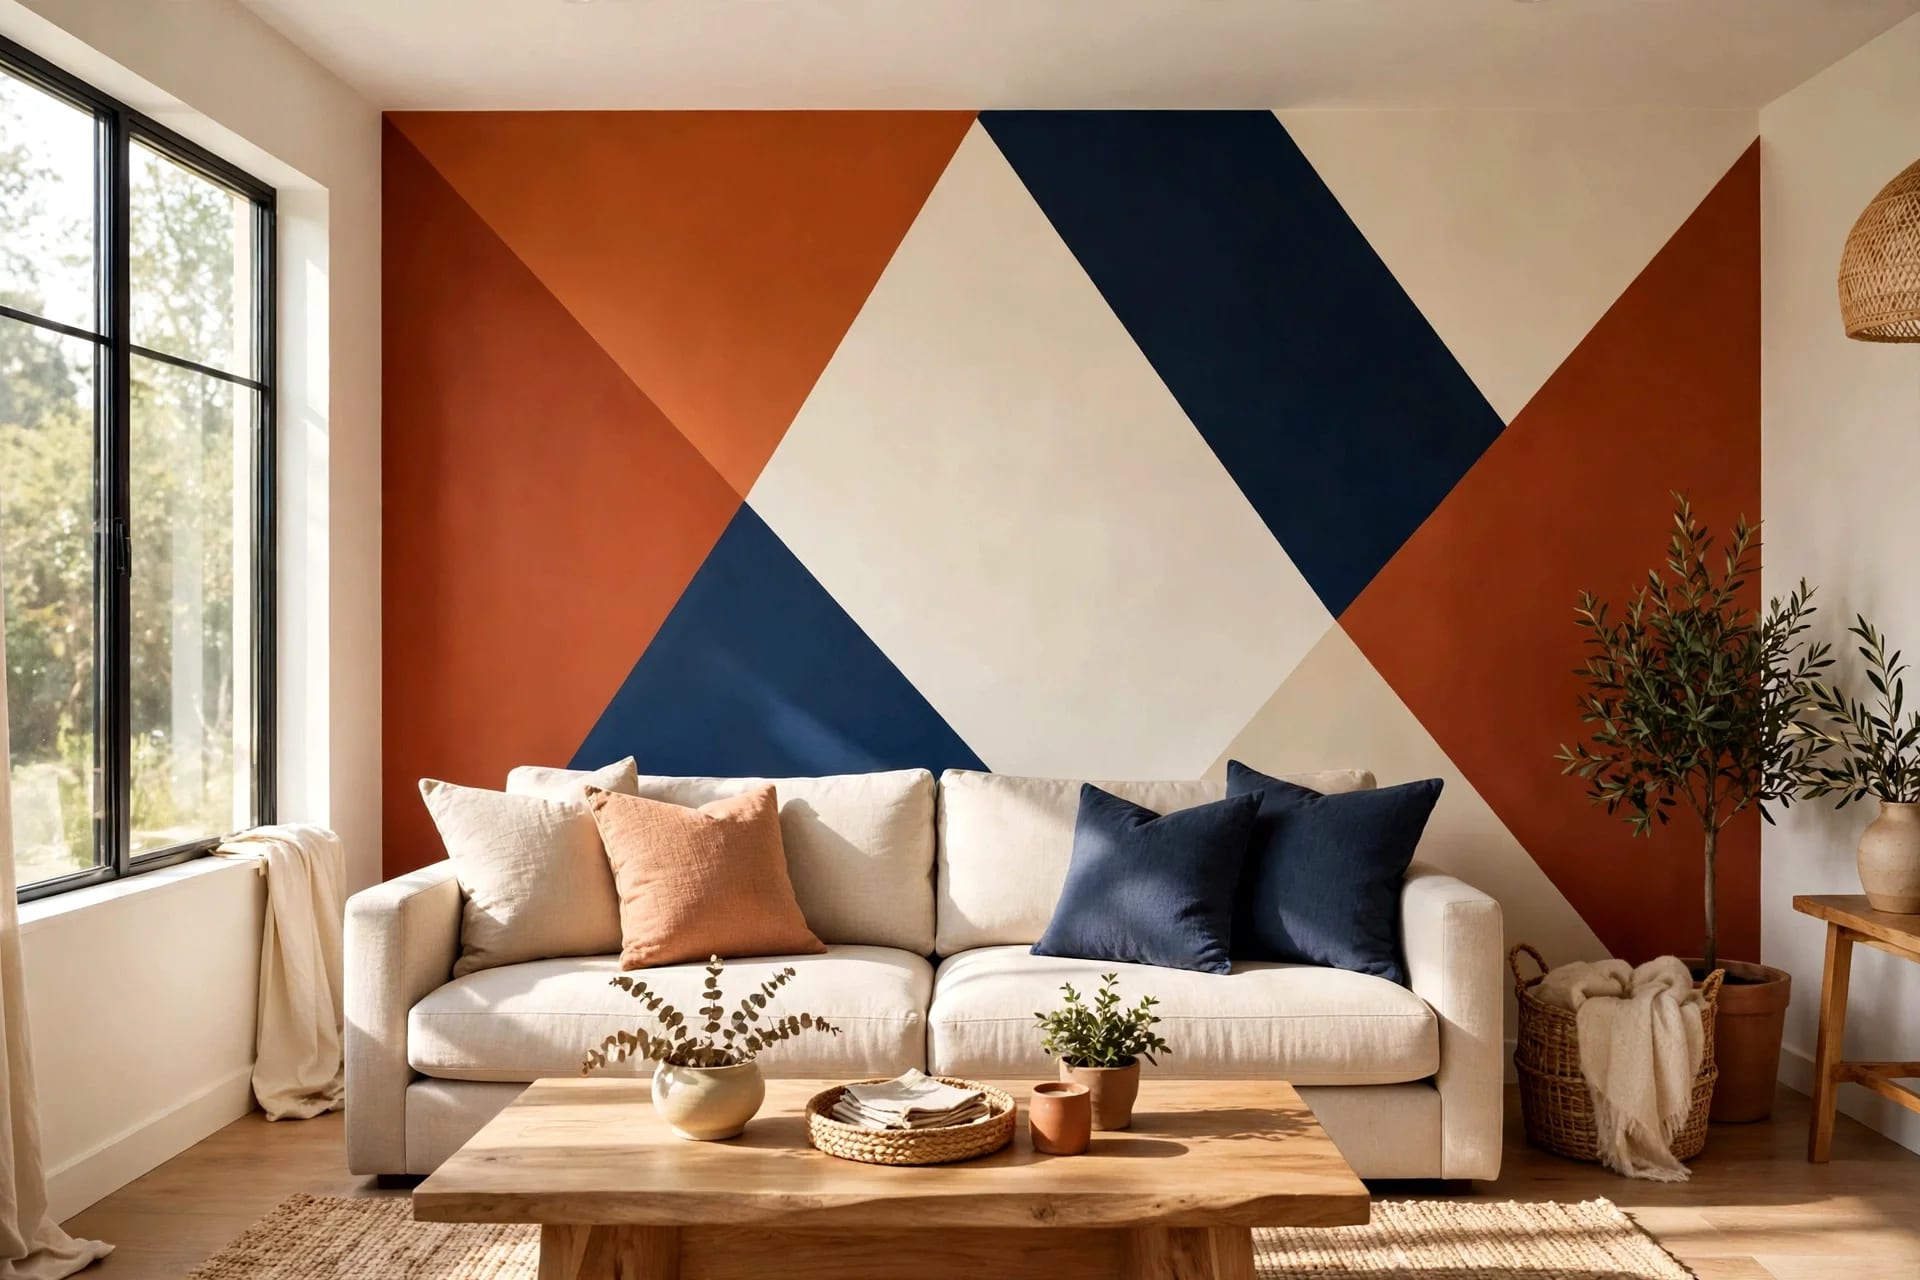
A geometric accent wall is the fastest way to make a plain room look designed. No new furniture, no renovation — just tape, paint and a free weekend. Done well, it reads like custom wallpaper. Done badly, it reads like a school art project: wobbly lines, bleeding edges and colours that fight each other.
The difference is rarely talent. It is pattern choice, colour discipline and one taping technique that most tutorials skip. This guide covers all three, plus five complete patterns ranked by difficulty, real costs, and fixes for every common mistake.
Key Takeaways
- Best beginner pattern: large colour-block triangles — one roll of tape, two colours, one weekend
- Colour rule: a maximum of three paint colours plus your base wall colour; more than that turns graphic into chaotic
- Bleed-proof trick: paint a thin coat of your base colour over the tape edge before the accent colour — it seals the edge so the accent cannot creep under
- Budget: most geometric walls cost $50–$90 in materials; a full wall in three colours rarely passes $120
- Time: 6–10 hours spread over two days, including drying time between coats
In this guide:
- Choosing your pattern
- Colour rules that keep it classy
- Tools, materials and real costs
- Prep: the hour that decides the result
- The bleed-proof taping method
- Pattern guides: triangles to honeycomb
- Which pattern for which room
- Renter-friendly version
- Mistakes to avoid
- FAQ
Choosing your pattern
Start with the wall, not the Pinterest board. A pattern that looks stunning on a wide, empty living-room wall can overwhelm a narrow hallway. Measure your wall first: width, height, and what already lives on it — doors, windows, radiators, large furniture.
Five patterns cover nearly every room. They are ranked here by difficulty, so you can pick honestly rather than ambitiously:
| Pattern | Difficulty | Tape needed | Best for | |---|---|---|---| | Colour-block triangles | Beginner | 1 roll | Living rooms, bedrooms | | Chevron stripes | Beginner to intermediate | 1–2 rolls | Hallways, behind beds | | Colour-block rectangles | Beginner | 1 roll | Home offices, dining rooms | | Honeycomb hexagons | Intermediate | 2 rolls + template | Feature walls, kids' rooms | | Random intersecting lines | Intermediate | 2 rolls | Modern spaces, stair walls |
Triangles are the safest first project: every line is straight and the design still looks intentional when slightly imperfect. Honeycomb looks the most impressive but demands a cardboard template and patience — every hexagon must match, or the eye catches the odd one out. If this is your first painted wall, start with triangles or rectangles and save honeycomb for wall number two.
Scale matters as much as pattern. On a wall wider than 12 feet, shapes smaller than 18 inches across start to look busy; go big. On a wall under 8 feet wide, keep shapes under 24 inches so the pattern does not swallow the room.
Colour rules that keep it classy
Most geometric walls fail on colour, not technique. The fix is the 60-30-10 rule: your base wall colour is the 60 per cent — usually white, cream or a soft neutral. Your main accent is the 30 per cent. Your second accent is the 10 per cent pop.
That means three paint colours maximum including the base, and ideally two accents that already appear elsewhere in the room — a cushion, a rug, a piece of art. When a wall introduces three brand-new colours, the room feels decorated around the wall instead of with it.
Contrast decides the mood. High contrast — navy on white, terracotta on cream — reads bold and modern. Low contrast — sage on cream, dusty blue on pale grey — reads calm but needs larger shapes to stay visible. For a first project, medium contrast is the sweet spot.
Test before you commit. Paint large swatches — at least 12 inches square — of each colour directly on the wall, side by side, and live with them for 24 hours. Colours shift dramatically between morning light and evening lamplight, and a sample pot costs a few dollars while a repainted wall costs a weekend. For more on choosing wall colours for small rooms, see our best paint colours for a small living room.
Tools, materials and real costs
You need less than most tutorials suggest. The essentials:
- Painter's tape (1–2 rolls, 1.5-inch width): $8–$16. Buy quality tape — cheap masking tape leaves residue and lets paint bleed. Blue multi-surface tape suits most walls; delicate-surface tape is worth it over fresh paint less than 30 days old.
- Paint (sample pots or quarts): $15–$45. One quart covers about 100 square feet with two coats — enough for the painted shapes on a standard 10 × 8 foot wall. Sample pots work for small accent shapes.
- Mini roller + tray (4-inch, 3/8-inch nap): $8–$12. Small rollers give cleaner edges near tape than large ones.
- Angled brush (2-inch): $6–$10, for cutting in along tape edges.
- Level (24-inch or laser): $0–$25. A standard level works; a cheap laser level makes long diagonal lines far easier.
- Pencil, tape measure, drop cloths: $10–$15.
Total: roughly $50–$90 for a two-colour wall, $70–$120 for three colours. Skip the extras — specialty edge-sealing products and pattern rollers are unnecessary when the taping method below is followed. If you already own a roller and brushes, the whole project can land under $50.
Prep: the hour that decides the result
Every crisp geometric wall is made in prep, not in painting. Rush this hour and no amount of careful rolling will save the edges.
First, clean the wall. Wipe it down with a damp cloth and let it dry fully — dust and grease are the main reason tape lifts mid-project. Fill nail holes and dents with spackle, let it dry, sand smooth, and wipe away the dust. A bump under tape becomes a gap that paint will find.
Next, paint your base colour if the wall needs it, and let it cure. Fresh paint needs at least 24 hours before tape goes on it; delicate-surface tape helps, but patience helps more. If your wall is already a colour you like, skip this step — the existing paint is your base.
Finally, plan on paper before touching the wall. Sketch the pattern to scale on graph paper or mark it lightly in pencil on the wall itself. Decide exactly where each shape starts and ends, and measure twice: a triangle that drifts two inches off-centre is obvious once painted. For a full beginner's grounding in wall projects, our DIY wall decor guide covers tools and sequencing in more depth.
The bleed-proof taping method
Paint bleed — colour creeping under tape edges — is the number one complaint in geometric wall projects. Here is the method that prevents it.
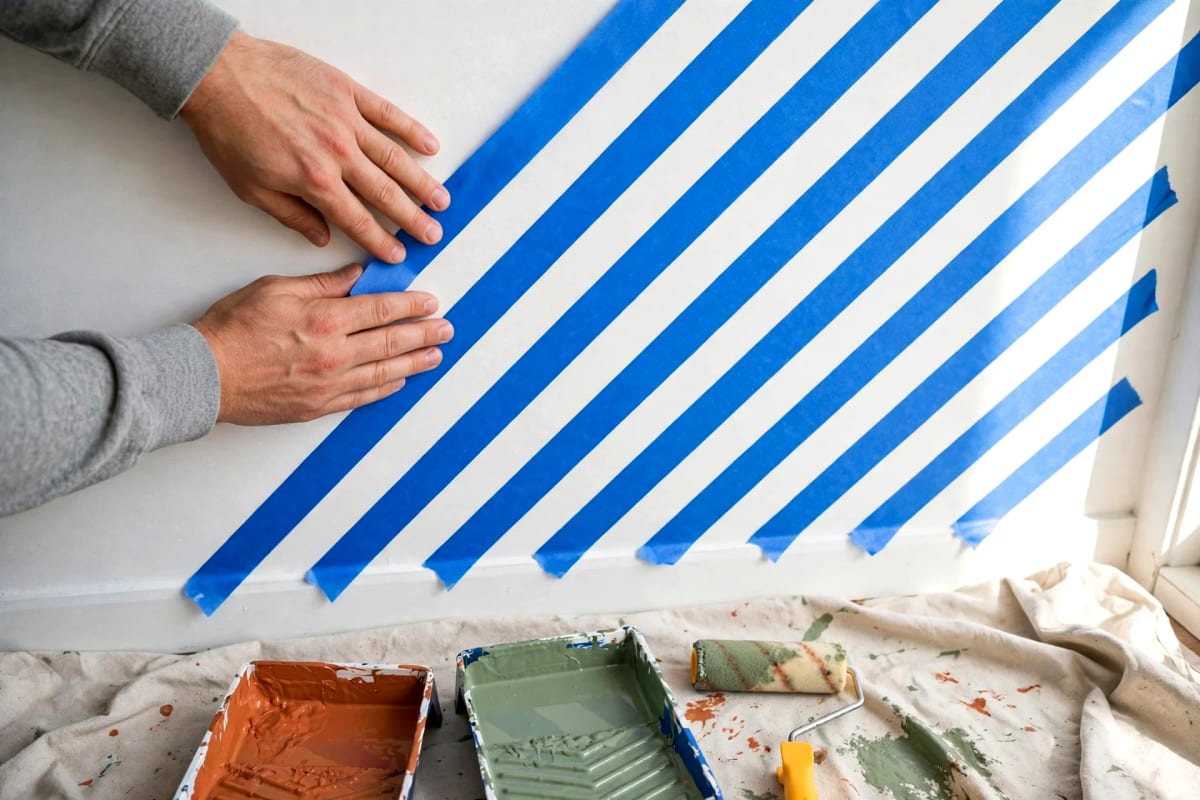
Step 1: Tape in long, firm runs. Apply tape in the longest straight runs you can manage, pressing the edge down firmly with a credit card. Short overlapping pieces create seams where paint sneaks through.
Step 2: Seal the edge with base colour. Paint a thin coat of your base wall colour over every tape edge and let it dry completely. Any paint that creeps under the tape is now base colour — invisible. This single step is the difference between amateur and professional-looking lines, and it costs nothing if you already have base paint.
Step 3: Paint the accent in thin coats. Lay down two light coats instead of one heavy one. Thick paint pools at tape edges and seeps under. Roll away from the tape edge, not toward it, and keep the roller lightly loaded near edges.
Step 4: Remove tape at the right moment. Peel tape while the final coat is dry to the touch but not fully cured — usually 1–2 hours after painting — pulling slowly back at a 45-degree angle. Wait too long and paint can crack along the edge; peel too early and wet paint smears. If an edge does crack, touch it up with a small artist's brush and base colour.
Pattern guides: triangles to honeycomb
Colour-block triangles
Mark a large triangle spanning roughly two-thirds of the wall width, with its point near the ceiling or upper corner. Tape the outline, seal, and paint it in your main accent. Once dry, tape a smaller, offset triangle overlapping the first and paint it in your second accent. Add two or three small triangles at the edges for rhythm.
Chevron stripes
Chevron is a zigzag of stripes, usually 6–10 inches wide, running across the wall. Mark the peaks and valleys with pencil dots first — skipping this is why homemade chevrons go wobbly. Tape one full zigzag line, then a parallel line one stripe-width away, and paint between them. Repeat across the wall, keeping stripe width consistent with a spacer block cut from cardboard.
Colour-block rectangles
Tape a grid of rectangles in varying sizes — one large, two medium, several small — leaving base-colour gaps between them. This is the easiest pattern to scale: it suits offices and dining rooms because it reads architectural rather than playful. Paint each rectangle in one of your two accents, alternating so no two neighbours share a colour.
Honeycomb hexagons
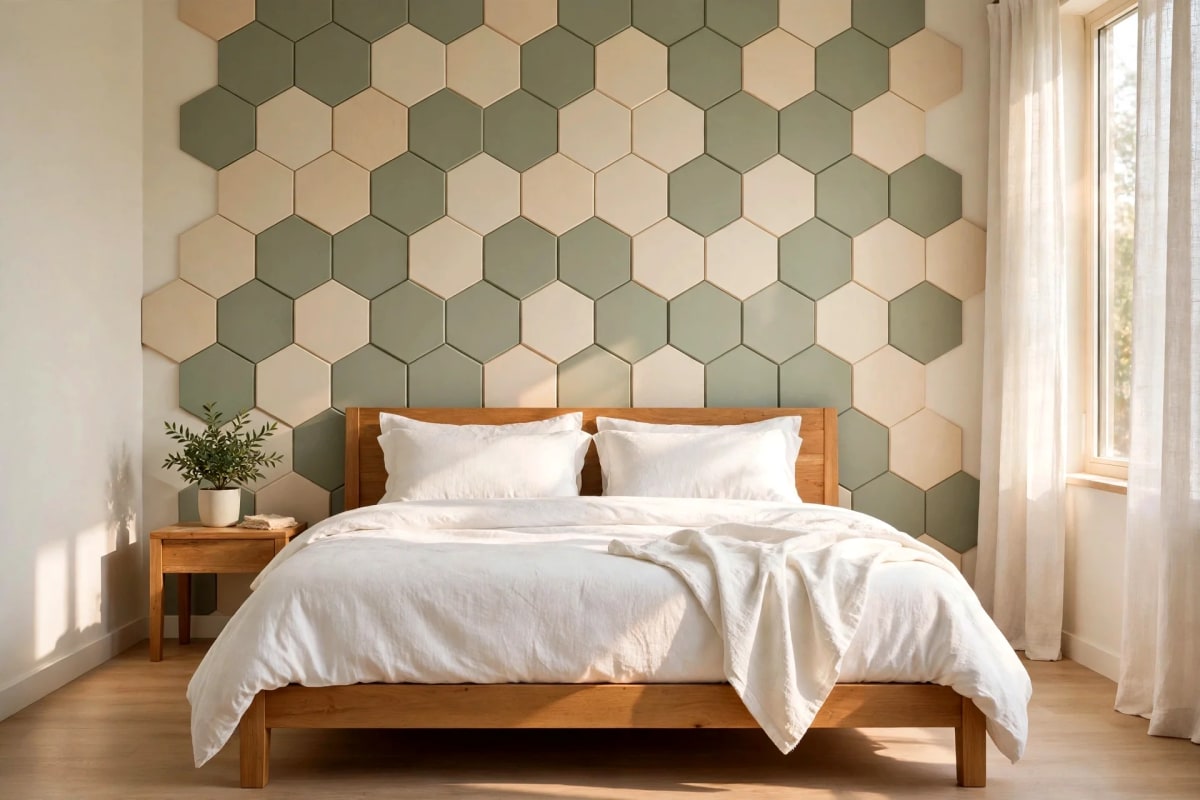
Cut a hexagon template from cardboard, roughly 12–16 inches across. Trace it across the wall in a honeycomb layout, offsetting each row by half a hexagon. Tape each hexagon's outline — this is slow work, budget an extra hour — seal, and paint alternating hexagons in your accents, leaving some base-coloured. If taping every hexagon feels too much, paint a honeycomb in one accent only and leave the rest base colour.
Random intersecting lines
Tape long diagonal lines across the whole wall at varied angles, letting them cross. Paint the resulting polygons in your accents, leaving at least a third of them base-coloured so the design breathes. This pattern hides imperfect walls better than any other, because the eye reads the overall energy rather than any single shape.
Which pattern for which room
- Living room: large triangles or intersecting lines — bold enough to anchor the seating area, especially behind a sofa. Keep the pattern to one wall.
- Bedroom: chevron or honeycomb in low-contrast colours — the repetition is calming, and the pattern frames the bed rather than competing with it.
- Home office: colour-block rectangles — structured and professional on video calls.
- Hallway: chevron running horizontally — it draws the eye along the space and makes a narrow hallway feel longer.
- Kids' room: honeycomb or triangles in three cheerful colours — playful, and easy to repaint as tastes change.
If your wall already has a lot going on — a gallery wall, heavy shelving, a large TV — choose a simpler pattern or a smaller section of wall. Geometric paint and busy decor compete; one of them should win. Our painted arch accent wall is a good alternative when a full pattern feels like too much, and DIY wall stencil ideas offer a softer route to the same impact.
Renter-friendly version
Renters can absolutely do this — with two changes. First, confirm your lease allows painting; many do with a repaint clause, and a single accent wall is the cheapest repaint there is. Second, if painting is off the table, recreate the look with washi tape in wide widths, or peel-and-stick geometric decals — both remove cleanly and cost under $30. Our renter-friendly wall decor and washi tape wall art guides cover the no-paint routes in detail.
Mistakes to avoid
- Too many colours. Four or more accents turn a graphic wall into visual noise. Three colours total, including the base.
- Skipping the base-colour seal coat. This is the step that separates crisp lines from fuzzy ones. Never skip it.
- Taping over wet paint. Tape on paint less than 24 hours old can pull it straight off. Wait, even when you are impatient.
- Tiny shapes on a big wall. Small shapes read as clutter from across the room. Go bigger than feels comfortable.
- Painting every shape. Leaving a third of shapes base-coloured is what makes the pattern breathe.
- Removing tape too late. Fully cured paint cracks along tape edges. Peel at 1–2 hours, while the paint is dry to the touch.
FAQ
How much does a DIY geometric accent wall cost? Typically $50–$90 for a two-colour wall, including tape, paint, a mini roller and brushes. Three colours run $70–$120. Sample pots keep small accent shapes cheap.
How do I stop paint bleeding under painter's tape? Paint a thin coat of your base wall colour over the tape edges first and let it dry. Any seepage is then invisible base colour, and the accent coat sits on a sealed edge.
Can I paint a geometric wall over textured walls? Yes, but expect softer edges — heavy orange-peel texture lets paint creep no matter how well you seal. Use thicker tape, press edges firmly, and choose larger, bolder shapes where slight imperfections disappear.
How long does a geometric accent wall take? About 6–10 hours total: 1 hour prep, 2–3 hours taping and measuring, 2–3 hours painting in two coats, plus drying time. Spread it over two days so coats dry properly.
What is the easiest geometric pattern for a beginner? Colour-block triangles. Straight lines, forgiving proportions, one roll of tape, and the design still looks intentional if sizes vary slightly.
Pick one pattern, test two colours, and tape one wall this weekend. The before-and-after photos will look like different rooms.



