
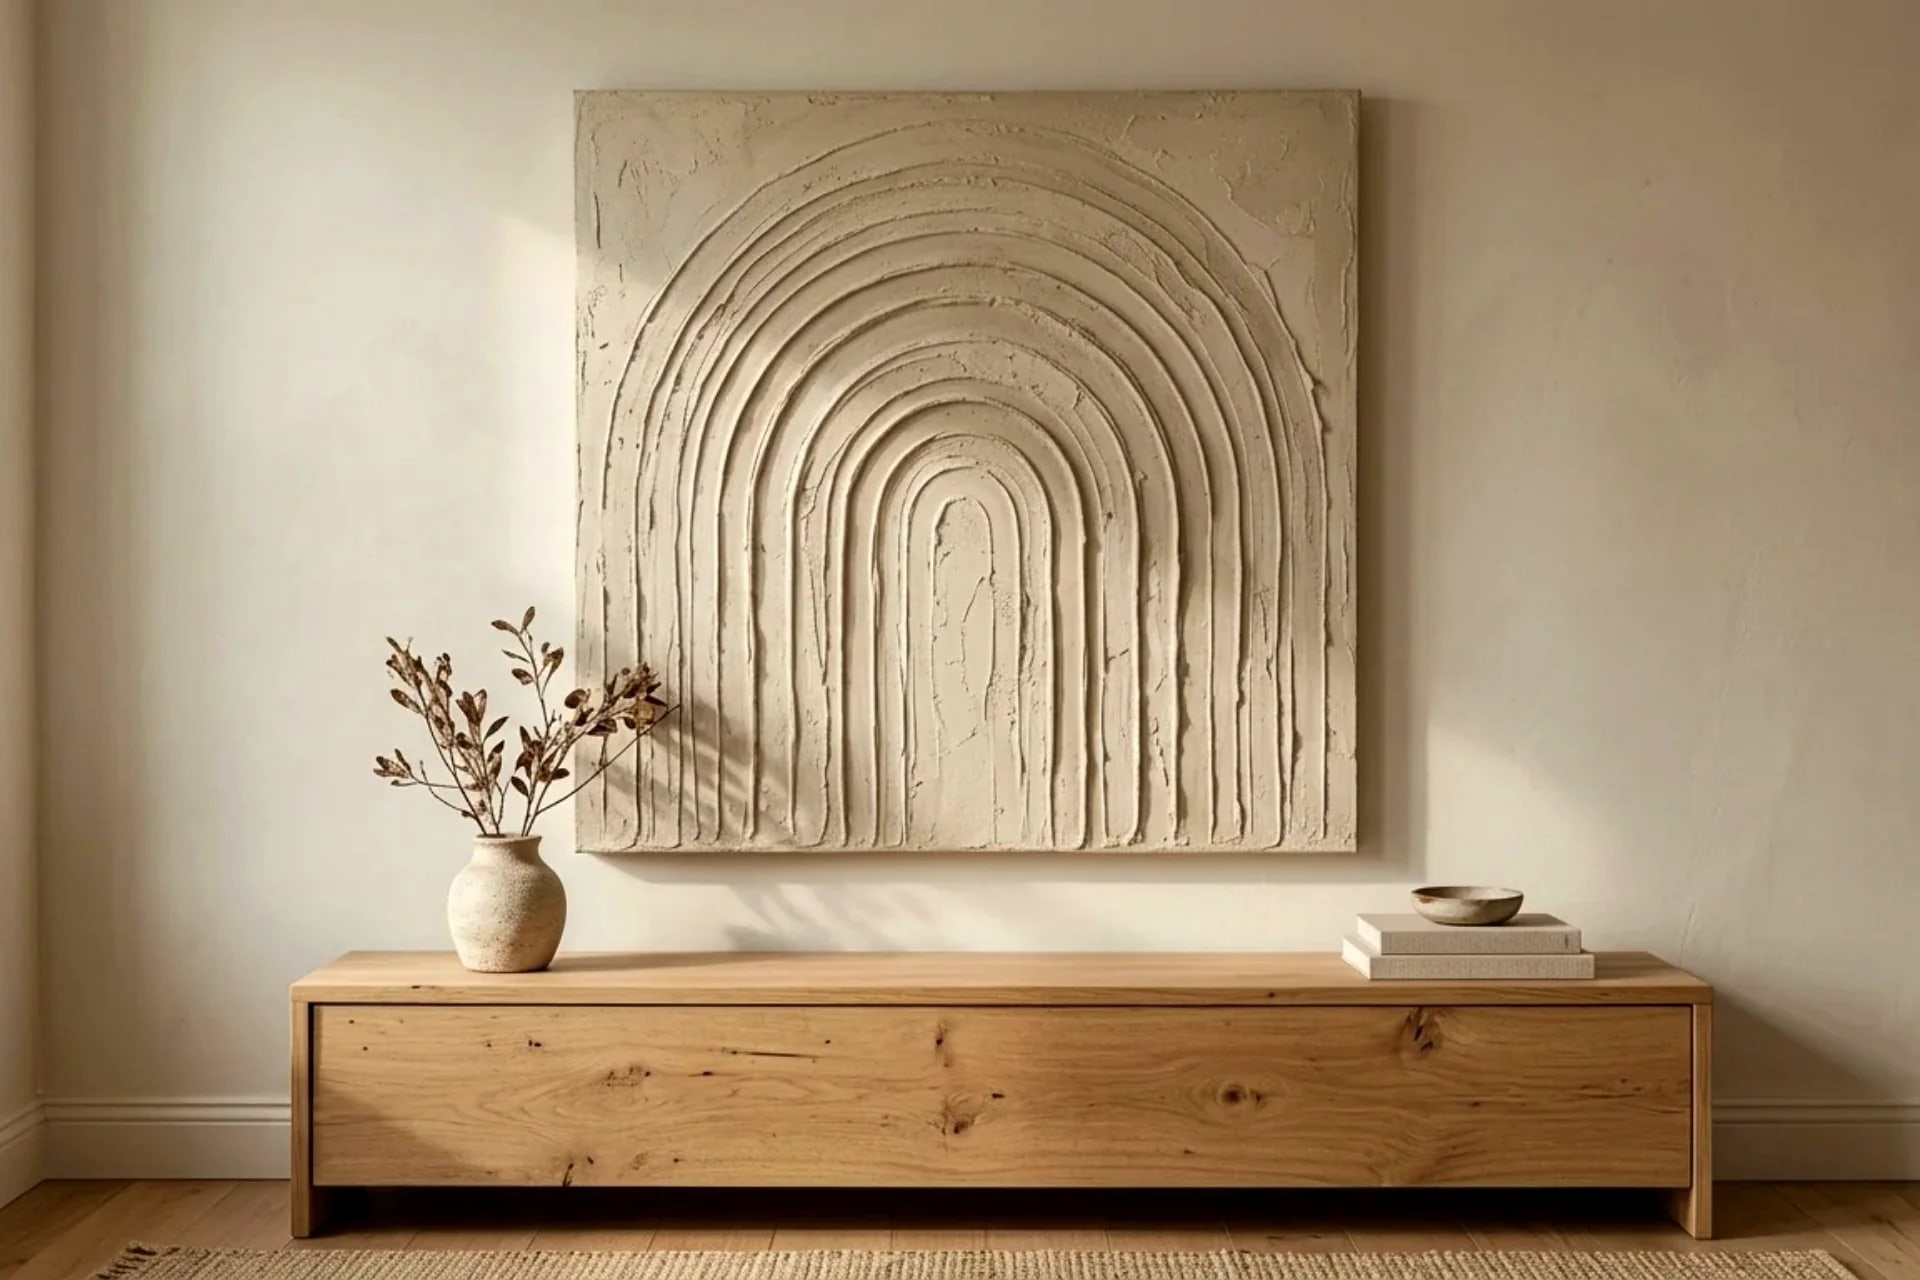
You've learned the basic technique — now the question is what to make. The design you carve into wet compound decides whether the finished piece reads as gallery art or a craft experiment. This guide covers 15+ textured plaster art designs, organized from easiest to most ambitious, with honest notes on difficulty, drying risk, and which room styles each design suits.
New to the technique itself? Start with the full DIY plaster wall art tutorial — it covers materials, the three core methods, drying times, and crack repair. This page is the design library. For the complete wall decor hub, see our ultimate DIY wall decor guide.
Key Takeaways
- Easiest high-impact designs: concentric arches, parallel waves, combed lines — all beginner-friendly, all dry reliably
- Design = composition first: sketch the layout on paper before touching compound; 5 minutes of planning prevents most failures
- Scale rule: bolder designs need bigger canvases (60×80 cm minimum for sculptural work); small canvases suit fine line work
- Drying risk rises with relief height: flat texture dries in 24h; sculptural elements need 48h+ and crack more
- Match design to room style: arches suit modern/boho, waves suit Japandi/minimalist, organic blobs suit eclectic
Table of Contents
- Before you start: the 5-minute sketch
- Level 1: beginner designs
- Level 2: intermediate designs
- Level 3: ambitious designs
- Matching designs to room styles
- Sizing and scale
- Color pairing for each design
- Design mistakes to avoid
- Frequently asked questions
- The takeaway
Before you start: the 5-minute sketch
Every design below works better with 5 minutes of paper planning. Draw the canvas rectangle, sketch the design inside it, and check three things:
- Focal point: where does the eye land first? Every strong design has one — usually achieved with the tallest relief, the densest lines, or an off-center element.
- Margins: leave 4–6 cm of calmer space around busy designs. Texture that runs edge-to-edge with no breathing room looks accidental, not artistic.
- Direction: decide whether lines/shapes flow horizontally (calm), vertically (dramatic), or radially (energetic) — then commit. Mixed directions in one piece look indecisive.
Keep the sketch next to you while you work. Wet compound invites improvisation, and improvisation without a plan is how pieces go wrong.
Level 1: beginner designs
These need only a putty knife and a comb, dry reliably in 24 hours, and forgive mistakes.
Concentric arches
The Pinterest classic: half-circles nested inside each other, usually rising from the bottom center. Spread a smooth 3–4 mm base, then drag a rounded tool (spoon back, bottle cap, or your finger) through in arcs. One pass per arc.
Why it works: arches are forgiving — slight wobbles read as organic. Start arcs 3–4 cm apart; tighter spacing looks busy, wider looks sparse.
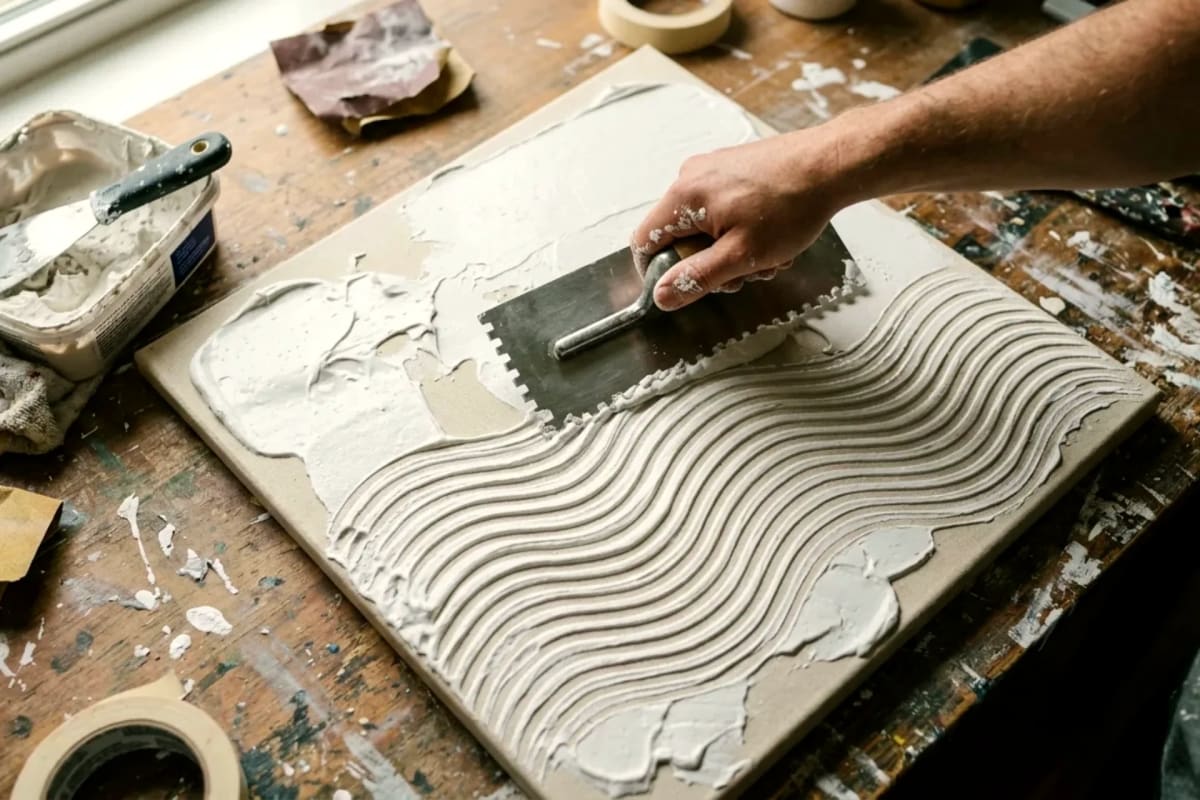
Parallel waves
Horizontal wavy lines, 3–4 cm apart, drawn with a notched trowel or fork. Keep the wave amplitude consistent — use your wrist, not your whole arm, for control.
Why it works: the calmest design here; suits minimalist and Japandi rooms. Imperfections vanish at viewing distance because the pattern is overall texture, not a focal image.
Combed straight lines
Vertical or diagonal parallel lines with a notched trowel. The modern-minimal workhorse. Keep lines evenly spaced by marking light guide dots with a pencil first.
Why it works: dead simple, dries fast (thin relief), and looks intentional even when slightly imperfect. Excellent first project.
stippled texture
Dab the compound with a stiff brush, sponge, or crumpled plastic — hundreds of small peaks. No drawing skill required whatsoever.
Why it works: pure texture, zero composition risk. Great for backgrounds behind other decor, or as a first experiment with the material.
Level 2: intermediate designs
More relief, more planning, 24–48 hour drying. Make one Level 1 piece first.
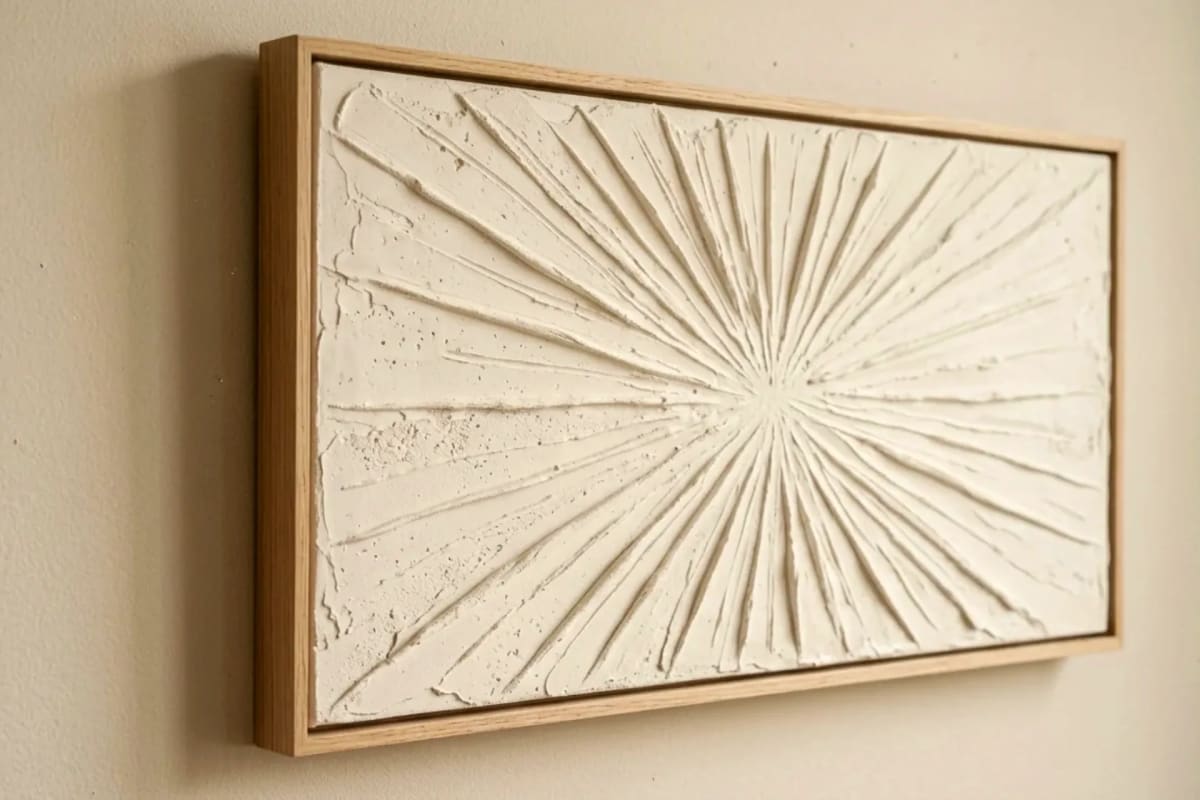
Sunburst
Lines radiating from a single point — usually a bottom corner or off-center. Mark the origin point, then drag lines outward with a comb, fanning evenly. The lines should get slightly farther apart as they radiate (that's the nature of radial geometry — don't fight it).
Watch out: the origin area gets thick with overlapping passes. Keep it thin there or it cracks. Wipe the comb every few passes.
Organic blobs
Raised, smooth, pebble-like forms scattered asymmetrically — the "3D bubble" look. Build each blob in two thin passes (8–10 mm each, 2–3 hours between), shape with gloved fingers, keep edges clean.
Watch out: this is the highest crack-risk design in this level. Thin passes are non-negotiable. See the crack-repair section of the plaster wall art tutorial before attempting.
Layered rectangles
Overlapping rectangular panels of slightly different heights — architectural, modern. Use painter's tape to mask crisp edges between panels; remove tape while the compound is still slightly tacky.
Watch out: tape timing matters. Too early and edges slump; too late and tape tears the surface. Test on a corner first.
Herringbone texture
Short diagonal strokes in alternating directions, like a herringbone fabric pattern. Use the edge of a putty knife, working in small sections with a wet edge.
Watch out: tedious on large canvases — reserve for pieces under 50×60 cm, or use it as an accent panel within a larger calmer design.
Level 3: ambitious designs
High relief (1–2 cm+), 48+ hour drying, real crack risk. Attempt after 2–3 successful pieces.
Sculptural arch relief
A single bold arch rising 1.5–2 cm off the canvas — part art, part sculpture. Build in three passes, let each firm up fully, sand between passes for clean edges.
Botanical impressions
Real leaves, ferns, or lace pressed into wet compound, then carefully lifted — leaving detailed negative impressions. Timing is everything: press when the surface is firm but not dry (usually 30–60 minutes after application, depending on thickness).
Carved geometric pattern
Moroccan or art-deco inspired geometry carved into a smooth base with a pointed tool. Requires a steady hand and a printed template transferred lightly to the surface first.
Mixed-media panel
Plaster texture combined with another material — a wood strip, a brass inlay line, dried botanicals embedded at the edges. Plan the non-plaster elements first; they're harder to adjust than compound.
Matching designs to room styles
| Room style | Best designs | Avoid | |---|---|---| | Japandi / minimalist | Parallel waves, combed lines, stippled | Sunburst, busy geometry | | Modern boho | Concentric arches, organic blobs | Herringbone, rigid geometry | | Modern / contemporary | Layered rectangles, carved geometry, sunburst | Stippled (too soft) | | Traditional / transitional | Botanical impressions, arches | Harsh geometry | | Eclectic / maximalist | Mixed-media, sculptural relief, sunburst | Overly calm designs get lost |
When uncertain, arches are the safest universal choice — they suit nearly every style except ultra-minimal.
Sizing and scale
Design and canvas size are linked:
- Under 40×50 cm: fine line work only (combed lines, waves, stippled). Bold designs feel cramped.
- 50×70 cm: the sweet spot for most designs — arches, sunburst, herringbone all work.
- 60×80 cm and up: required for sculptural relief and organic blobs; big designs need room to breathe.
- Diptych/triptych: split one design across 2–3 canvases for large walls — easier to make, easier to hang, and reads as high-end.
The wall rule: the finished piece should span about two-thirds of the furniture width below it. Measure the wall before choosing the design, not after making it.
Color pairing for each design
Texture catches light, so color choice changes everything:
- Leave it raw (warm white compound) for waves, combed lines, stippled — the shadows do the work.
- Tone-on-tone neutrals (greige, warm beige) suit arches and organic shapes — soft and gallery-like.
- Bold single color (terracotta, deep olive, charcoal) transforms sunbursts and geometric carvings into statement pieces.
- Gold dry-brush on high points elevates any design — the classic gallery trick.
Full palettes, finish types, and painting technique are in the plaster art color ideas guide.
Design mistakes to avoid
Designing directly in wet compound. The #1 cause of muddy, indecisive pieces. Sketch first, every time.
Uniform spacing everywhere. Perfectly even lines and identical blobs look manufactured. Vary spacing slightly — 10–15% irregularity reads as handmade in the good way.
No focal point. All-over texture with no hierarchy is wallpaper, not art. Give the eye somewhere to land: a taller element, a denser cluster, an asymmetric accent.
Ignoring the edges. Design that stops awkwardly 2 cm from the canvas edge looks unfinished. Either run the design deliberately off the edge (full-bleed) or frame it with a clean margin — never the accidental in-between.
Too many ideas in one piece. Arches AND sunburst AND blobs in one canvas is three mediocre pieces instead of one good one. One design language per piece.
Frequently asked questions
What is the easiest plaster art design for a beginner? Concentric arches or parallel waves. Both need only basic tools, forgive wobbles, dry in 24 hours, and look intentional even on a first attempt. Avoid sculptural relief until you've made 2–3 flat-texture pieces.
How thick can I build plaster art designs? Up to 2 cm if built in multiple thin passes (8–10 mm each) with drying time between. Single applications thicker than 1 cm will almost certainly crack. Flat texture designs (3–5 mm) are the safest.
Can I combine two designs in one piece? Yes, if one dominates. A calm wave background with one sculptural arch accent works; arches plus sunburst plus blobs in equal measure looks chaotic. The 80/20 rule: 80% one design language, 20% accent.
Do I need to draw the design before applying compound? Sketching on paper first is strongly recommended — 5 minutes of planning prevents most composition failures. For Level 1 designs you can work more freely, but always decide the layout before the compound is on the canvas.
Which plaster art designs dry the fastest? Flat designs: stippled texture, combed lines, and waves (3–5 mm relief) dry in about 24 hours. Anything sculptural needs 48+ hours. A fan on low 2 meters away helps; direct heat causes cracking regardless of design.
How do I fix a design I don't like halfway through? While wet (first 30–45 minutes for joint compound): scrape it flat with a putty knife and restart — the material is fully reusable. Once dry: sand down high spots with 120-grit and reapply, or paint over and treat it as a textured base for a new design.
The takeaway
Design is what separates plaster art from plaster mess. Start with arches or waves, sketch before you spread, match the design to your room's style, and build relief in thin passes. The technique tutorial teaches your hands; this library teaches your eye. Between the two — plus the right colors and tools — you have everything needed to make pieces that genuinely pass as store-bought.



