A home office wall does two jobs at once, and most decorating advice only covers one of them. It has to help you focus for eight hours, and it has to look professional behind you on video calls. A wall that is beautiful in person but chaotic on camera fails half its job. A wall that is perfect on camera but blank and sterile in person fails the other half.
This guide covers both jobs: video-call framing maths, focus-versus-inspiration zoning, acoustic ideas that improve call audio, fifteen looks with costs, and a weekend pegboard project.
Key Takeaways
- Your video-call backdrop is a rectangle about 90 to 120 centimetres wide and 60 to 75 centimetres tall, centred behind your head: style that zone first.
- One clean piece, centred in the camera frame, reads better on calls than a full gallery wall.
- Hang art with its centre at 145 to 150 centimetres from the floor, or slightly higher if your camera sits above eye level.
- Acoustic slat panels and soft textiles cut flutter echo and make your microphone sound noticeably clearer.
- Keep the wall behind you to three elements at most; a fourth competing item is where calm turns into clutter.
Table of Contents
- Design for the Camera First
- Focus Zones and Inspiration Zones
- Art That Works on Camera
- Texture Sound and Storage Walls
- Colour and Light for Long Workdays
- Costs at a Glance
- Step by Step: A Focus Pegboard Wall
- Common Mistakes and Fixes
- FAQ
Design for the Camera First
Before you buy anything, set up your camera exactly as you use it for calls and take a screenshot of the empty wall behind you. That screenshot is your real canvas. At a standard webcam distance, the visible backdrop is roughly 90 to 120 centimetres wide and 60 to 75 centimetres tall, centred on your head. Everything outside that rectangle is invisible to colleagues; everything inside it is your professional first impression.
Style the rectangle deliberately. One piece of art, centred behind your head, reads as calm and intentional. A busy bookshelf, a bright window, or a door people walk past all compete with your face over a long meeting.
Lighting decides whether the backdrop works. Never sit with a bright window directly behind you: the camera exposes for the window and turns you into a silhouette. Face the window instead, or put a soft lamp at 45 degrees to your face, and check the result on a real call, since webcams flatten contrast and exaggerate bright spots.
Focus Zones and Inspiration Zones
An office wall works best when it has zones with different jobs. The focus zone is the wall you face while working: it should be calm, with one restful element at most, because your eyes rest there between tasks. The inspiration zone is a side wall or a board you glance at deliberately: mood images, a calendar, project notes, and reference material belong here, not in your direct eyeline.
Keep the two zones physically separate. When inspiration material sits in the focus zone, every glance becomes a distraction; when the focus zone is completely blank, the room feels sterile. A single framed print in the focus zone, plus a pinboard on a side wall, gives you both calm and stimulation.
Restraint holds the zones together. Competitor guides in this niche list seventy or more ideas, but piling them onto one wall is exactly how offices end up cluttered on camera and tiring in person. Choose one idea per zone, live with it for a week, and only then add a second.
Art That Works on Camera
1. One large abstract canvas behind the desk. A single canvas, 60 to 90 centimetres wide, in muted tones, is the safest video backdrop there is. It fills the camera rectangle without competing with your face. Choose soft shapes and two or three colours at most; fine detail and small text blur on webcam resolution and look like noise.
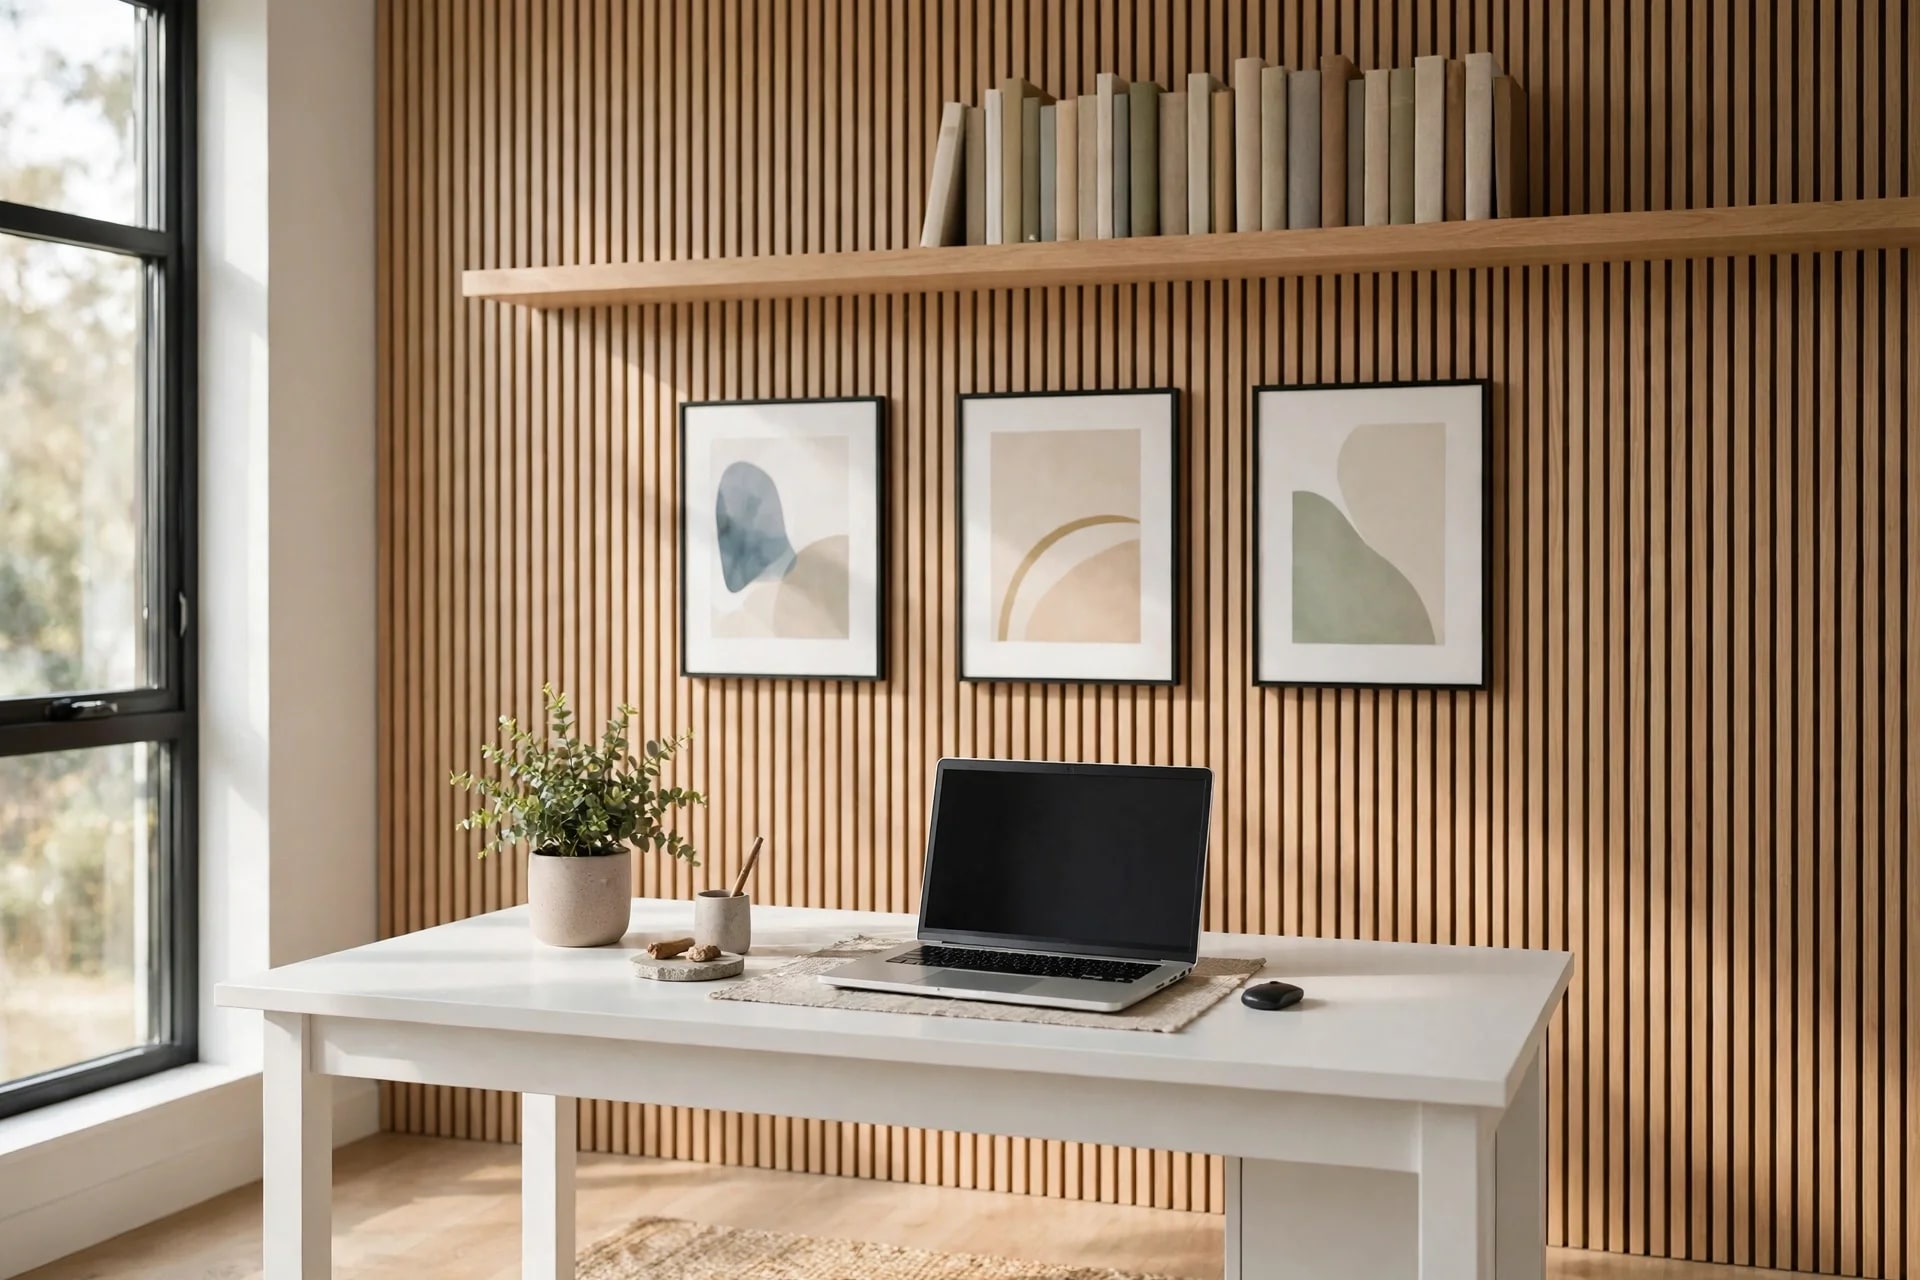
2. A trio of matching prints. Three identical frames in a horizontal row suit wider desks and read as organised on camera. Keep subjects simple, hang the middle frame centred on your head in the camera view, and keep gaps tight, 5 to 8 centimetres.
3. A framed map or city print. A large framed map of a place that matters to you adds personality without distraction, provided colours stay muted. Sepia, navy, or sage maps work; bright, high-contrast posters do not, because webcams exaggerate their colours.
4. A monochrome photography grid. Six black-and-white photographs in identical frames, in a three-by-two grid, look sharp and professional on camera. Monochrome avoids colour clashes with your clothing and keeps the backdrop calm in every light.
5. A single typographic print. One short word, in large, clean lettering, works well behind a desk. Long quotes blur into grey lines on camera and look like clutter, so pick one word that matters to your work and let the empty space around it do the talking.
Texture Sound and Storage Walls
6. Vertical acoustic slat panels. Oak slats on a felt backing are the best upgrade for looks and sound: they add warm vertical rhythm on camera and absorb the flutter echo that makes home offices sound hollow. A panel 120 to 180 centimetres wide behind the desk covers the camera rectangle and clarifies microphone audio. For the method, see our wood slat accent wall guide.
7. A felt or fabric pinboard panel. A large felt panel, framed in timber, gives a changeable inspiration surface that also dampens sound. Unlike corkboard, felt looks finished even when half empty. Keep it on a side wall, not behind you, so its changing contents never distract a call.
8. Floating shelves with three objects. One or two oak shelves above a side desk hold a plant, a book stack, and one sculptural object. A shelf with seven small things looks like a shop on camera; three considered objects look like a styled room. For spacing and weight rules, see our DIY floating shelves guide.
9. A pegboard command wall. A painted pegboard, covered in the tutorial below, holds notebooks, headphones, scissors, and cables on hooks and small shelves. It keeps the desk clear, which matters more than any decoration.
10. A wall-mounted plant shelf. A single trailing plant on a wall bracket softens a hard office corner and reads beautifully on camera. Choose one plant, not five, hung where it does not cast shadows across your face.
11. A large leaning mirror beside the desk. A mirror on a side wall bounces daylight deeper into the room and makes a small office feel larger. Never place one directly behind you on camera: it reflects the room and the window, both of which distract. Our mirror wall decor ideas guide explains the placement rule.

Colour and Light for Long Workdays
12. A single painted accent wall in a focus colour. Sage green, warm greige, or dusty blue suit long workdays: interesting enough to avoid sterility, calm enough to avoid fatigue. Paint the wall behind the desk, not the wall you face, so the colour appears on camera while your own eyeline stays on a calmer wall.
13. A picture ledge for rotating work. A single 120-centimetre ledge above a side cabinet holds two or three framed prints you can rotate when projects change. Unlike a fixed gallery, a ledge lets the wall evolve without new holes. For layouts, see our picture ledge wall decor guide.
14. A slim wall sconce for evening work. A plug-in sconce beside the desk, aimed at the wall, gives warm evening light without a desk lamp crowding your workspace. Choose warm white and a dimmer, and keep it out of the camera rectangle so it never flares into the lens.
15. A whiteboard or chalkboard zone. A framed whiteboard panel on a side wall is decoration and tool in one: it holds weekly plans and sketches where you can see them. Keep it off-camera if your notes are private, and wipe it every Monday so it never becomes wallpaper.
Costs at a Glance
| Idea | Typical cost | Camera rating | | --- | --- | --- | | Large abstract canvas | $60–$200 | Excellent | | Trio of matching prints | $50–$150 | Excellent | | Framed map or city print | $40–$120 | Good | | Monochrome photo grid | $60–$160 | Excellent | | Typographic print | $25–$80 | Good | | Acoustic slat panels | $120–$350 | Excellent | | Felt pinboard panel | $40–$110 | Side wall only | | Floating shelves (2) | $50–$140 | Good | | Pegboard command wall | $40–$110 | Side wall only | | Wall plant shelf | $25–$70 | Good | | Leaning mirror | $60–$180 | Side wall only | | Painted accent wall | $30–$90 | Excellent | | Picture ledge | $30–$80 | Good | | Plug-in wall sconce | $35–$90 | Good | | Framed whiteboard panel | $45–$120 | Side wall only |
Prices assume off-the-shelf frames and mid-range materials. Start with the camera rectangle: one canvas or print trio, plus light.
Step by Step: A Focus Pegboard Wall
This project takes about two hours and costs $40 to $110. It suits a side wall within arm's reach of your desk, where tools stay visible but off camera.
You will need: one pegboard panel (60 by 90 centimetres or larger), two timber battens, wall fixings rated for 10 kilograms, a selection of hooks, two small shelves, a pot hook, and paint to match your wall or a contrasting accent colour.
Step 1 — Choose the wall and height. Pick a side wall you reach without standing. Mark the panel's centre at 150 centimetres from the floor, so the most-used hooks sit at comfortable hand height.
Step 2 — Fix the battens. Screw two horizontal battens to the wall, into studs where possible, spaced to match the panel's height. Battens hold the pegboard 2 centimetres off the wall, which is what lets hooks seat properly.
Step 3 — Paint and mount. Paint the pegboard and let it dry fully, then screw it to the battens. Check it is level before the last screw goes in; a tilted pegboard is visible from across the room.
Step 4 — Hang by frequency. Put daily tools at hand height: headphones, notebook, scissors. Put weekly items higher and rarely used items at the edges. Leave at least a quarter of the board empty, or it becomes visual noise.
Step 5 — Edit weekly. Every Friday, remove anything you did not use that week. A pegboard only stays a focus tool while it stays edited; the moment it fills up, it becomes the clutter it was meant to replace.
Common Mistakes and Fixes
Decorating before testing the camera. A wall that looks great in person can look chaotic on a webcam. Fix: screenshot your camera view first, and style only what appears in it.
Putting a mirror or window behind you. Both create glare, reflections, and silhouettes on calls. Fix: face the window, move the mirror to a side wall, and add a soft lamp at 45 degrees.
Hanging small text on camera. Quotes and detailed prints blur into noise at webcam resolution. Fix: use large, simple shapes and short words only in the camera rectangle.
Overfilling shelves and boards. Seven objects on a shelf read as clutter on camera. Fix: apply the three-object rule and the one-quarter-empty rule to every surface.
Ignoring sound. Bare walls echo, and echo makes you sound less professional than any backdrop looks. Fix: add slat panels, felt, or a textile hanging to at least one wall.
Forgetting the focus zone. Inspiration material in your direct eyeline distracts all day. Fix: move boards and notes to a side wall and keep the wall you face calm.

FAQ
What should be on the wall behind me on video calls?
One clean piece, centred behind your head: a large abstract canvas, a trio of matching prints, or a muted map. Keep the visible rectangle, about 90 to 120 centimetres wide, to three elements at most.
How high should office wall art hang?
Hang the centre at 145 to 150 centimetres from the floor, or slightly higher if your camera sits above eye level. Always check the height in your camera view, not just from standing height.
Do acoustic wall panels really help on calls?
Yes. Slat panels on felt backing and fabric panels cut flutter echo, which is the hollow sound that makes home offices tiring to listen to. They also look warm and professional on camera.
What wall colour is best for a home office?
Sage green, warm greige, or dusty blue: calm enough for long days, interesting enough to avoid sterility. Paint the wall behind the desk so the colour works as your call backdrop.
Can renters decorate a home office wall well?
Yes. Leaning art, adhesive-hook ledges, peel-and-stick panels, freestanding pegboards, and plug-in sconces all avoid drilling. Keep the camera zone to one strong piece and let the rest stay simple.
How do I stop my office wall becoming cluttered?
Apply two rules: three objects per shelf, and one quarter of every board left empty. Edit weekly, removing anything you did not use, and keep inspiration material on a side wall, not in your eyeline.